


Table of Contents
This quick guide will teach you how to open a new Jupyter Notebook in Mac OS or Windows. It assumes that you have already installed Jupyter using the Anaconda distribution. For details on how to install Jupyter on your computer, using the Anaconda distribution, read this article on how to set up your system to start coding in Python:
For details on how to use Jupyter, read this quick guide on how to use Jupyter Notebook:
Article continues below
Want to learn more? Check out some of our courses:
How to Open a Jupyter Notebook on Mac OS
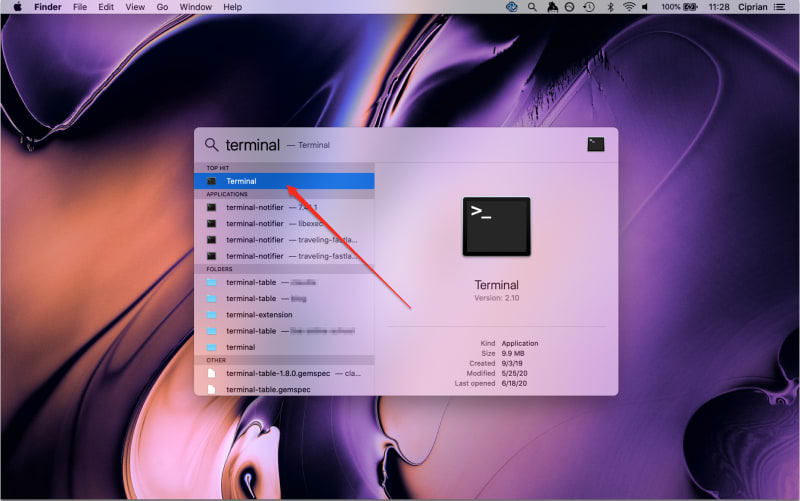
Step 1. Open the Terminal app on your Mac by clicking ![]() in the upper-right corner of the menu bar, or pressing Command-Space bar and then typing terminal.
in the upper-right corner of the menu bar, or pressing Command-Space bar and then typing terminal.
Image Source: Edlitera
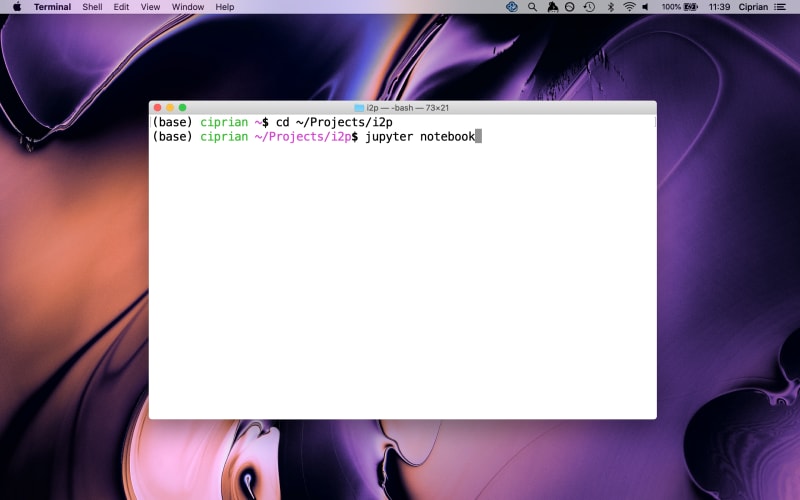
Step 2. Once the Terminal app opens, navigate to the desired folder, using the cd command. For details on how to use the command line, read this tutorial on how to use the command line, part 1 and part 2:
- Intro to Programming: How to Use the Command Line (Part 1)
- Intro to Programming: How to Use the Command Line (Part 2)
Please note that your Terminal colors and text may differ.
Image Source: Edlitera
Step 3. Once you are in the desired folder, type jupyter notebook and press the Enter key.
Image Source: Edlitera
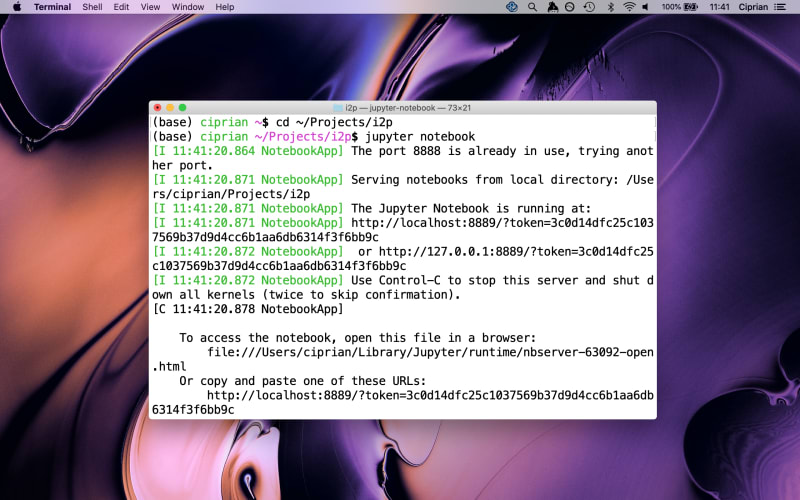
Step 4. The Jupyter server will start. You should see some server logs printed.
Image Source: Edlitera
Step 5. Shortly after, a browser window should open, showing the files and folders located in the folder where you started the Jupyter server (in my case, this folder is ~/Projects/i2p).
Image Source: Edlitera
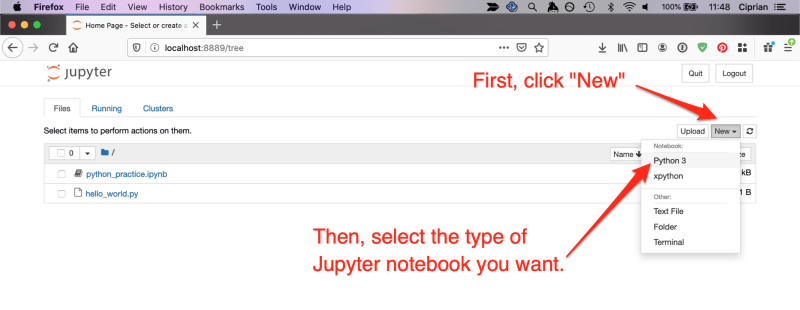
Step 6. Create a new Jupyter notebook.
Image Source: Edlitera
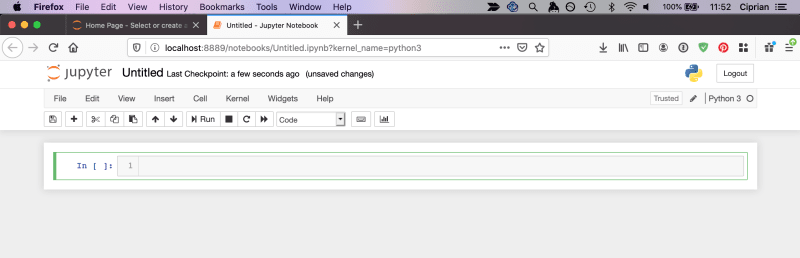
Step 7. Your new Jupyter notebook is now ready.
Image Source: Edlitera
How to Open a Jupyter Notebook on Windows
NOTE: For best performance, I strongly recommend Firefox or Chrome as your browser when using Jupyter notebook on a Windows computer.
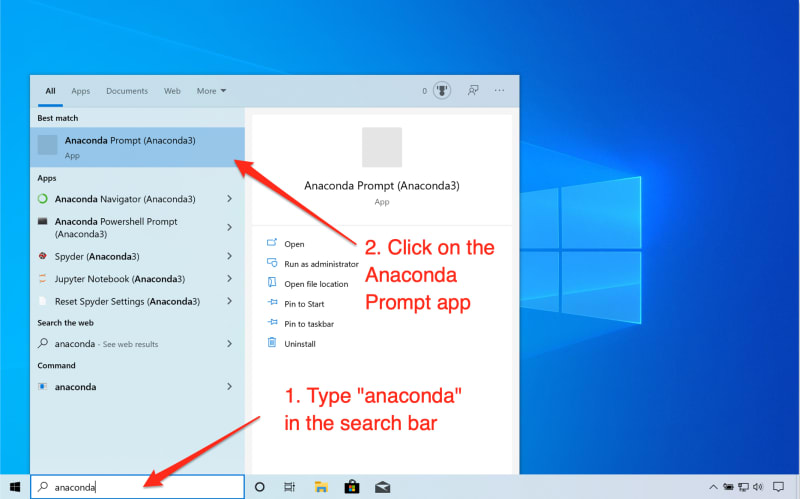
Step 1. Find and open the Anaconda Prompt app using the search bar. Alternatively, you can use the Anaconda Powershell Prompt. The Anaconda Powershell Prompt has more bells and whistles and it is generally nicer to work with.
Image Source: Edlitera
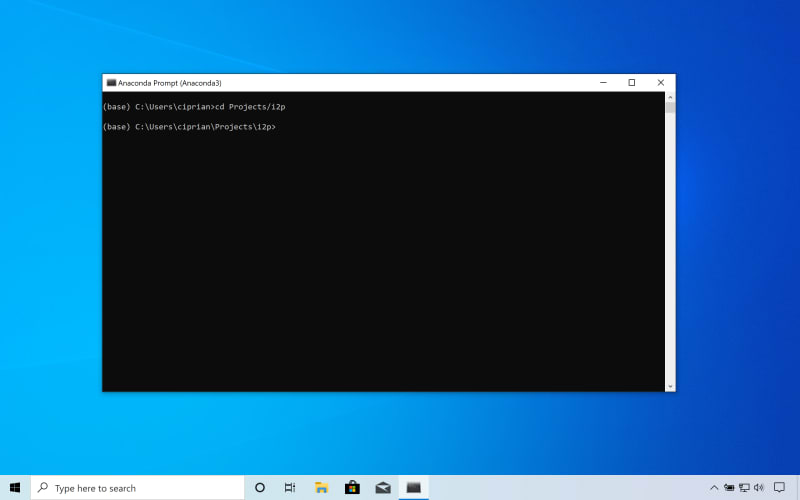
Step 2. Once the Anaconda Prompt (or Anaconda Powershell Prompt) app opens, navigate to the desired folder, using the cd command.
Image Source: Edlitera
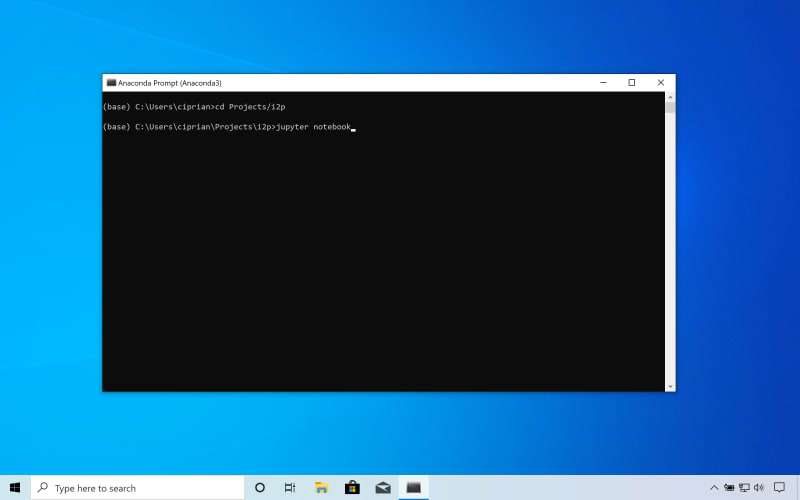
Step 3. Once in the desired folder, type jupyter notebook followed by the Enter key.
Image Source: Edlitera
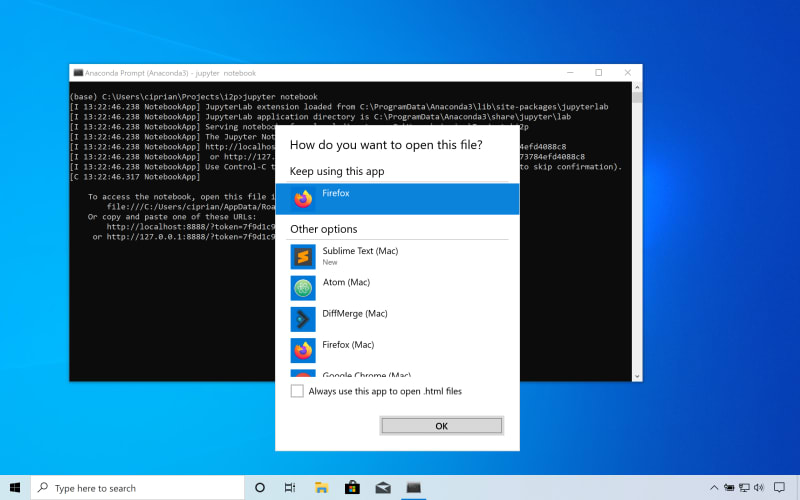
Step 4. The Jupyter server will start. You should see some server logs printed. You may be prompted to select an application to open Jupyter in. Firefox or Chrome are preferred.
Image Source: Edlitera
Step 5. Shortly after, a browser window should open, showing the files and folders located in the folder where you started the Jupyter server (in my case, this folder is C:\Users\ciprian\Projects\i2p).
Image Source: Edlitera
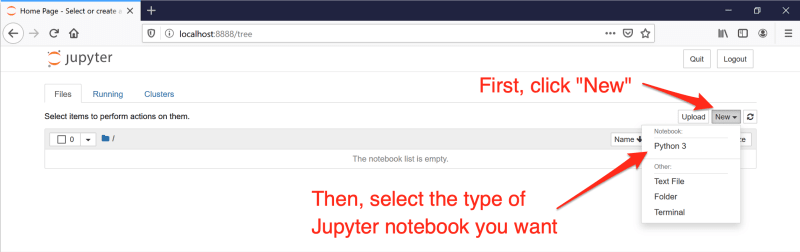
Step 6. Create a new Jupyter notebook.
Image Source: Edlitera
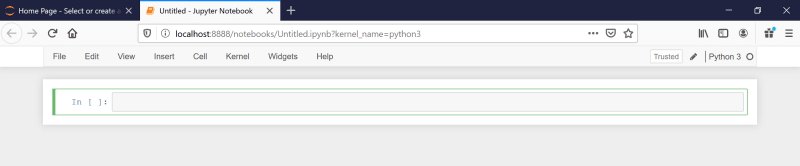
Step 7. Your new Jupyter notebook is now ready and you can start learning more about data types, variables, numbers, and more!
Image Source: Edlitera
- Intro to Programming: What Are Different Data Types in Programming?
- Intro to Programming: What Are Variables in Python and How to Name Them
- Intro to Programming: What Are Integer Numbers and Floating-Point Number Data Types in Python?

