


ChatGPT changed the AI landscape forever from the moment of its initial release. While not exactly the first advanced chatbot out there, it was by far the best. What is more, it was also made available for free, for anyone to use. Following the release of the free version, a paid subscription became available for users seeking enhanced features from the chatbot.
ChatGPT Plus, the paid subscription, ensured that paid customers would not encounter issues like too many people accessing the chatbot at one time. Additionally, it also granted users access to the newest, at times, even experimental, features of ChatGPT. Once confirmed for functionality, these experimental features were integrated into the subscription's offerings for paying users.
Among the most significant additions to ChatGPT Plus today is the GPT store, along with the introduction of the GPT builder. This article is going to cover the process of creating a custom GPT using the GPT builder. It will also explain how you can then make it available to others on the GPT store.
What Is the GPT Builder
There are two approaches to building custom GPTs. One approach is more complex, as it requires users to manually handle a great amount of the work required for the custom GPT to provide value to users. This approach is not something that will be covered in this article as it requires a background in Deep Learning from users. This means that the general public attempting to navigate data preparation, model training, fine-tuning, and application building finds the process overly complicated. To avoid going through the complexity of the entire process, OpenAI offers its own GPT builder, where we can easily build a custom GPT.
The GPT builder offers a user-friendly solution for non-technical individuals to create custom GPTs. Essentially, the GPT Builder is itself a custom GPT, one trained to allow users without coding knowledge to create other custom GPTs through conversational interaction. In other words, the only thing you will have to do, more or less, is to know how to best articulate, in detail, exactly what you want your custom GPT to do. The GPT Builder will understand what you want to build, and create a custom GPT for you.
Before we dive deep into how you can use the interface to build a custom GPT, let us mention something essential. In order to build custom GPTs using the GPT Builder, you must have a ChatGPT Plus subscription or be an Enterprise user. It was already explained how ChatGPT Plus works, however, the specifics of Enterprise users were not yet covered.
Enterprise users of ChatGPT refer to businesses, organizations, or entities that employ ChatGPT in a professional or commercial capacity. They use ChatGPT for various applications, encompassing customer service, automating responses to frequently asked questions, engaging in conversational commerce, providing support through chatbots, improving productivity through automation of repetitive tasks, and integrating natural language processing capabilities into their products or services.
Enterprise users can range from small businesses to large multinational corporations across various industries, including finance, healthcare, technology, education, and more. They might employ ChatGPT to improve efficiency, enhance user experience, or create new products and services that utilize conversational AI.
- How to Build a Data-Driven Organization
- How to Start Using Machine Learning and Artificial Intelligence: Tips for Business Leaders
OpenAI offers specialized plans and API access for enterprise users. This provides them with the necessary tools and support to integrate ChatGPT into their systems. These plans often include advanced features like improved response times, higher request limits, customization options, and dedicated support tailored to fulfill the unique needs and demands of enterprise clients.
While the GPT Builder simplifies custom GPT development, many enterprises with an existing workflow for building such models may not utilize this feature extensively. Therefore, this article is mainly seeking to reach ChatGPT Plus users.
How to Build a Custom GPT Using the GPT Builder
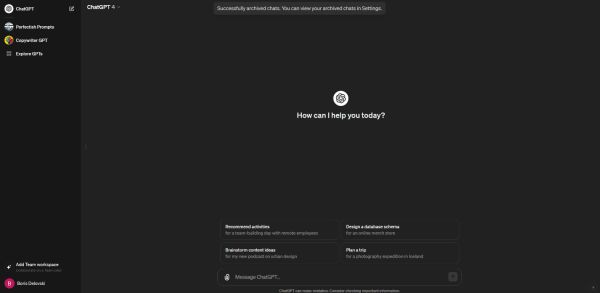
The process of building custom GPTs using the GPT Builder involves multiple steps. The first thing you need to do is to log in to your ChatGPT Plus account, which will direct you to the standard starting ChatGPT screen.
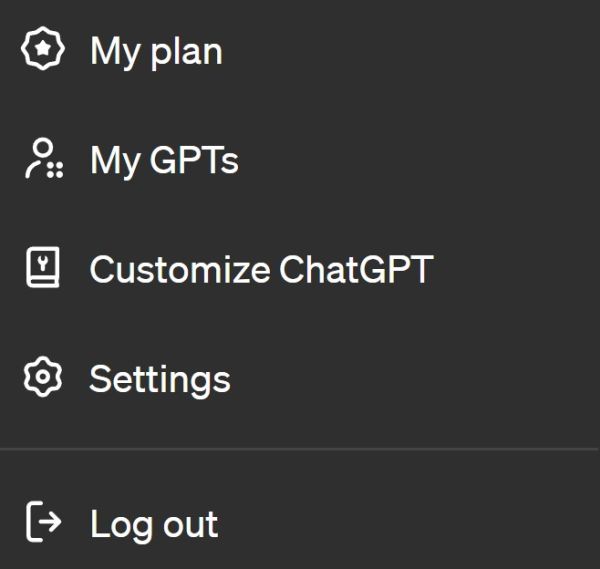
Once on this screen, you can click on your account in the bottom left of the screen, under the "Add Team workspace" tab. This will open up a small window that looks like this:
Here, you need to click on "My GPTs". This will direct you to the GPT Builder. Your screen should now look something like this:
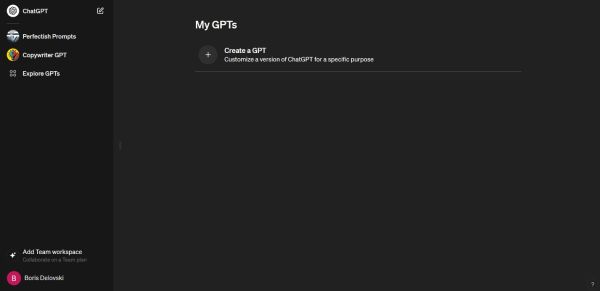
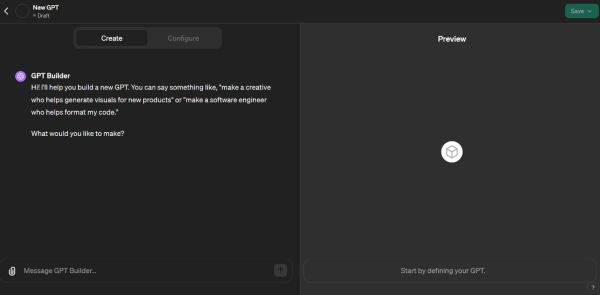
This is the starting screen of the GPT Builder and is also the one that will track the custom GPTs you build using a paid account. To start creating a custom GPT, you only need to click on "Create a GPT". This will direct you to a screen that looks like this:
As can be seen, there are two tabs at the top:
- Create
- Configure
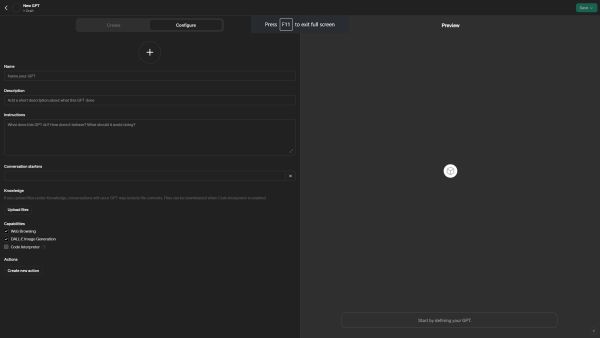
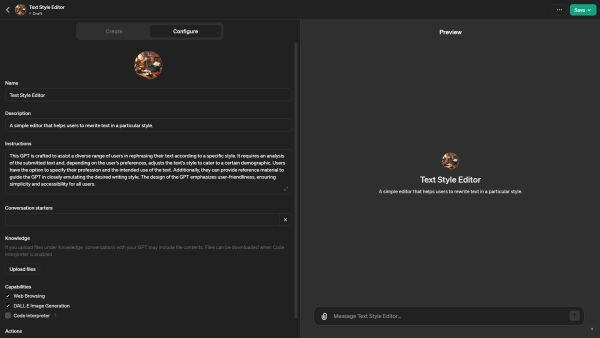
The "Create" tab enables you to message the GPT Builder to help you build a custom GPT. While this is a way to create a custom GPT, it is more advisable to click on the "Configure" tab. This will allow you to access a screen that enables you to provide more detailed instructions to the Builder. As a result, you will have the chance to better customize the GPT in harmony with your needs. By clicking on "Configure", you will be directed to a screen that looks like this:
As can be seen, there are multiple fields here that allow you to customize your custom GPT. You can define the following:
- add an image that will be used to represent your custom GPT
- name your custom GPT
- add a short description that explains what the GPT does
- provide detailed instructions to the Builder outlining the tasks for the custom GPT
- define several conversation starters
- add files from which the custom GPT can extract data
- define which of the capabilities of GPT 4 the custom GPT can use
- define so-called actions
To demonstrate, let us build a custom GPT capable of processing Word files, and rephrasing their text in a specific writing style.
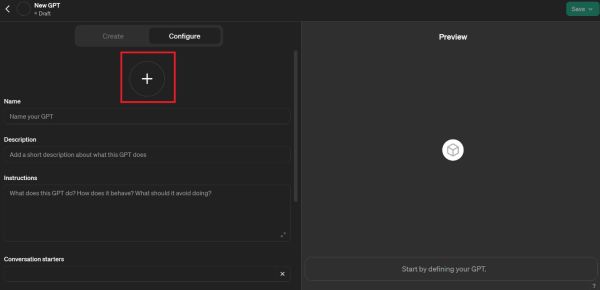
How to Add an Image
The first thing we can do is add an image. To do so, you can click on the large + sign that is directly under the Configure tab button.
When you click on this, you will be provided with two options:
- Upload photo
- Use DALL-E
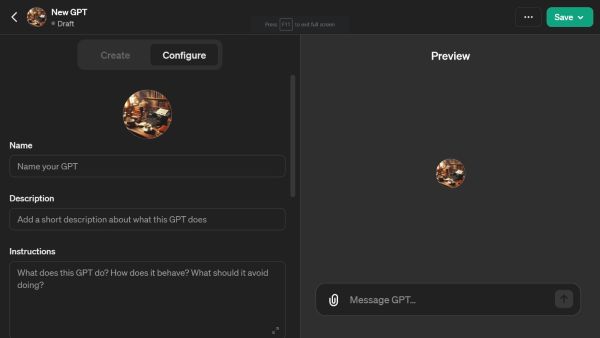
Your custom GPT should have a small image that represents it. You can either upload a photo that you have prepared in advance, or you can even request DALL-E, the image model from OpenAI, to generate one for you. In this case, let us request DALL-E to generate an image for us. The image produced by DALL-E looks like this:
A highly convenient feature of the builder is the ability to preview the custom GPT as we build it. Currently, with only the DALL-E generated photo created, the preview window shows only the photo and a stock chat bar.
How to Name the Custom GPT
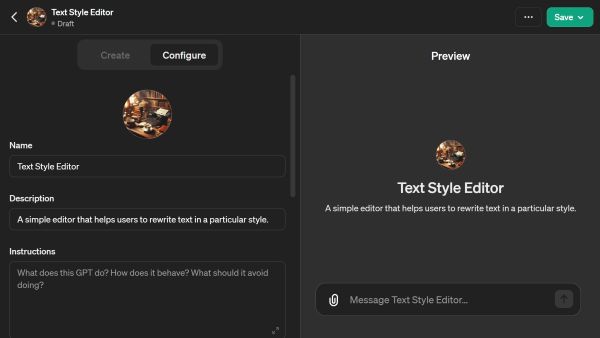
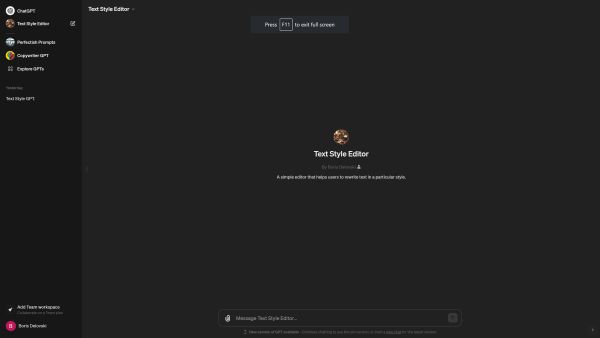
The following step is to name the custom GPT. You usually want to give a name that directly conveys the purpose of the custom GPT. In this case, we will use the GPT to rewrite the text in a specific style, therefore, let us call our custom GPT "Text Style Editor".
As can be seen, as soon as we name the custom GPT, the Preview window gets updated. Thus, now it not only displays the image created for the custom GPT but also the name that was given to the custom GPT.
Article continues below
Want to learn more? Check out some of our courses:
How to Add a Description
At this point, it is time to start explaining to the editor what we want our custom GPT to do. The first thing we need to do is add a short description, so based on what I want my custom GPT to do, I am going to write:
A simple editor that helps users to rewrite text in a particular style.
Certainly, this will also update the Preview window.
How to Give Instructions to the Builder
The next step is arguably the most critical one, as it is the one instructing the Builder on what you want your custom GPT to do. To be more precise, here is where we provide detailed instructions that define the behavior of custom GPT, its functionalities, and any particular behaviors it needs to avoid. In this case, the following instructions will be provided:
This GPT is crafted to assist a diverse range of users in rephrasing their text according to a specific style. It requires an analysis of the submitted text and, depending on the user's preferences adjusts the text's style to cater to a certain demographic. Users have the option to specify their profession and the intended use of the text. Additionally, they can provide reference material to guide the GPT in closely emulating the desired writing style. The design of the GPT emphasizes user-friendliness, ensuring simplicity and accessibility for all users.
This will not change the preview window at all, because it is what defines the custom GPT's background behavior. Before the Builder was made available, getting the GPT to behave in a certain way was relatively complex, and was something that was achieved only by people with advanced programming skills. However, with the introduction of the Builder, we can simply write yet another simple prompt, allowing the Builder to handle the complexity in the background.
How to Define Conversation Starters
You have likely noticed how, when you enter ChatGPT, it immediately offers a few examples of how you can start conversing with it. These are so-called conversation starters. However, since we are building a GPT that will rewrite the text, there is no need to include any conversation starters.
How to Upload Files that the GPT Can Extract Information From
In the Knowledge tab, you can provide additional context for the custom GPT to reference. This usually comes in the form of certain files that you upload and make available to the custom GPT. In this particular case, there is no need to upload anything. However, this would change if you were, for instance, building a custom GPT that will assign tasks to people working for a company based on their skills. In such a case you would probably need to upload a file listing workers' names alongside their respective skills.
Keep in mind, however, that content from the files that are uploaded could be included in the output. This means that you need to be especially careful about including sensitive content here.
How to Define the Capabilities of the Custom GPT
Probably the second most critical step, after providing detailed instructions on what it should do, is defining the capabilities of your custom GPT. There are three options here, as you can see in the image below:
By default, the Web Browsing and DALL-E Image Generation capabilities are enabled. However, in this case, our custom GPT will not be generating images, thus we can disable that feature. Instead, we need to select the Code Interpreter capability. This will allow our custom GPT to process files, which is highly important because it allows us to upload text files to it. This means that if we have some text that we want to rewrite stored in some text file, there is no need to copy the text to the window. What we can do is instruct the custom GPT to extract the text from the text file and return a new version of it to us.
How to Define Actions
Finally, we have the option to define so-called actions. Actions allow us to connect our custom GPT to third-party APIs. This is done by providing details about the endpoints and by defining how we want our model to interact with them. Essentially, we can build plugins and integrate them into our custom GPT. However, this is a more advanced feature, as it requires coding knowledge, therefore, we are going to skip it for now.
How to Publish the GPT
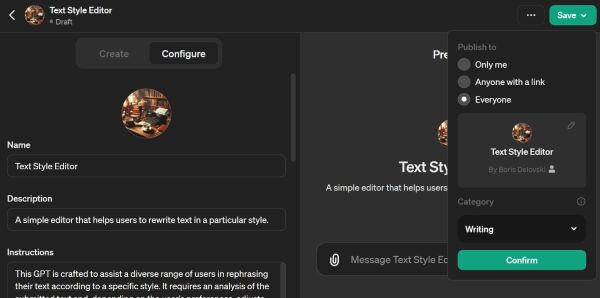
Finally, after defining everything you need to construct your custom GPT, you can click on the save button in the top right corner. This will open up a tab that looks like this:
Here we can decide if we want to keep our custom GPT private or share it with others. If you wish to share it with others, you can either decide to share it with people you share the link to, or to everyone. In this particular case, let us share this custom GPT with everyone. Also, we need to define in which category our GPT belongs to. In this case, we are certainly going to put it in the Writing category. Once all configurations are complete, simply click "confirm" to finalize the setup.
How to Check the GPT Store
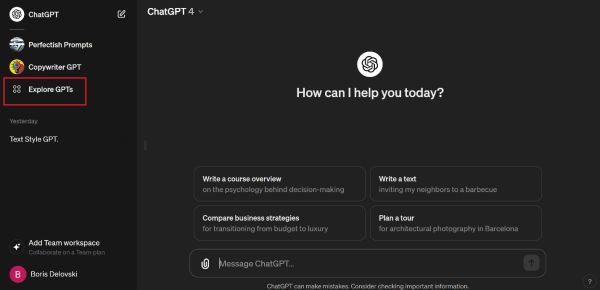
Once we have published our GPT, we can verify if everything was successful by trying to locate it on the GPT store. To do so, go back to the starting screen of ChatGPT and click on Explore GPTs:
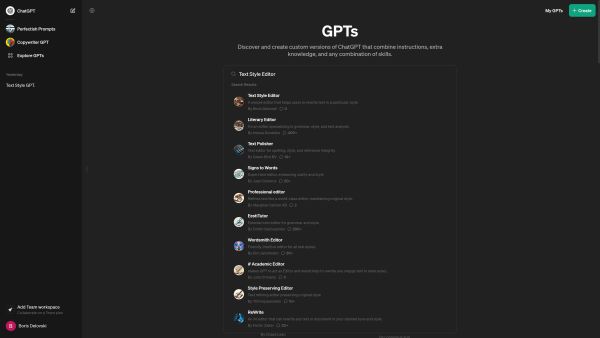
This will direct you to the GPT store. You can find many different custom GPTs in the GPT store. However, for now, let us try to locate the one that we created throughout this article. To do so, we will type in its name in the search box:
As can be seen, we can easily locate our custom GPT in the store. Let us test if everything is functioning properly. Let us click on our custom GPT. This will direct us to the screen that we saw in the Preview window previously.
Now, let us try to upload a text file and ask the custom GPT to rewrite it so that even children going to elementary school can understand it. The text talks about the Higgs Boson, an elementary particle in the Standard Model of particle physics, and explains its importance at a level appropriate for college students.
As can be seen, after we enter the prompt and upload the file, the custom GPT will first analyze the text file and explain what it found. Afterward, it will offer a simplified explanation, appropriate for elementary school children. By first providing an analysis of the text, we ensure that the custom GPT correctly identifies the content's subject matter guaranteeing it understands the topic it should address. The simplified version of the explanation it returned is:
The simplified explanation still carries the most important information from the original text. However, it now conveys the ideas using much simpler language. It also does away with a lot of the complex terms, because they are not suitable for children of that age.
- What Are the Most Popular AI and ML Tools?
- What Is The Difference Between Machine Learning and Artificial Intelligence?
To conclude, in this article, I focused on explaining the step-by-step process of creating a custom GPT model. As was illustrated, creating one is an especially easy process, even for people with zero coding experience. Certainly, knowing how to code is beneficial, as you can use the "actions" option during the custom GPT creation process to further personalize the GPT and add additional functionality. However, for most people that is not necessary nor is it something they should trouble themselves with.

