


Table of Contents
In the first article of this two-part series, I introduced you to the concept of Integrated Development Environments (IDEs), emphasizing their role in making coding more efficient and enjoyable. I focused mainly on PyCharm, which is widely regarded as the go-to IDE for Python programming because it includes many features that can make your life easier as a programmer. In this article, I’ll provide a real-life example to demonstrate how to use PyCharm and reap the benefits.
How to Install PyCharm
First, you’ll need to install PyCharm. To do that, go to the PyCharm section of the JetBrains website and download the .exe file.
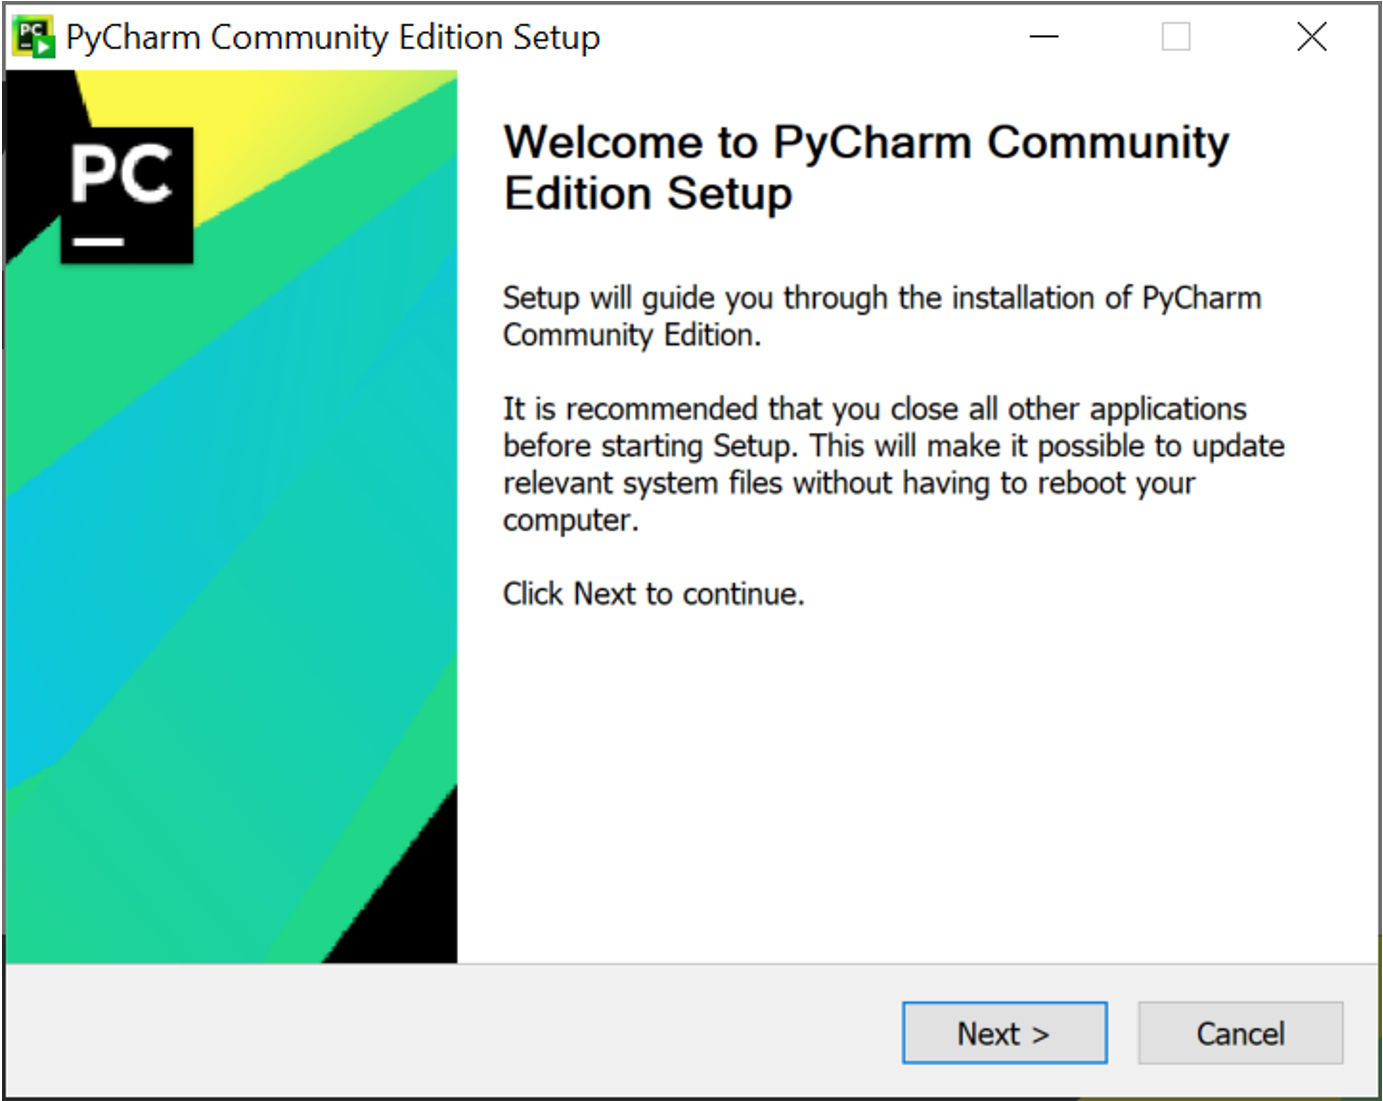
You can download either the file that lets you install the paid Professional Edition or the one for the free Community Edition. I'll use the free Community Edition in this example to ensure you don't need to pay anything to follow this article. After downloading the .exe file of the Community Edition, click on it and start the installation process. This will open a window like this:
The PyCharm Community Edition Setup window.
Image source: Edlitera
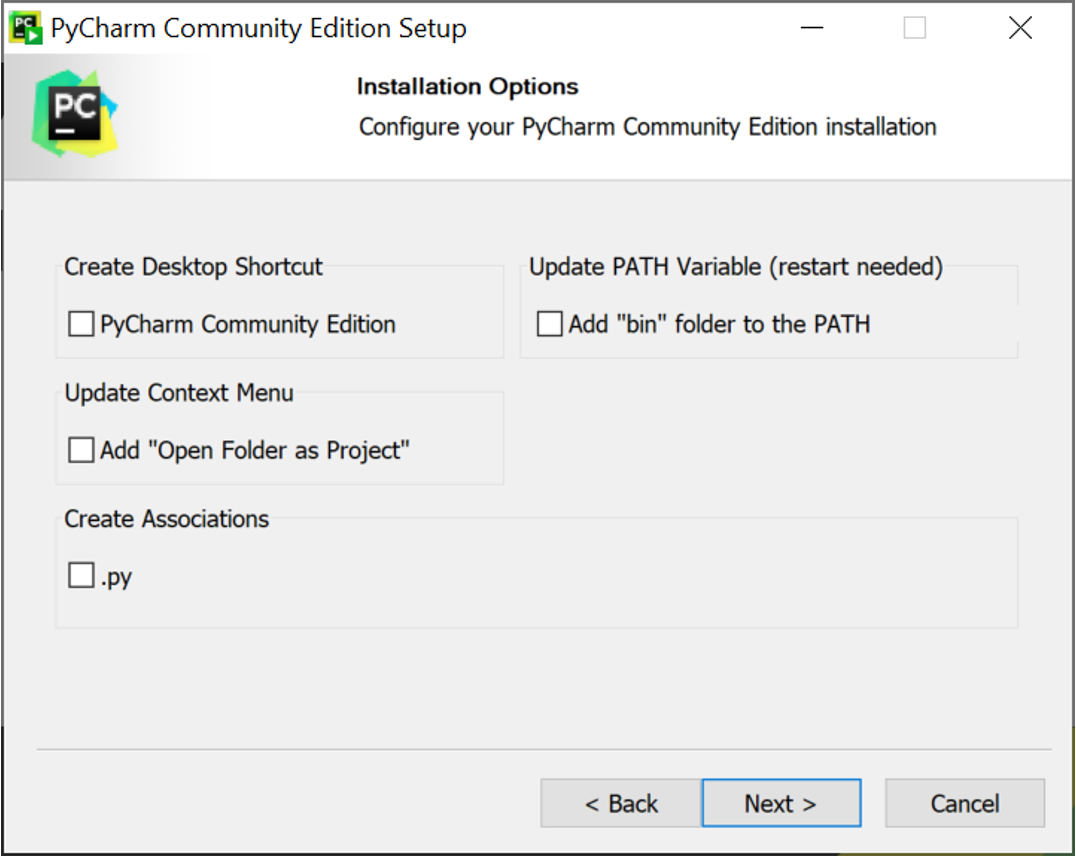
Here, just click on "Next" to continue. PyCharm will then ask you where you want to install it on your computer. This is entirely up to you, but I recommend installing it in your program files on your computer's main drive. After selecting where you want to install it, click on "Next," and you’ll see this window:
PyCharm setup installation options.
Image source: Edlitera
As you can see, there are a few options here. Let's go over them one by one:
- Creating a desktop shortcut will let me easily access the program, so I’ll select that.
- I’ll add the "bin" folder to the PATH. Adding the "bin" folder to your PATH allows you to run PyCharm-specific utilities from any command prompt or terminal window. This can be very useful if you intend to perform actions related to PyCharm from the command line.
- The Add 'Open Folder as Project' option during the PyCharm installation would add a context menu entry when you right-click a folder in your file system. This context menu option allows you to directly open that folder as a PyCharm project, simplifying the process of starting a new project or working on an existing one. In practice, however, that is something that you will rarely do.
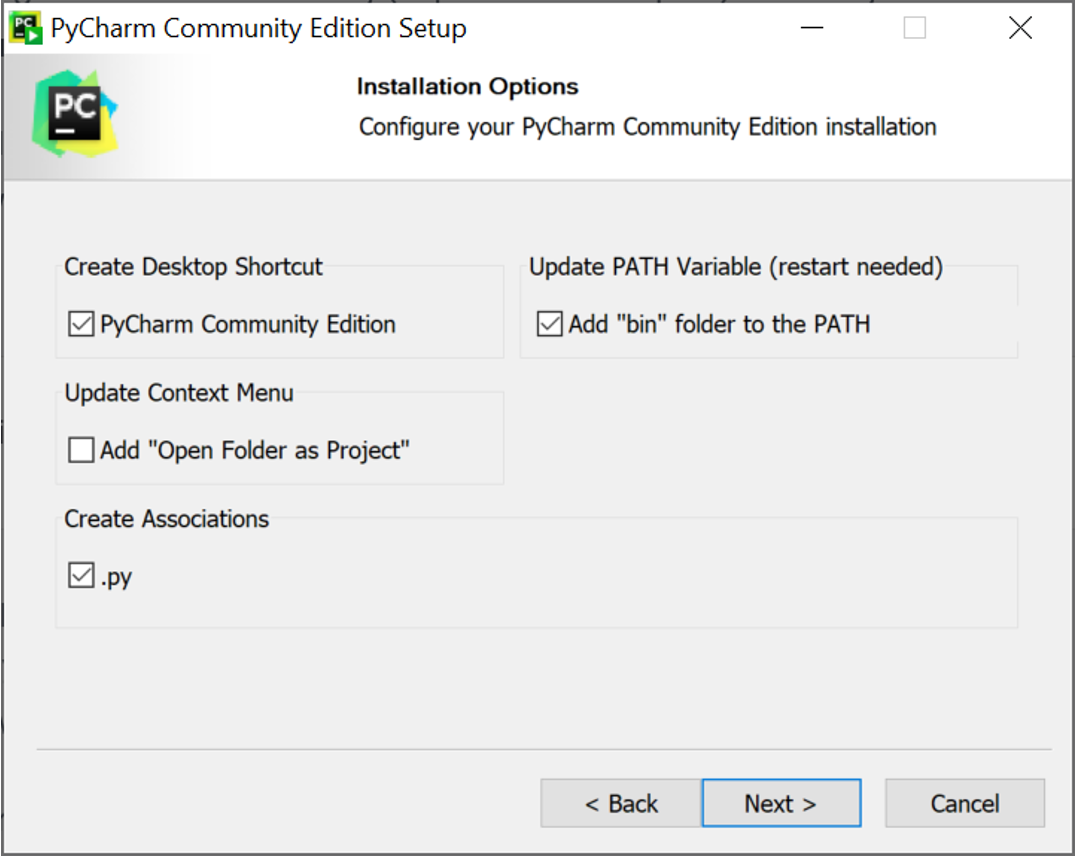
- The Create associations .py option during the PyCharm installation process allows you to associate .py files with the PyCharm application. This means that when you double-click on a Python script (*.py), it will automatically open in PyCharm. This can be a time-saver and make for a smoother workflow if you primarily use PyCharm for Python development, so I’ll select that.
All in all, your window should look like this before you click on "Next:"
PyCharm setup installation options.
Image source: Edlitera
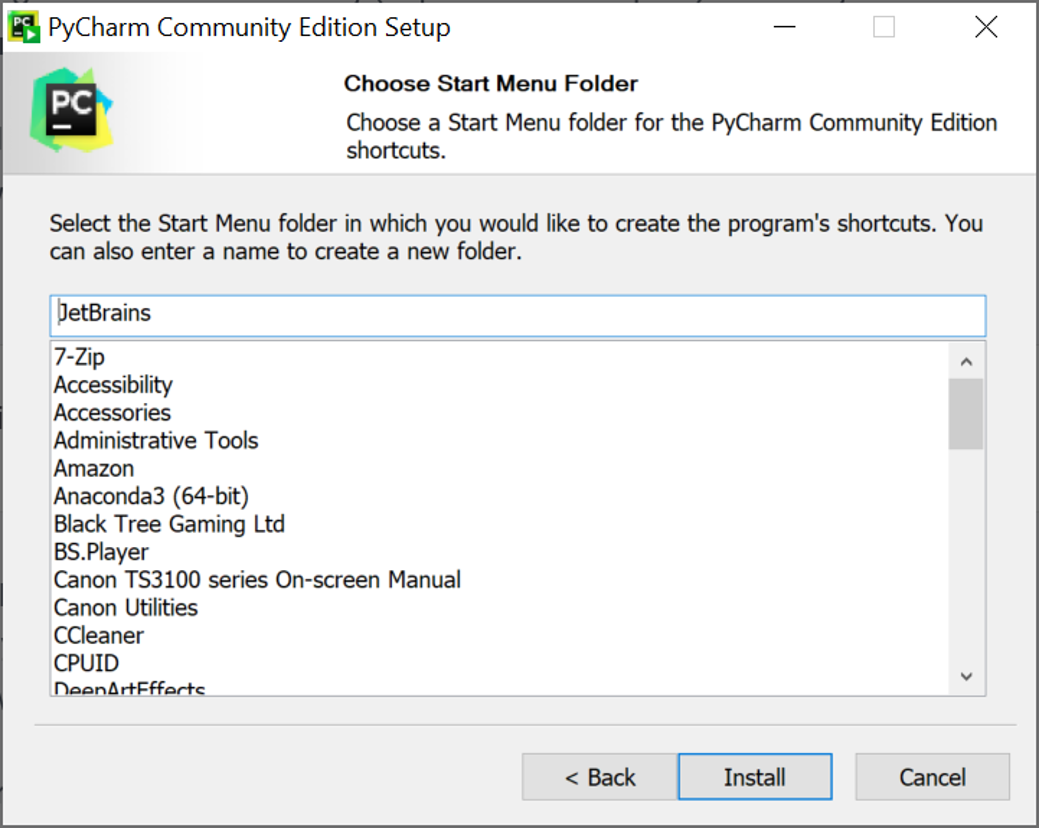
Finally, you need to select where to create the program's shortcuts. I suggest leaving it as is and clicking on "Install."
Choosing a start menu folder for PyCharm shortcuts.
Image source: Edlitera
After the installation has finished, you can run PyCharm by clicking on its shortcut on your computer.
How to Manage a Project in PyCharm
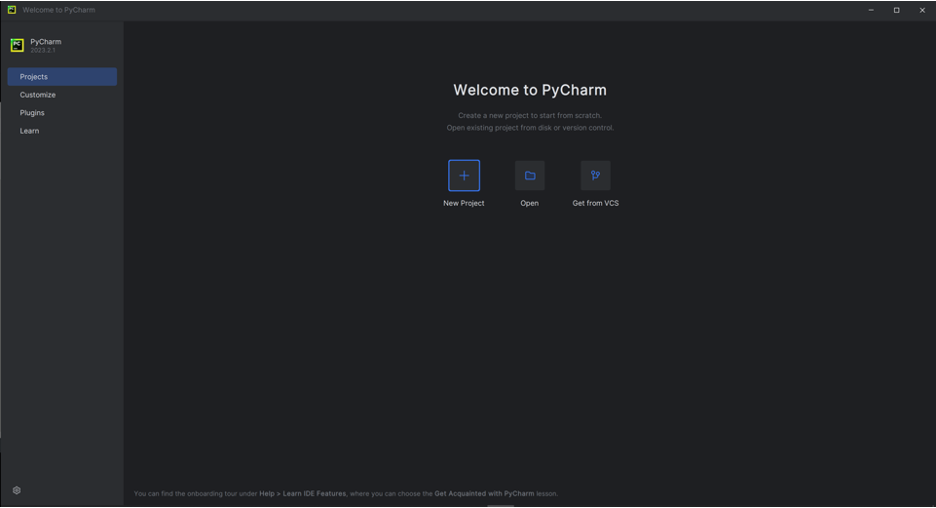
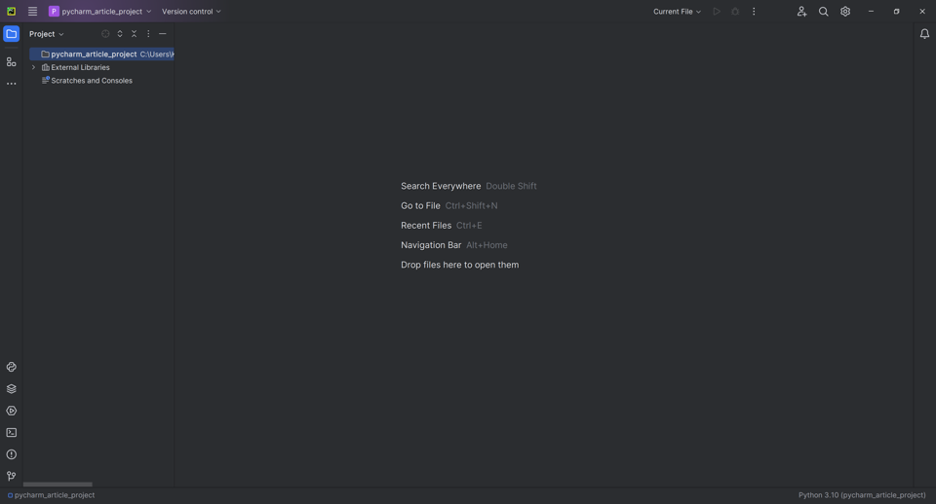
Once inside PyCharm, you will be greeted by a screen that looks like this:
The PyCharm welcome screen.
Image source: Edlitera
There are multiple tabs on the left:
- The Projects tab allows you to create new projects and open existing projects.
- The Customize tab enables you to choose the color theme and font, among other things.
- The Plugins tab allows you to manage plugins that are already installed and to install new plugins.
- The Learn tab contains tutorials on how to use PyCharm.
The most important tab here is the Projects tab. As you can see, there are three main options you can pick from when you want to start working on a project:
- Create a new project.
- Open an existing project.
- Open an existing from an existing repository.
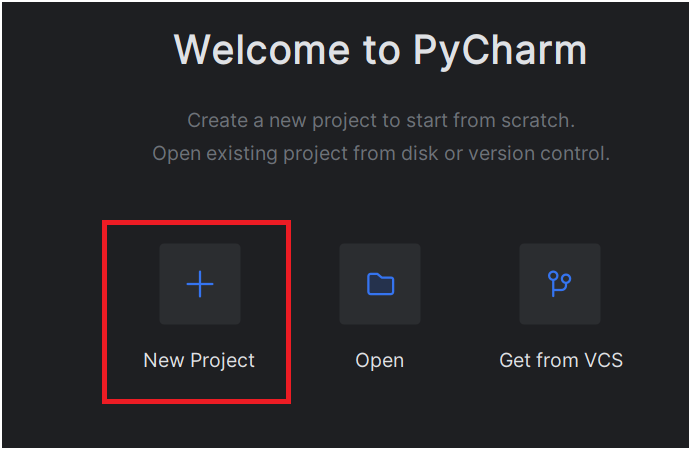
I’ll create a new project for this demonstration by clicking on "New Project."
Creating a new project on PyCharm.
Image source: Edlitera
Immediately upon clicking on this, you will be forwarded to a screen like this:
Defining a new project in PyCharm.
Image source: Edlitera
On this screen, you need to define where to create your project and which environment to run it in. By default, PyCharm creates a "PycharmProjects" folder on your computer, where it will store your PyCharm projects. I will name my project "pycharm_article_project" and create a new environment using Anaconda to run it. If you are unfamiliar with virtual environments and how they are created and managed, you can check out our article about virtual environments. However, you also have the option to use an already existing environment by clicking on the previously configured interpreter button.
- How to Manage Virtual Environments with Anaconda Navigator
- How to Manage a Data Science Project
- What Are 8 Critical Steps in the AI Project Life Cycle?
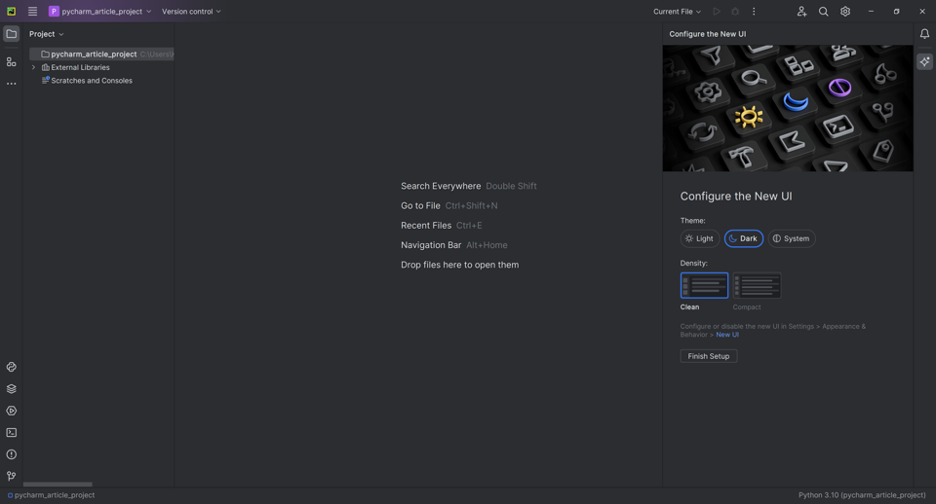
Once the project has been created, your screen will look like this:
The pycharm_article_project window.
Image source: Edlitera
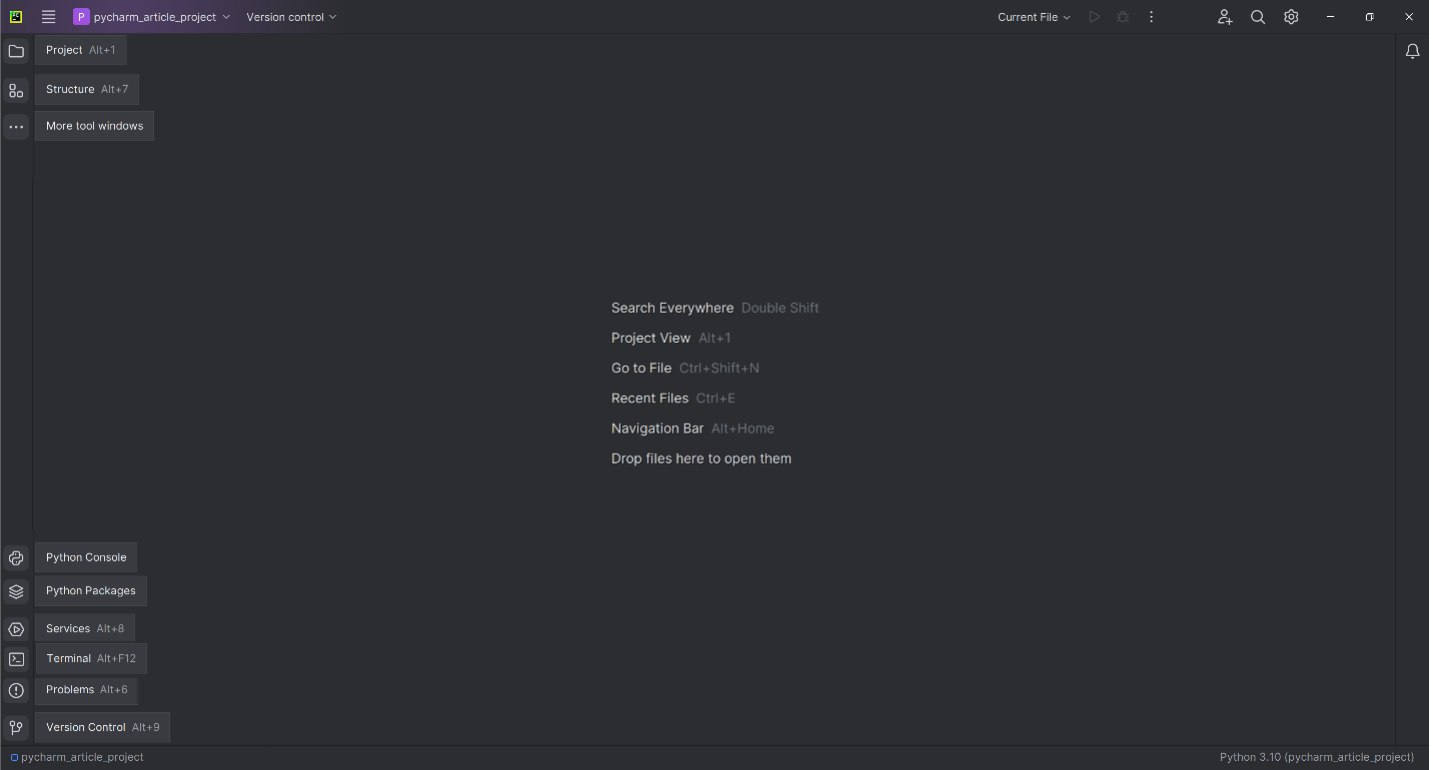
You can also configure your UI a bit here – you can change, for example, the font and theme (dark/light), but that is merely a matter of preference. On the left side of the screen, you’ll find everything you need to manage your projects. These different tabs offer different functionalities. The tabs are:
- Project
- Structure
- More Tool Windows
- Python Console
- Python Packages
- Services
- Terminal
- Problems
- Version Control
You’ll likely never have all tabs selected at the same time, but if you did, then it would look something like this:
All PyCharm tabs selected.
Image source: Edlitera
The Project Tab
The Project tab is the main window that allows you to browse through your project's file system. It lists all your directories and files in a tree-like structure. You can right-click on folders and files to execute various tasks like creating new files, deleting, and refactoring.
The Structure Tab
The Structure tab provides an outline of your code within the selected file. This is especially useful for quickly navigating to different functions, classes, or other code entities within the file.
The More Tool Windows Tab
The More Tool Windows tab is more like a category than a single tab. Clicking on it will reveal additional tool windows that you can activate. These may include things like a Database window or a TODO window.
Article continues below
Want to learn more? Check out some of our courses:
The Python Console Tab
The Python Console tab opens an interactive Python console within PyCharm, where you can run Python commands and scripts. It's a quick way to test out code snippets.
The Python Packages Tab
The Python Packages tab allows you to manage Python packages and dependencies for your project. You can install, uninstall, and update Python libraries directly from this window.
The Services Tab
The Services tab contains various services and tools, like databases, servers, and other background processes that can be run within PyCharm.
The Terminal Tab
The Terminal tab provides access to the system shell (cmd, bash, etc.) from within PyCharm. Here, you can execute shell commands without having to leave the IDE.
The Problems Tab
The Problems tab displays code issues, like errors or warnings, for easy navigation and fixing. It helps in identifying issues as you type, making debugging easier.
The Version Control Tab
The Version Control tab is your gateway to various version control systems (VCS) like Git and Mercurial. You can make changes, create branches, and perform other VCS operations directly from this tab.
You can easily access whatever feature you need by clicking on one of the tabs. I won’t use most of the tabs in this article because the code will be pretty basic. To start, I will click on Project, which will open up the project window:
The project window.
Image source: Edlitera
The project window shows you the directory on your computer where the project is stored, and it also shows a list of all the external Python packages and libraries available to your project via the "External Libraries" directory. This includes globally installed packages and those in your project's virtual environment. The folder provides a quick and convenient way to inspect which libraries are accessible to your project without opening a terminal or running pip commands.
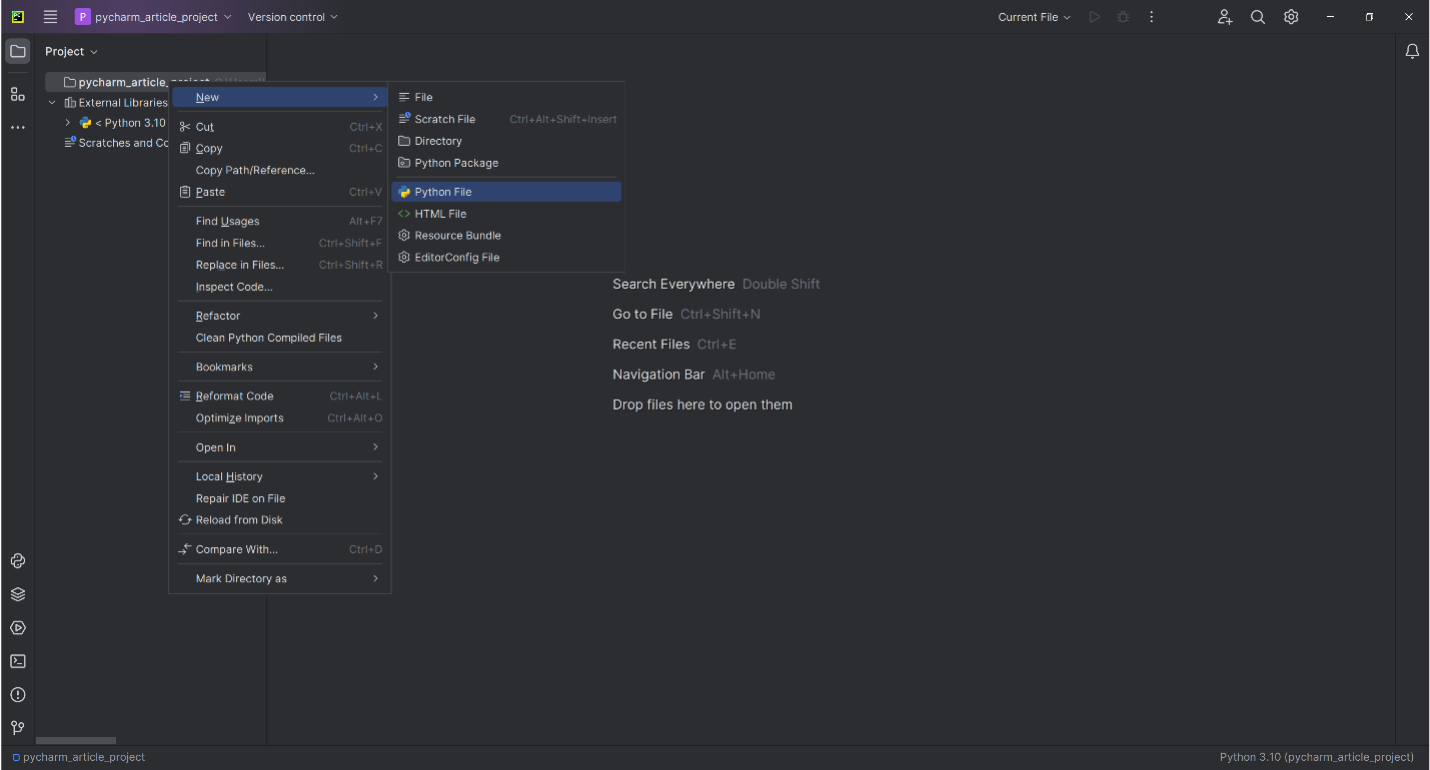
To start writing code, you first need to create a Python file in your project by right-clicking on the directory where your project is stored and selecting that you want to make a new Python file:
Making a new Python file in PyCharm.
Image source: Edlitera
I will create a new file called "simple_example.py" to demonstrate the basics of the code editor, debugging, refactoring, and code inspection.
How to Use the PyCharm Code Editor
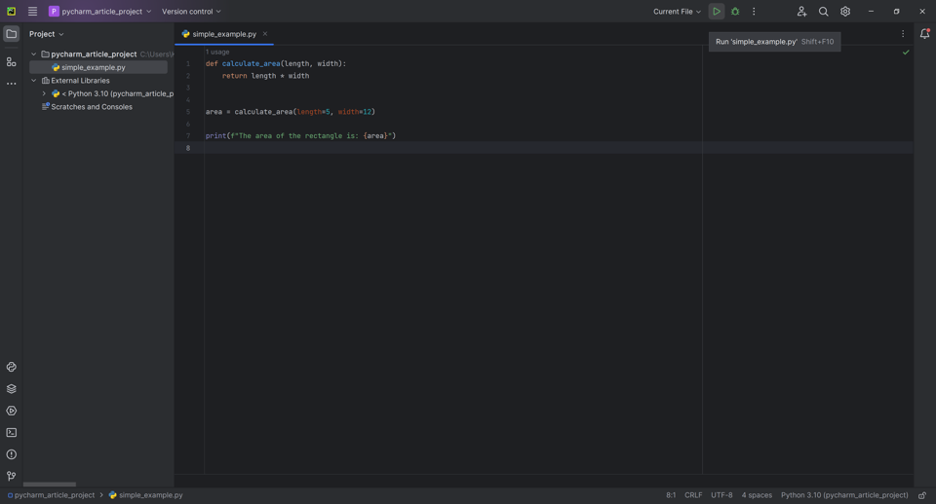
To demonstrate how the PyCharm code editor works, I’ll create a simple function that calculates the area of a rectangle. Then, I will use that function to calculate the area of a 4 x 2 rectangle and print the area. One thing you will notice while typing out this code is that as soon as you start typing, for example, "pr", the editor will offer you to automatically create a print() statement in your code. You will also notice that different parts of the code will be highlighted differently. The code will look like this:
def calculate_area(length, width):
    return length * width

area = calculate_rectangle_area(length=5, width=12)

print(f"The area of the rectangle is: {area}")
To run this code, I only need to click on the little "Play" button on the screen.
Running code in PyCharm.
Image source: Edlitera
In PyCharm, the result of running the code is displayed in the Run tool window, which is usually located at the bottom of the IDE window. This tool window contains a terminal-like interface where the output of your program will be displayed.
The result of running the code.
Image source: Edlitera
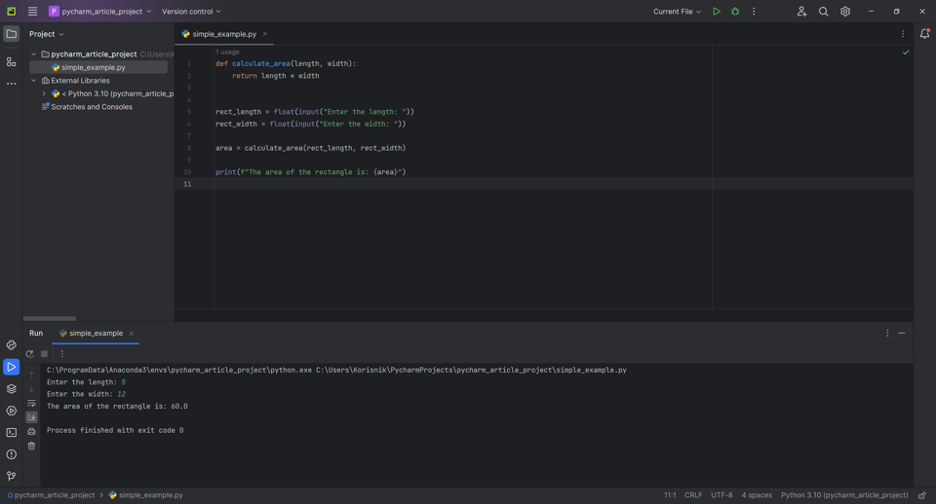
The Run tool window allows you to interact with your program. For example, if your code expects user input via input(), you can type your input directly into the terminal area of the window. Let's change our code a bit:
def calculate_area(length, width):
    return length * width


rect_length = float(input("Enter the length: "))
rect_width = float(input("Enter the width: "))

area = calculate_area(rect_length, rect_width)

print(f"The area of the rectangle is: {area}")
When you run the code, before it finishes running, it will first ask you to input the length and width in the Run tool window.
Finishing running the code.
Image source: Edlitera
How to Inspect, Refactor, and Debug Code in PyCharm
To explain how you can inspect your code, use refactoring to fix mistakes and perform debugging, I’ll make the following mistakes in the code on purpose:
- Add a useless variable called a to the function
- Mess up the spacing
- Forget to close the print() statement parenthesis
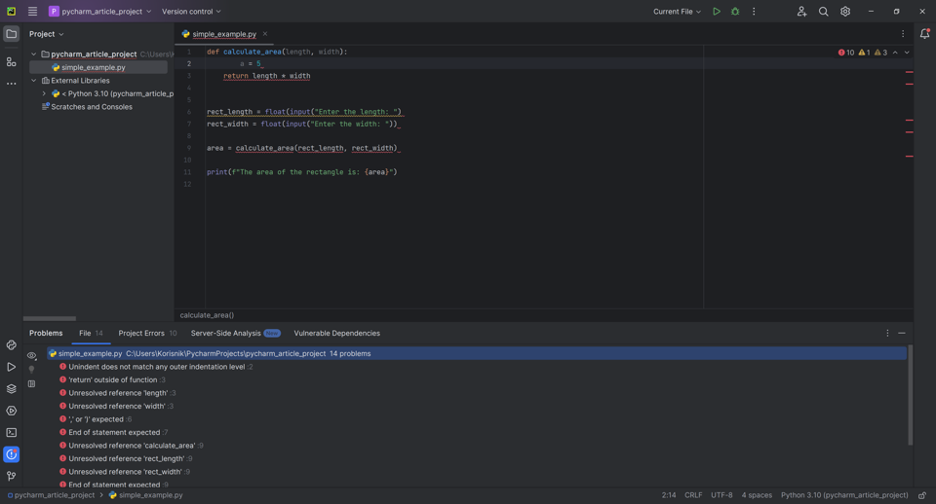
How to Inspect Code in PyCharm
The messed-up code will look like this:
Inspecting code in PyCharm.
Image source: Edlitera
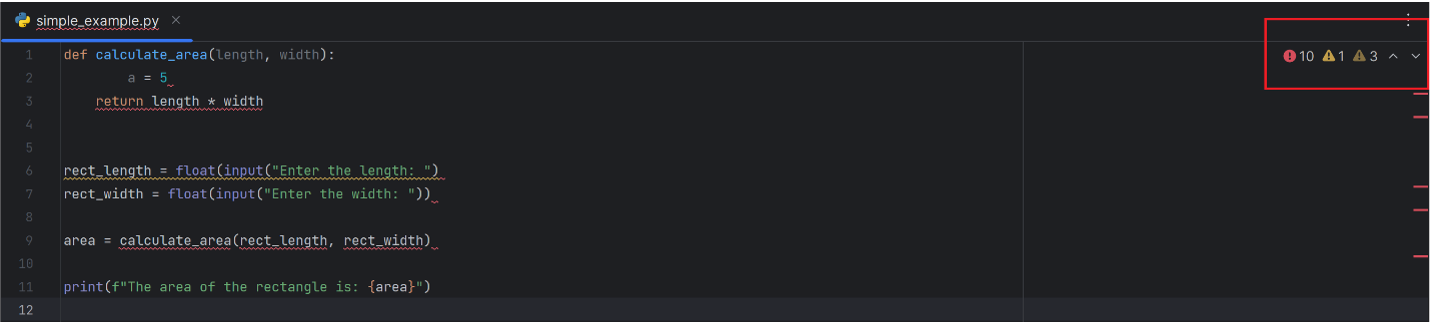
As you can see, PyCharm automatically inspects the code and displays all the errors in the top right corner, so I don’t have to do anything. If you click on the errors in the top right corner, you’ll be able to see all the mistakes in your code:
A list of errors in the code.
Image source: Edlitera
PyCharm will tell you where the error is and what it is. In this example, it will tell you that the a variable is not used anywhere and that because of the indentation of a, the return statement ends up being outside of the function on line 3. It will also tell you I didn't close the brackets on line 6.
Basically, PyCharm will analyze your code on the fly and return any mistakes it encounters in the code. This helps you debug your code much easier because you’re aware of the mistakes you make in real-time. This is useful by itself, but it becomes even more helpful when you combine it with PyCharm's debugging tool.
How to Debug Code in PyCharm
Instead of clicking on the "Play" button to run your code, you can also click on the button bug-shaped "Debug" button next to it:
The Debug button.
Image source: Edlitera
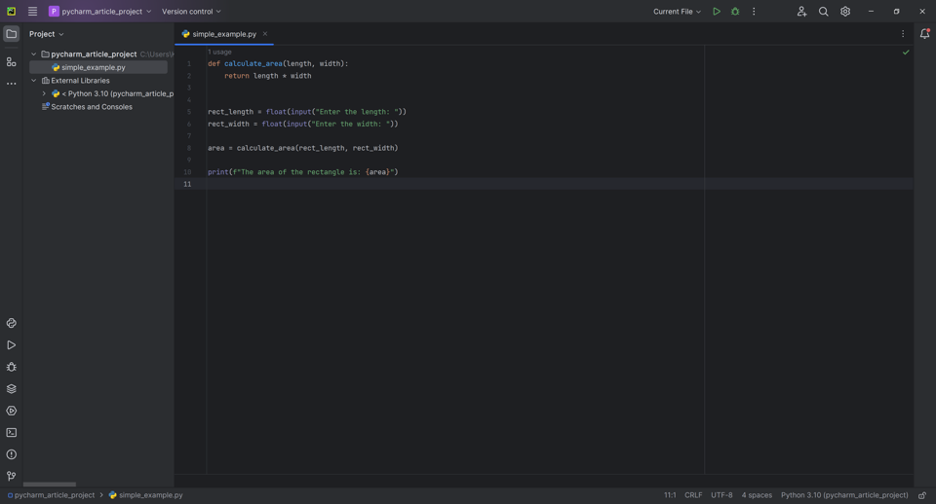
Now, let's fix the function and rerun the debugger. This time, the debugger will let us know that I didn't close the parenthesis on line 5. Of course, if you want, you can even take advantage of breakpoints, but to demonstrate that properly, the code would need to be much more complicated, so I won’t go over that right now.
At this point, the only mistake in our code is the missing parenthesis, so let's fix that.
Adding the missing parenthesis on line 5.
Image source: Edlitera
How to Refactor in PyCharm
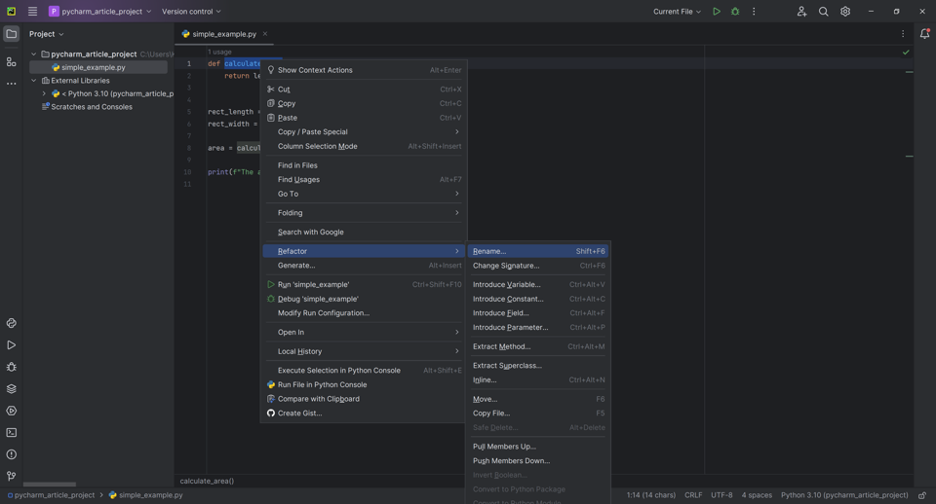
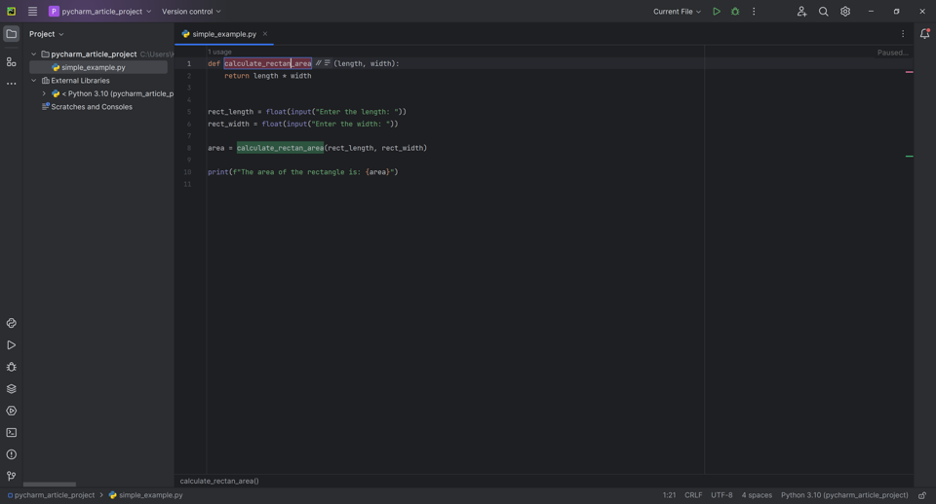
Finally, let's use refactoring to rename our function. The current name, "calculate_area," is not great because the function specifically calculates the area of a rectangle. Using refactoring, I can change the name of the function to "calculate_rectangle_area." I just need to highlight it, right-click on it, and I can select that I want to rename it by refactoring:
Renaming the function by refactoring.
Image source: Edlitera
As I change the function's name at the top of my code, later uses of the same function are renamed in real-time. For instance, this is how it looks like while I type:
Refactoring changes all instances of the function’s name in real-time.
Image source: Edlitera
This effect of rippling changes is extremely useful because it means that I can't run into a situation where I’ve, for example, changed the name of my function in one place in the code but didn't do it in another place.
How to Test Your Code in PyCharm
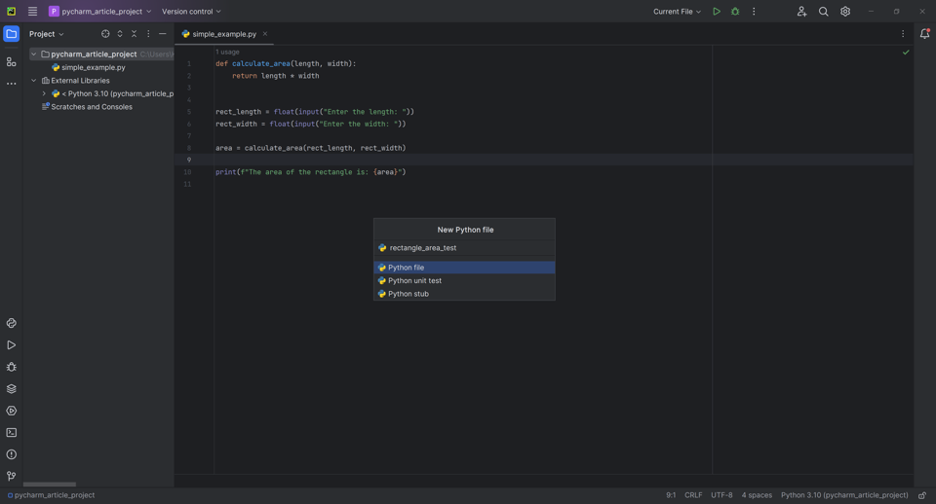
You can test your code using one of the many frameworks PyCharm offers. Let's use the default framework of PyCharm: the unittest framework. I am going to create a new Python file and call it "rectangle_area_test."
Creating a new Python file.
Image source: Edlitera
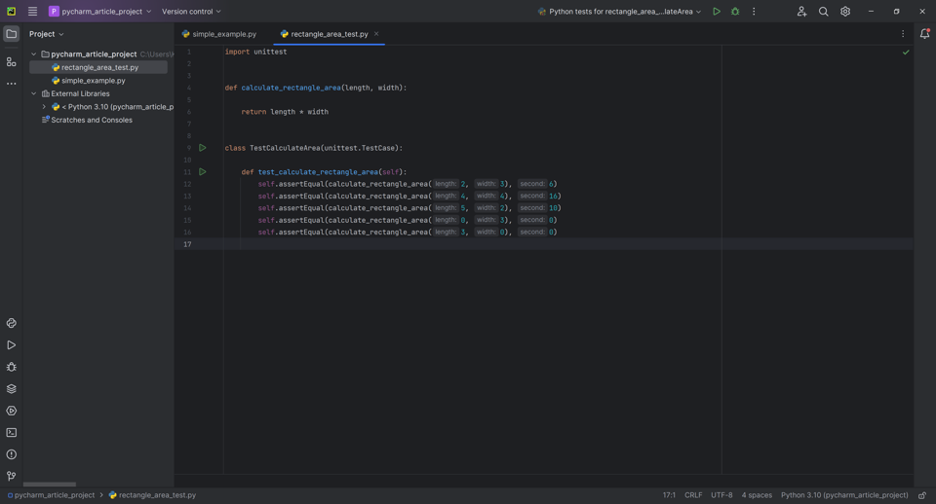
Once I’ve created the file, I will implement a rudimentary test using the unittest framework. To keep things simple, I will just try using various combinations of input parameters with my function to see if it produces correct results.
import unittest


def calculate_rectangle_area(length, width):

    return length * width


class TestCalculateArea(unittest.TestCase):

    def test_calculate_rectangle_area(self):
        self.assertEqual(calculate_rectangle_area(2, 3), 6)
        self.assertEqual(calculate_rectangle_area(4, 4), 16)
        self.assertEqual(calculate_rectangle_area(5, 2), 10)
        self.assertEqual(calculate_rectangle_area(0, 3), 0)
        self.assertEqual(calculate_rectangle_area(3, 0), 0)
One thing you will notice here is that I am not adding the following line to my code:
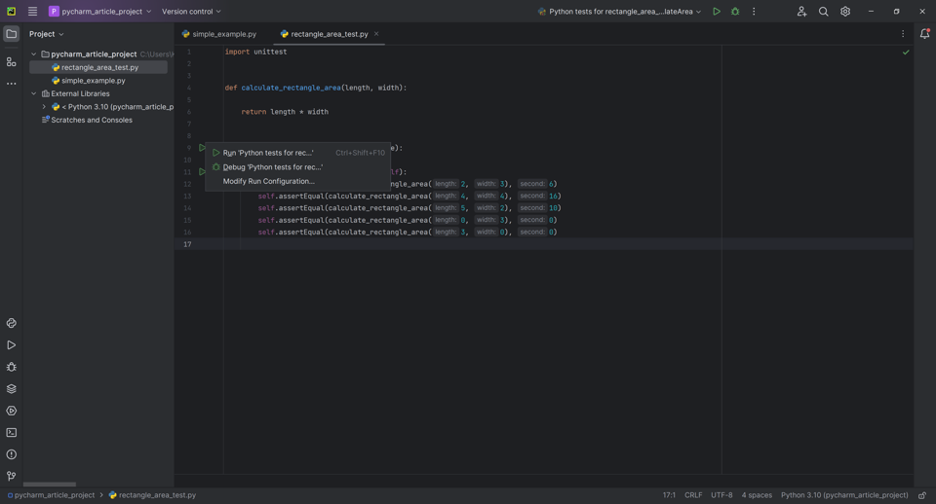
if __name__ == '__main__': unittest.main()This line is often used in Python test scripts to ensure the tests are run when the script is executed directly. Essentially, it makes sure the script is run as the main program and not being imported as a module into another script. If the script is the main program, it will run the tests contained in the script. I am not using it here because PyCharm has a test runner that allows you to run tests. When you create a test, it will display a small "Play" button next to it that allows you to run that test:
Running a test on Pycharm.
Image source: Edlitera
When you click on the small "Play" button on the line where the test class definition starts, it will not only allow you to run the test but also debug it if you want to:
You can debug your code along with testing it.
Image source: Edlitera
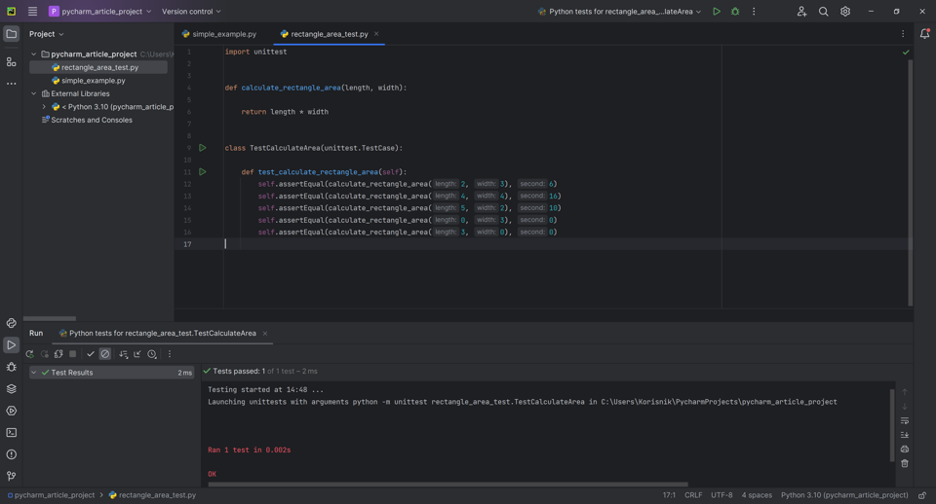
After running the test, my results will be displayed in the Run tool window, where I can see that the test didn't run into any problems and my function works fine.
The results of the test are displayed in the Run tool window.
Image source: Edlitera
In this article, I’ve introduced you to all the essential features of PyCharm so you can get started with it. As you keep using PyCharm, you’ll discover more complex functionalities, such as version control. With the previous article in this series, you should have all the knowledge you need to begin using PyCharm as your go-to Python IDE.

