


![[Future of Work Ep. 3] Future of Banking with Marino Vedanayagam: Data and AI Skills Wanted](https://res.cloudinary.com/edlitera/image/upload/ar_16:9,c_fill,f_auto,q_auto,w_100/bdlkg8tjz28hvungyn09i9otr9cb?_a=BACADKBn)
Table of Contents
When you start learning how to code, you’re probably looking for ways to get good at it quickly. One thing that is going to help you advance is virtual environments. I talked about this a little in the previous article about Anaconda Navigator. In this article, I'll go into more detail: I'll tell you why virtual environments are critical and why it’s so important to learn about them when you start coding.
What Are Virtual Environments?
The concept of virtual environments can be a little hard to understand, so let's use an analogy. Imagine your computer as a recipe book full of different dishes you can cook: the basic Python installation is like having a kitchen where you can cook any recipe from the book, and in this kitchen, you have a pantry full of various ingredients, spices, and utensils—these are your libraries and packages.
A virtual environment is like a recipe card that lists specific ingredients and steps for one dish. When you want to cook that dish, you pull out its recipe and gather only the ingredients (packages) and utensils (libraries) you need, as listed on the card. This ensures you don't accidentally include ingredients that could spoil your dish. In this analogy, you don't have to sort through the entire pantry (all available libraries and packages) each time you cook a new dish. Instead, you have a recipe card (virtual environment) that tells you exactly what you need, making the process more efficient and reducing the chance of mistakes.
What Is the Difference Between Packages and Libraries?
The terms package and library are often used interchangeably in Python, but technically, they are different. In general, it's not something you need to worry about, but it’s good to be aware of the difference.
A library is a bundle of pre-written code organized into files called modules that contain functions and other elements that you can use in your code, saving you the effort of writing them yourself. In the kitchen analogy, a library would be a kitchen appliance, such as a blender: it helps you do specific tasks more efficiently, like blending fruits, and you can use it for various recipes because it's versatile.
A package is like a folder that contains multiple related modules, and possibly even other nested folders (sub packages), to organize various functionalities. Unlike a library - a single collection of useful code - a package is a structured collection of multiple modules that work together to perform a specific set of tasks. Getting back to the analogy, a package is more like a spice rack containing a variety of spices grouped for a particular type of dish, like baking: it's a collection of related tools often used together to create something specific, like baking a cake. Just as a spice rack may have a subset of spices, a package may have a subset of tools from a more extensive library.
Even though you will install different packages and libraries for every project you work on, a default environment is automatically created when you install Python and contains a basic set of tools that you will use in all of your projects: the root environment.
Article continues below
Want to learn more? Check out some of our courses:
What Is The Root Virtual Environment?
The root environment (sometimes called the base environment) comes with the Python interpreter and a collection of pre-installed packages and libraries. Think of this as your kitchen's essential pantry items and utensils that you'll use in almost every recipe.
The root environment is crucial for managing Anaconda's package operations. While adding new packages or libraries directly to this base environment may be tempting, doing so is not a good idea because adding to the root environment can lead to conflicts between dependencies and may even compromise your entire Anaconda setup. To put it in culinary terms, adding specialized ingredients like truffle oil to every dish could ruin your meal.
The smart thing to do is to leave the root environment alone, especially if you're new to this—it already has all the basic packages you need for regular coding. Rather than changing it, create a new virtual environment for each new project and set it up according to its needs.
How You Can Manage Environments with Anaconda Navigator
You can manage your Python packages and libraries in two main ways: using the terminal or the Anaconda Navigator's graphical interface. Using the terminal to manage packages and libraries is quicker but can be intimidating for those new to programming. Even for those with some experience, keeping track of installed packages and their versions can sometimes be challenging. On the other hand, the Anaconda Navigator is more user-friendly and intuitive, especially for those not familiar with programming. However, it can be slower to navigate compared to the terminal.
- Intro to Programming: How to Use the Command Line (Part 1)
- Intro to Programming: How to Use the Command Line (Part 2)
I believe the graphical interface is more beginner-friendly because it makes it easier to avoid making mistakes, reducing potential frustration when managing libraries and packages. That's why, in this article, I’ll demonstrate how you can use the graphical interface of Anaconda Navigator to manage your virtual environments.
If you don't know how to install Anaconda Navigator, don’t worry, we went through the process step-by-step in our previous article.
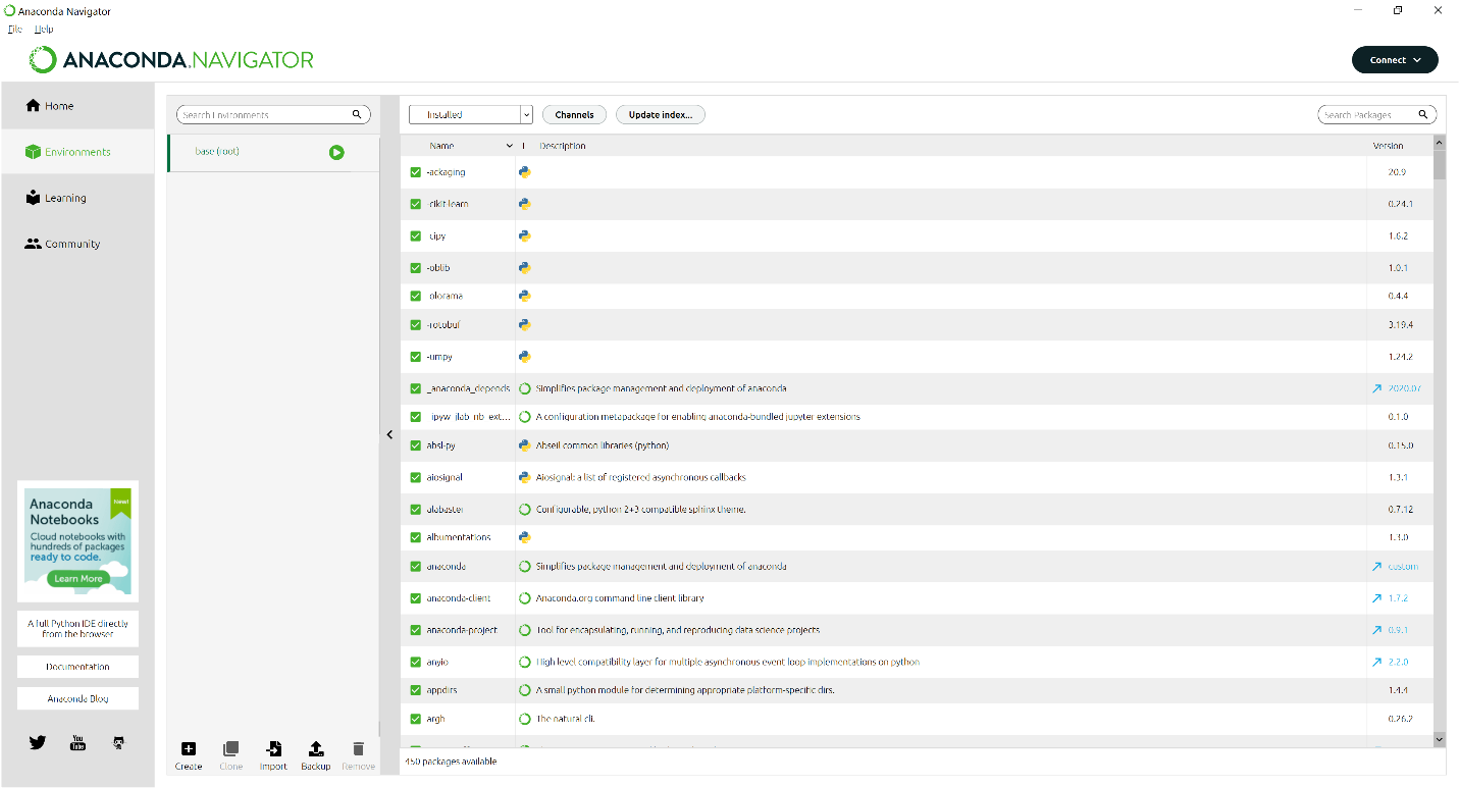
To manage your environments, run the Anaconda Navigator program and go to the Environments tab.
Anaconda Navigator Environments tab.
Image source: Edlitera
How to Create a Virtual Environment
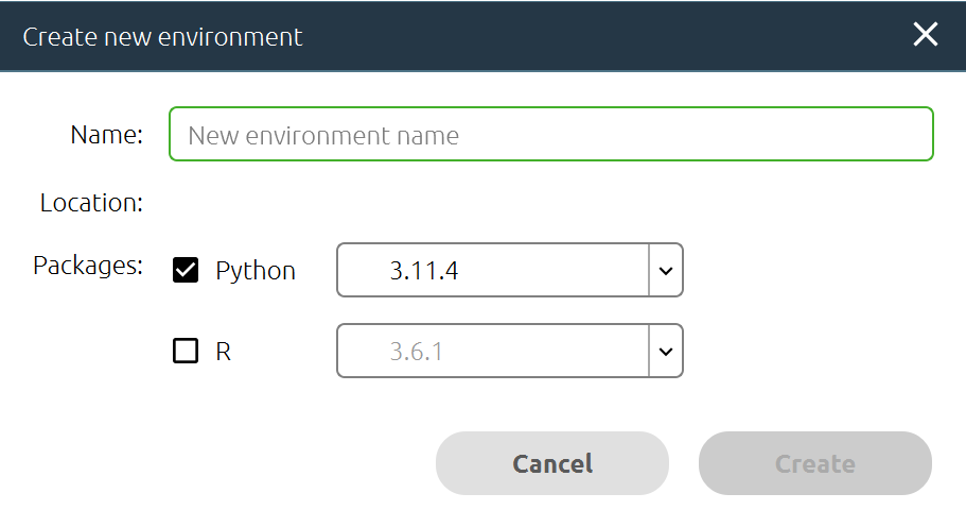
To create an environment using Anaconda Navigator, you just need to click on "Create" at the bottom of the screen.
Doing this will make a smaller window like this pop up:
As you can see, there are two things we need to define when creating a new environment with Anaconda Navigator:
- The name of the environment
- The version of the Python interpreter you want to use
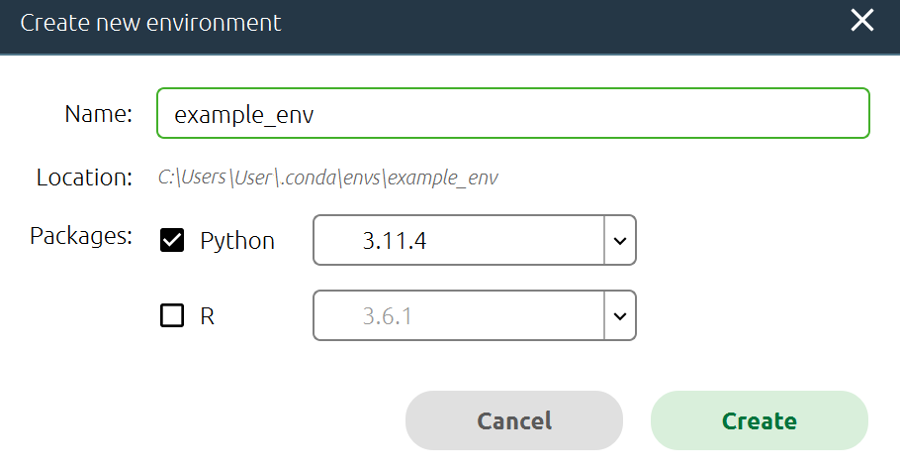
You can name your environment however you want, so that is straightforward. However, the second part is a bit misleading: it says packages, but you are actually choosing which Python interpreter version you want to run in the new environment. The idea behind using the term packages here is to remind users that the environment isn't just for holding a Python interpreter—it's also for managing all the other Python packages you may want to use for a particular project or task. I find this unintuitive, but it is a minor gripe and shouldn’t discourage you from using Anaconda Navigator. Let's create a new environment and name it example_env:
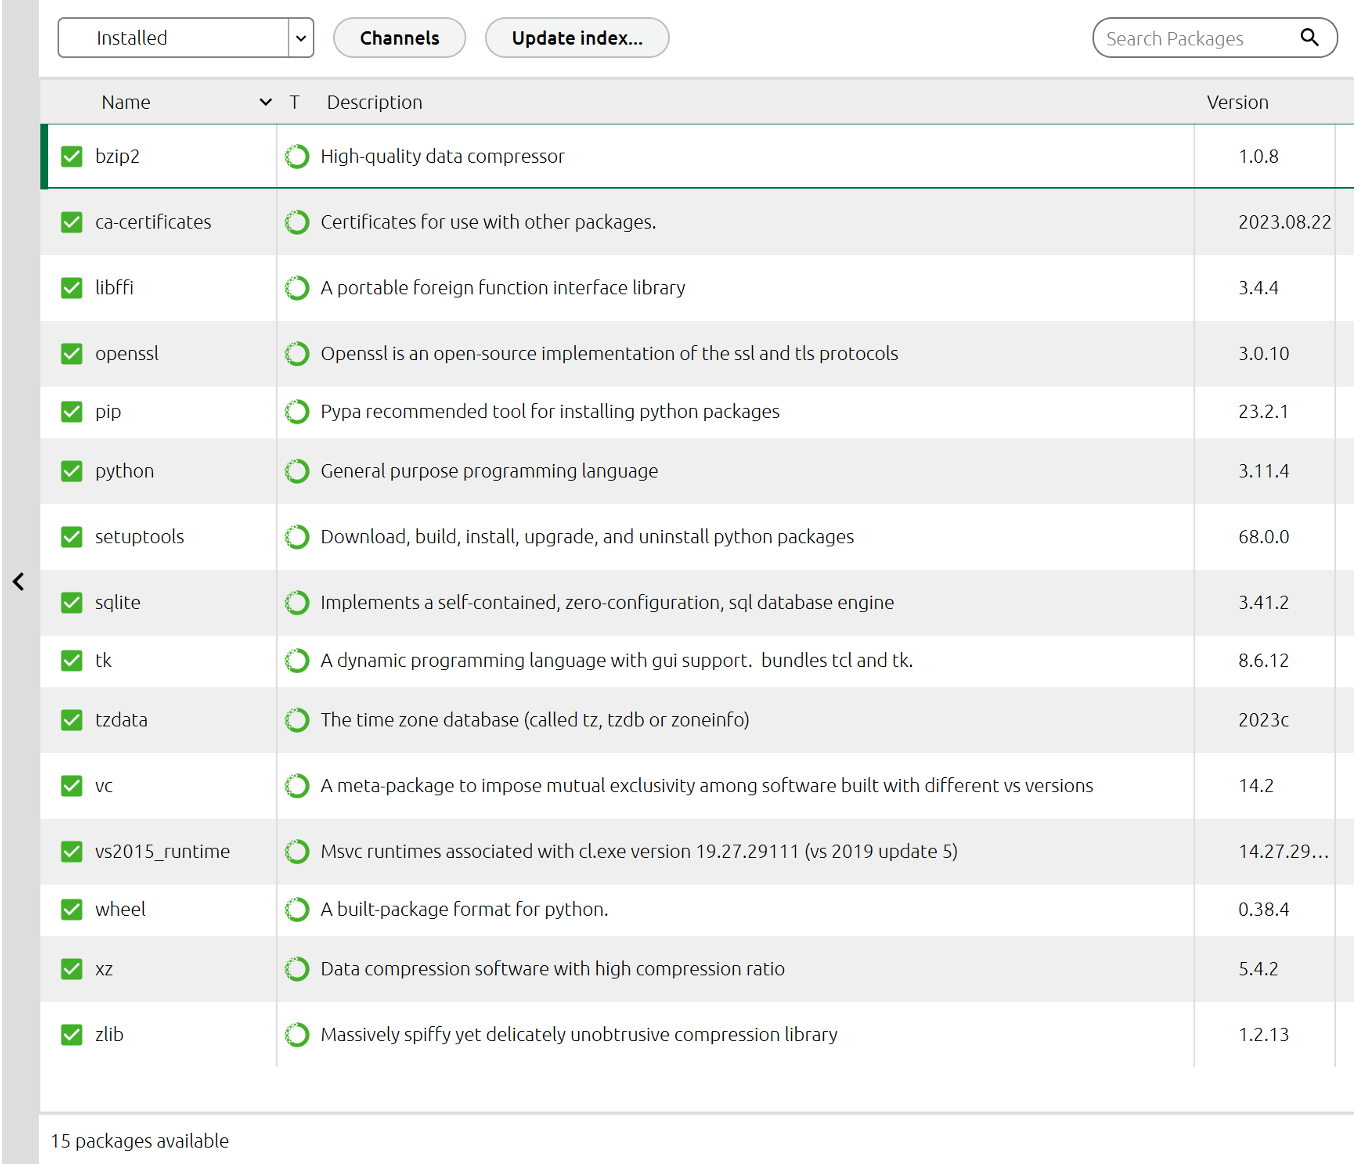
Clicking “Create” will create the environment and automatically switch to it in the Anaconda Navigator window:
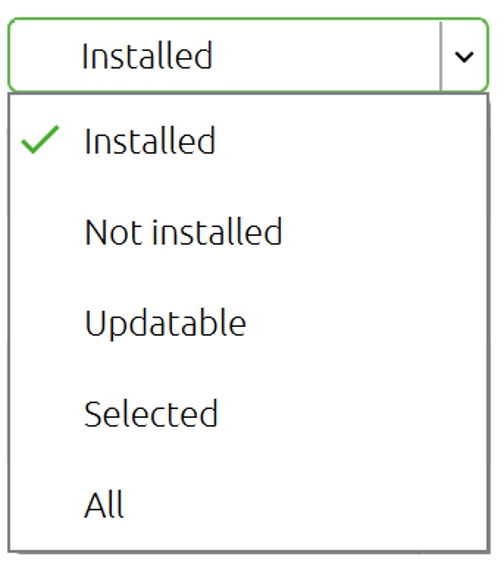
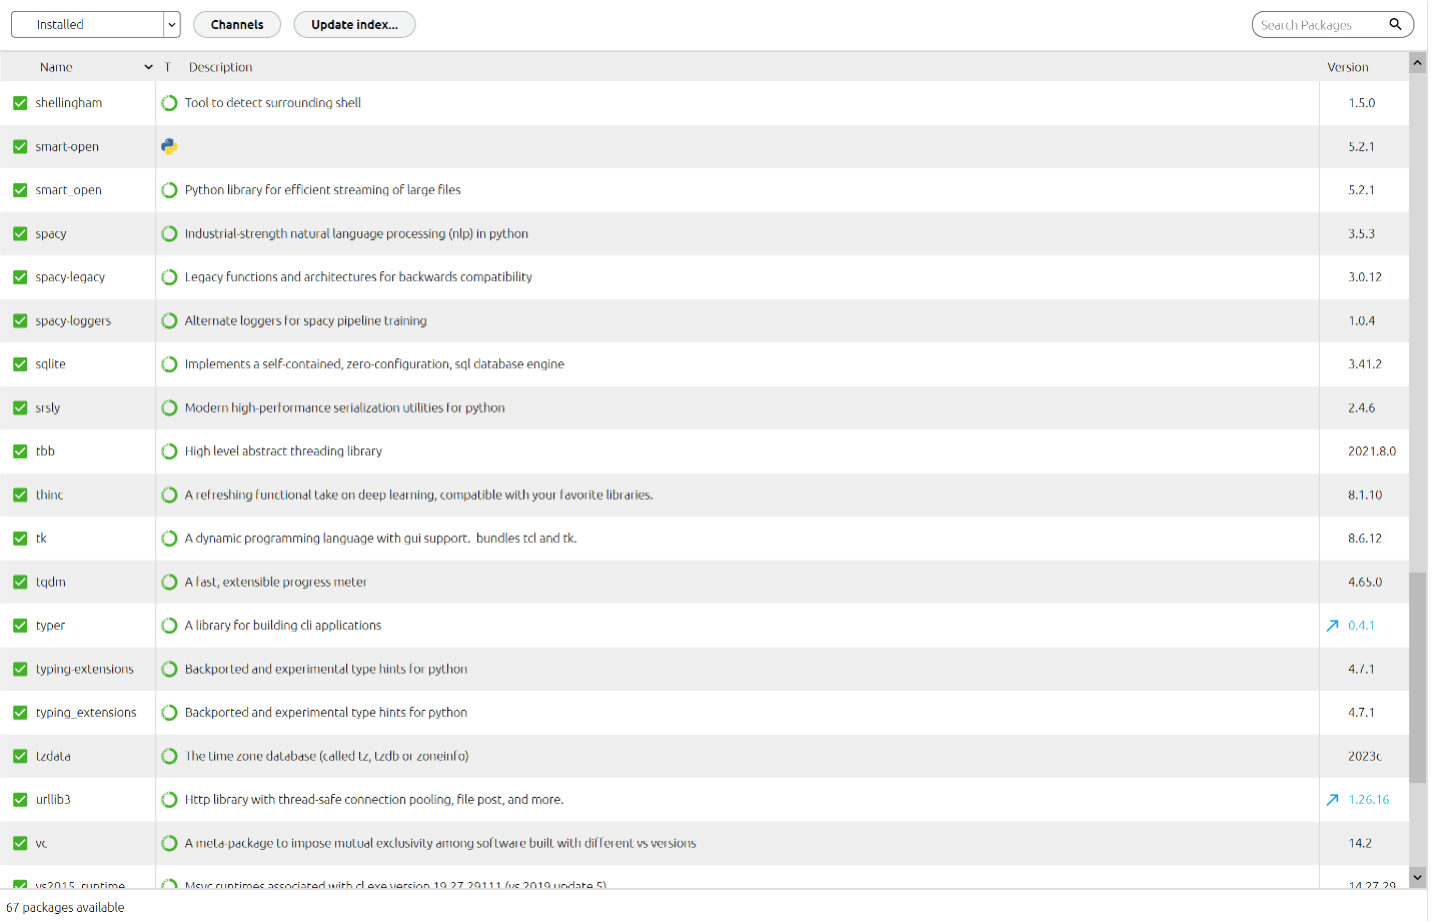
My new environment only has the most basic packages installed. Anaconda Navigator displays the name, description, and version for each package, and the drop-down menu at the top is set to "Installed" by default, so Anaconda only displays the packages I currently have in my environment. Still, there are a few other options I can select in the drop-down menu:
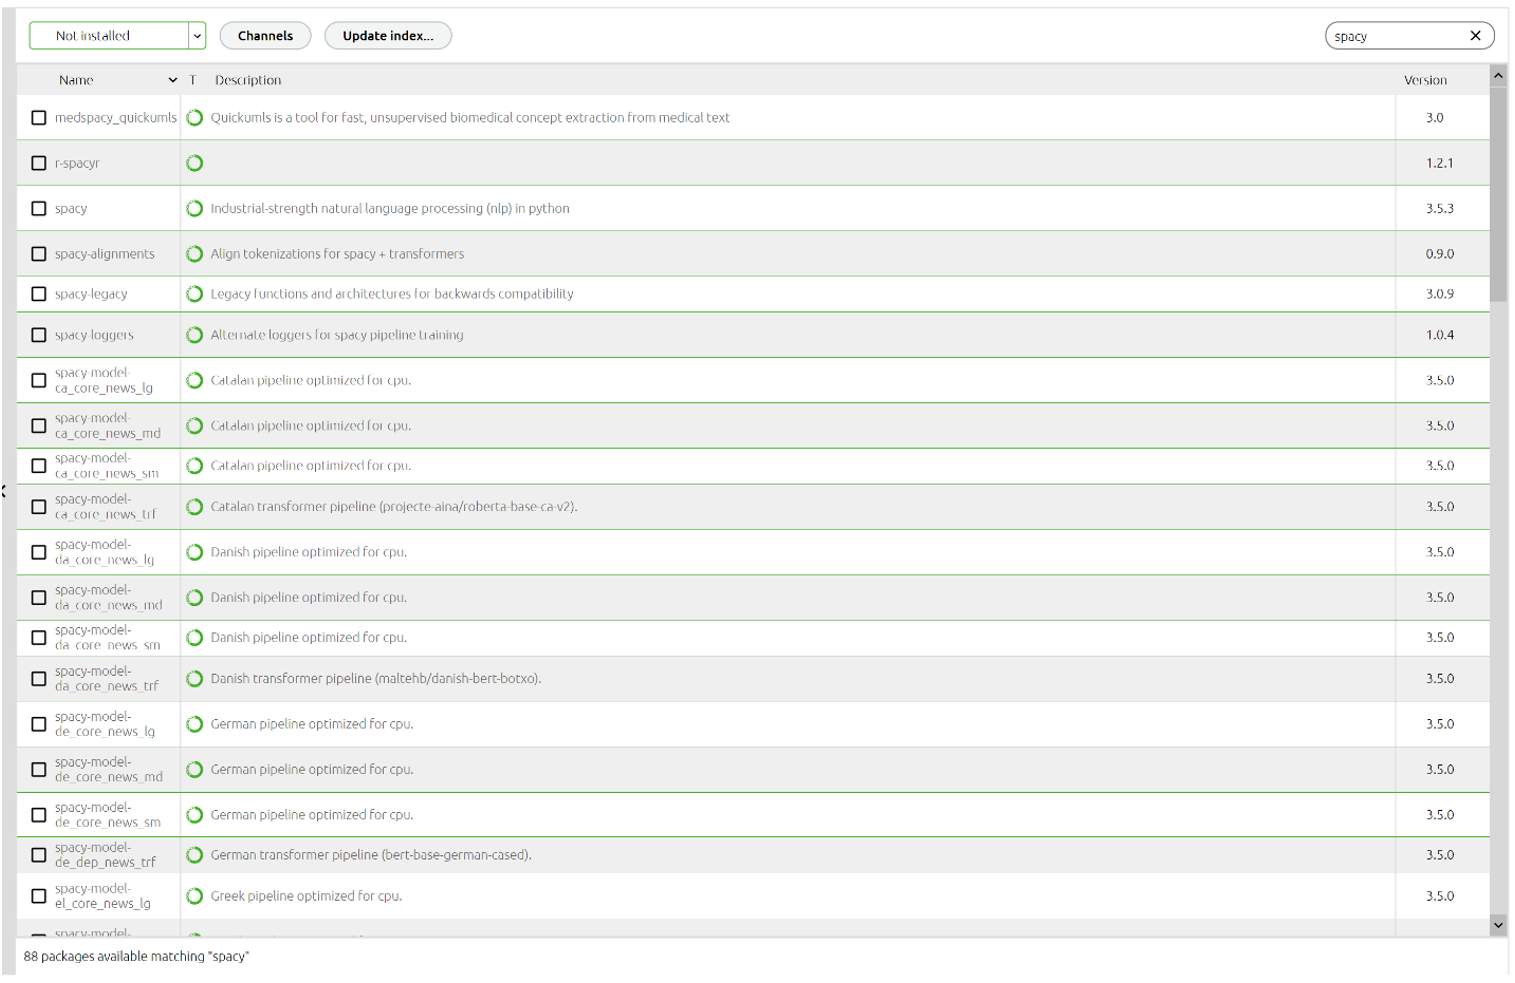
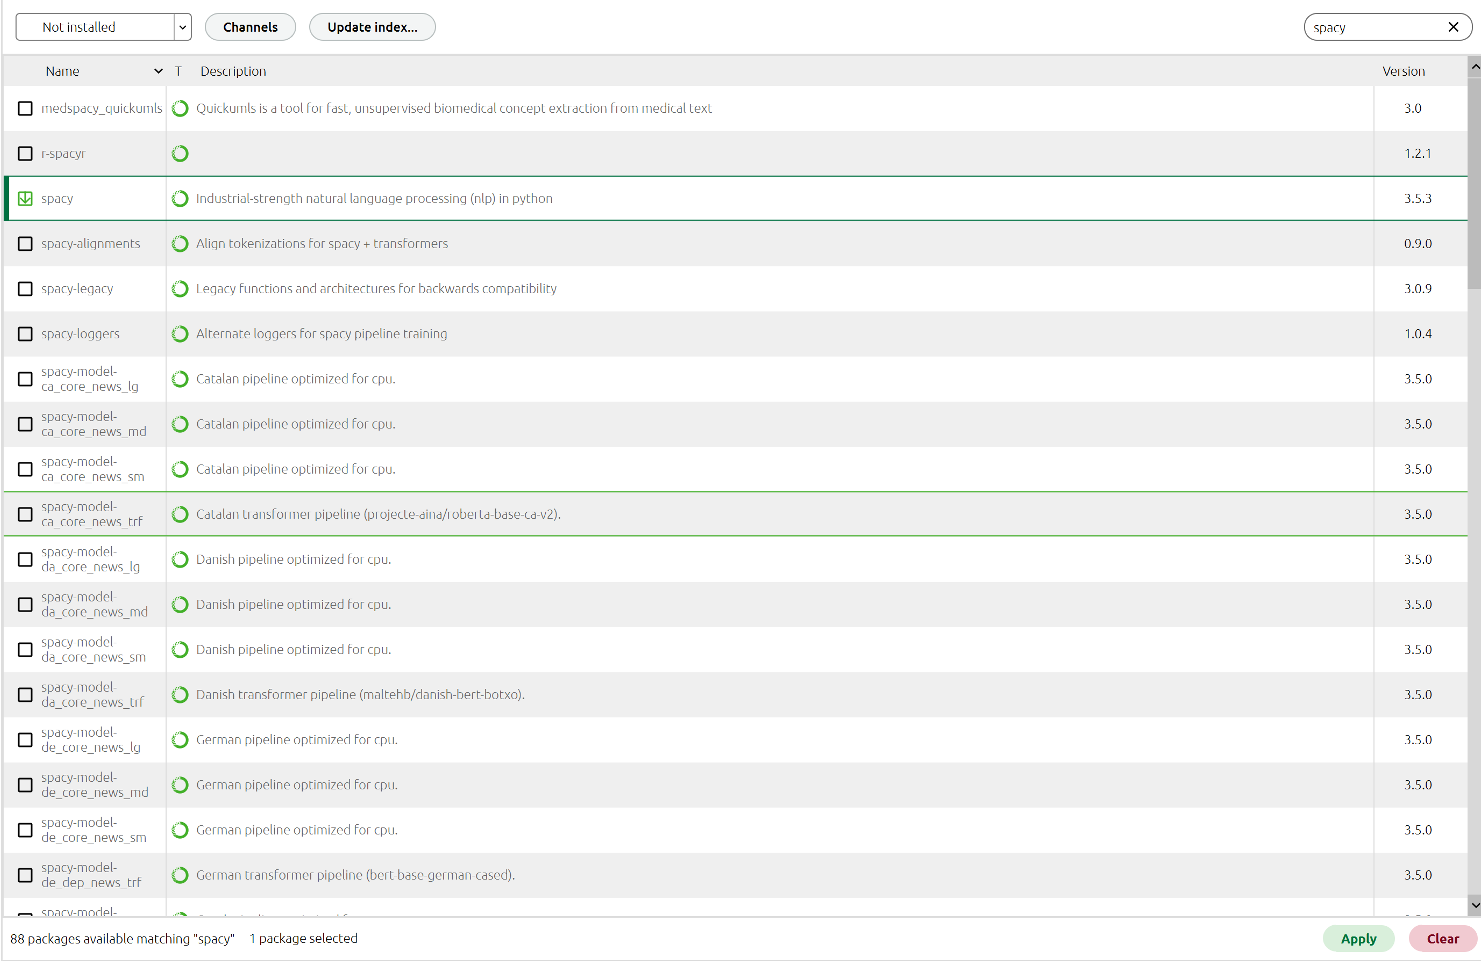
This drop-down menu, combined with the "Search Packages" box in the top right corner, allows us to manage packages easily. For example, let's say that I am working on a natural language processing project for which I need the SpaCy library. I already know SpaCy is not installed because it doesn't appear among my installed packages. To find SpaCy and install it, I will select "Not installed" in the drop-down menu and type out the name of the package in the search box:
By doing so, I will get a list of all packages that match the search criteria:
As you can see, 88 packages contain "spacy" in them. Let's say that I want the base SpaCy package. I am going to tick the box next to the package, and click on "Apply."
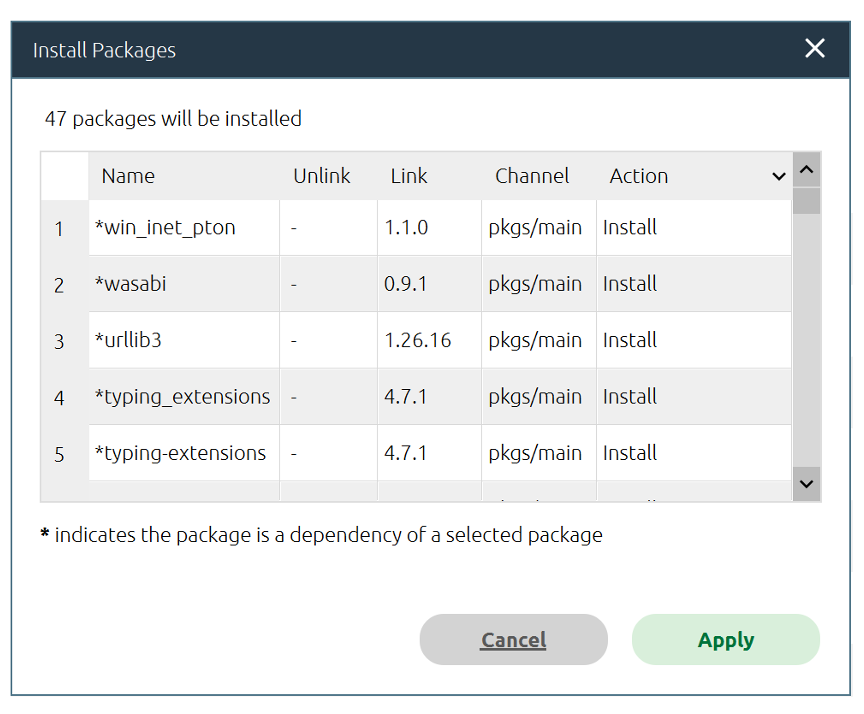
By doing so, the following window will pop up:
At this point you might be wondering: “If you selected that you want to install SpaCy, why does it say it’s going to install 47 packages?” Well, SpaCy is a very advanced package, so you have to install many prerequisite packages for SpaCy to work. Not only that, but you also have to install the correct versions of the packages for SpaCy to work. Aside from the fact that doing so manually would be very tiresome, it would also mean that you can easily make a mistake somewhere along the line.
Fortunately, Anaconda Navigator handles all of this for you: just select the package you need, and it will automatically install everything required for that package to work correctly. Finally, click “Apply” again to finish adding the SpaCy package to the virtual environment. After doing so, when I move the drop-down menu back to "Installed," I’ll find SpaCy among the installed packages.
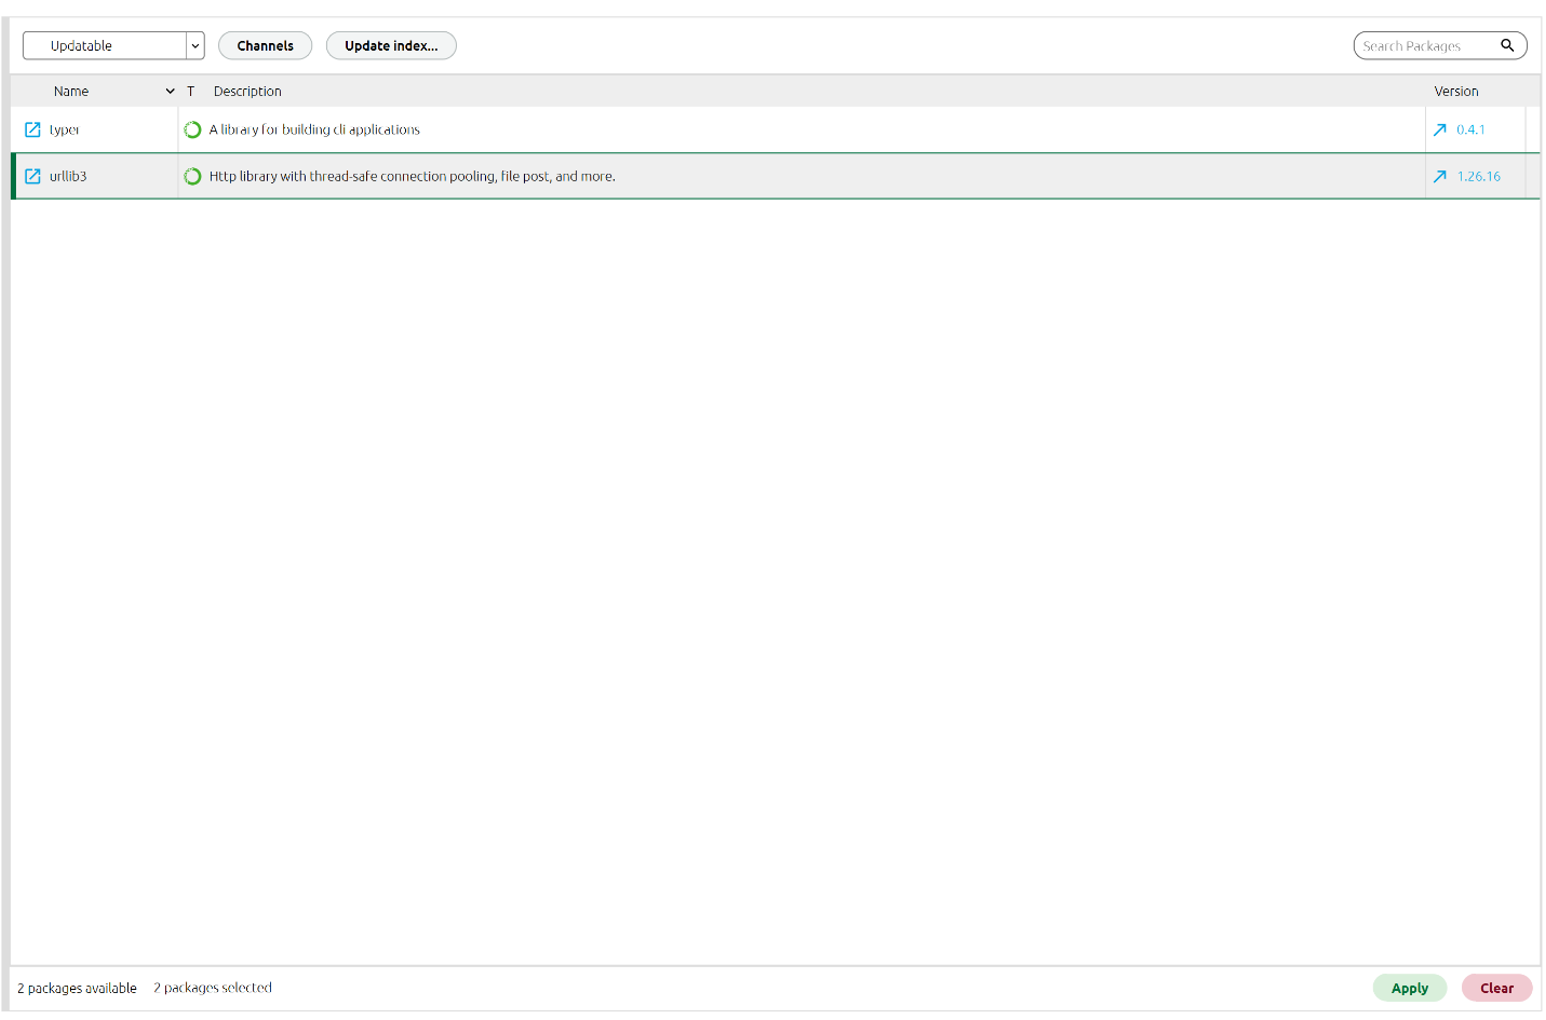
Aside from the "Installed" and "Not installed" options in the drop-down menu, there is one other important option: "Updatable." If you select this, you’ll see if any packages can be updated—this way, you can easily ensure that your packages are up to date. In my case, there are two packages that I can update:
As you can see, newer versions of these two packages are available. If I want to update them, I can simply click on them and select ”Apply.”
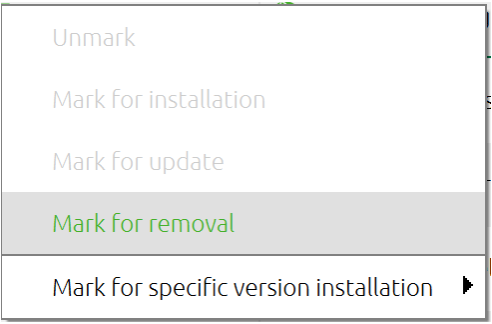
To be fair, if you don't want to bother updating packages, you don't need to do it at all. Because Anaconda Navigator always installs all the correct versions of prerequisite packages when installing a new package, it will also update older ones. So, technically speaking, you don't need to do it yourself. However, as you get more practice, you will see that managing package versions is not that hard. If you want to remove an installed package, click on it and select "Mark for removal" in the drop-down menu.
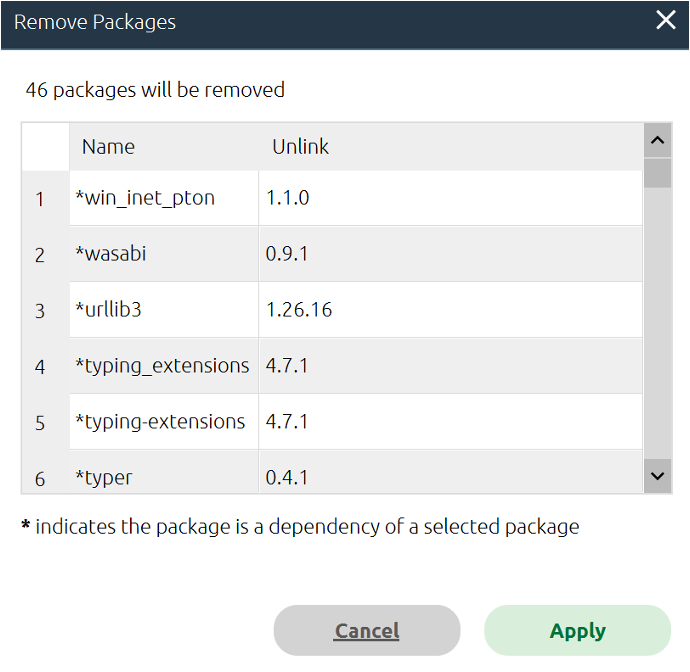
After marking a package for removal, click "Apply" again in the bottom right corner, and Anaconda will remove that package and its prerequisite packages. For example, if I select that I want to remove SpaCy and select “Apply,” this screen will pop up:
If I click on "Apply" here, it will remove SpaCy from this environment.
How to Clone Virtual Environments
Cloning an environment is the process of creating an exact copy of an existing environment. For example, let's make a copy of our example_env environment. Since it is already selected, I don't need to do it myself. I just click on “Clone,” and that is it.
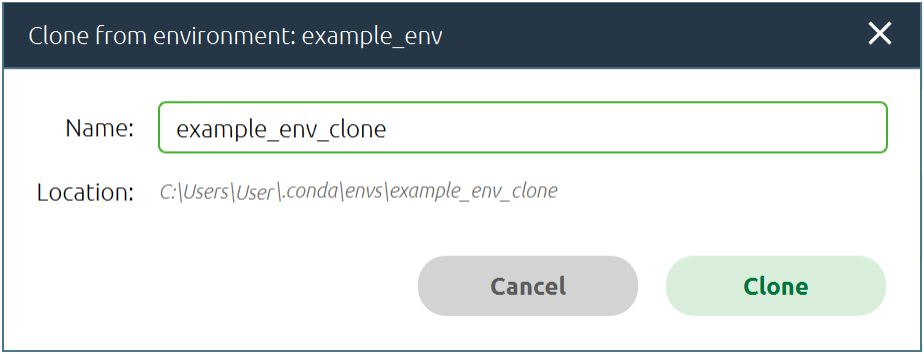
When you click on “Clone,” a window similar to the one you saw when creating the environment will pop, except this time, you only need to define a name for your environment. Let's name it example_env_clone.
Cloning serves several practical purposes but is used mainly for experimentation. Sometimes, you might want to try adding stuff to an environment you are using, but doing that can be risky. In that case, you can simply create a copy of your environment and try out stuff there. You could also use cloning to create a backup, but since there is already a backup function included in Anaconda Navigator, it is a better idea just to use that.
How to Back Up and Import a Virtual Environment
Backing up your Anaconda Navigator environment safeguards your projects, preserving the current setup for easy duplication later. Backups are beneficial for several purposes.
Firstly, they are invaluable for collaborative work: a saved environment ensures that all team members can execute the same code with identical outcomes, fostering consistency across the project.
Secondly, it offers a straightforward way to manage versions of your environment. You can effortlessly revert if issues arise with the new configuration by archiving your current setup before making changes. Restoring an environment that worked previously is often quicker and more efficient than finding and fixing problems.
Lastly, backups simplify transitioning your work to a different computer. By restoring the saved environment, you can maintain productivity levels, avoiding the time-consuming task of manually reconfiguring settings and installations.
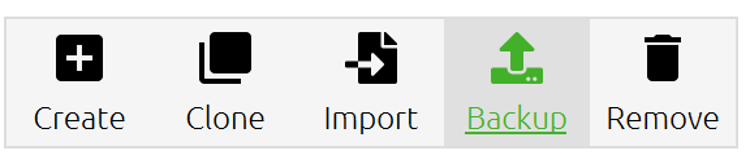
To create an environment backup in Anaconda Navigator, click the backup button.
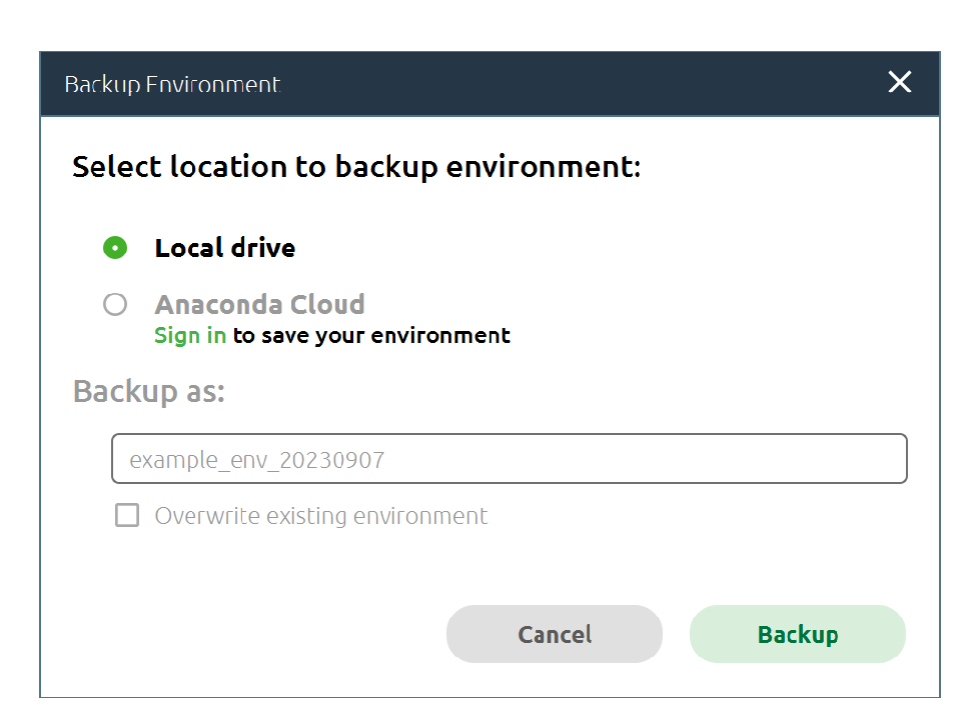
A window that looks like this will pop up:
If you’re logged in, you can save the backup to the cloud, but in most cases, it’s more convenient to save it locally to your computer. When you click "Backup," it will ask where on your computer you want to save your backup and how you want to name it. The backup that Anaconda Navigator will create will be in the form of a YAML file.
"YAML Ain't Markup Language" (YAML) files are human-readable data serialization files. They are used for configuration files, data storage, and data exchange between languages with different data structures. The format uses indentation and simple punctuation marks to delineate data and structure, making it easy to read and write. If you want to take a look at the YAML file, just find it on your computer and open it with a text editor, for example, Notepad. YAML files are important because they contain a list of everything you have installed in an environment, which makes it very easy for Anaconda to replicate that environment.
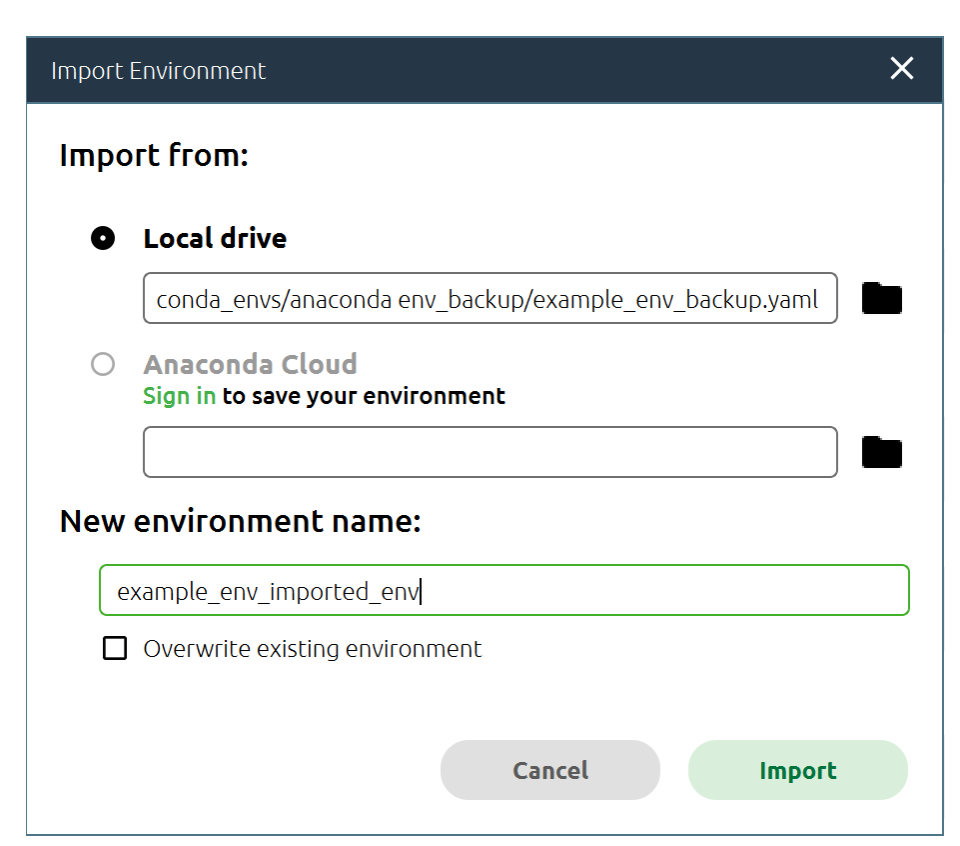
To create an environment from a YAML file, you just need to click on "Import" in Anaconda Navigator:
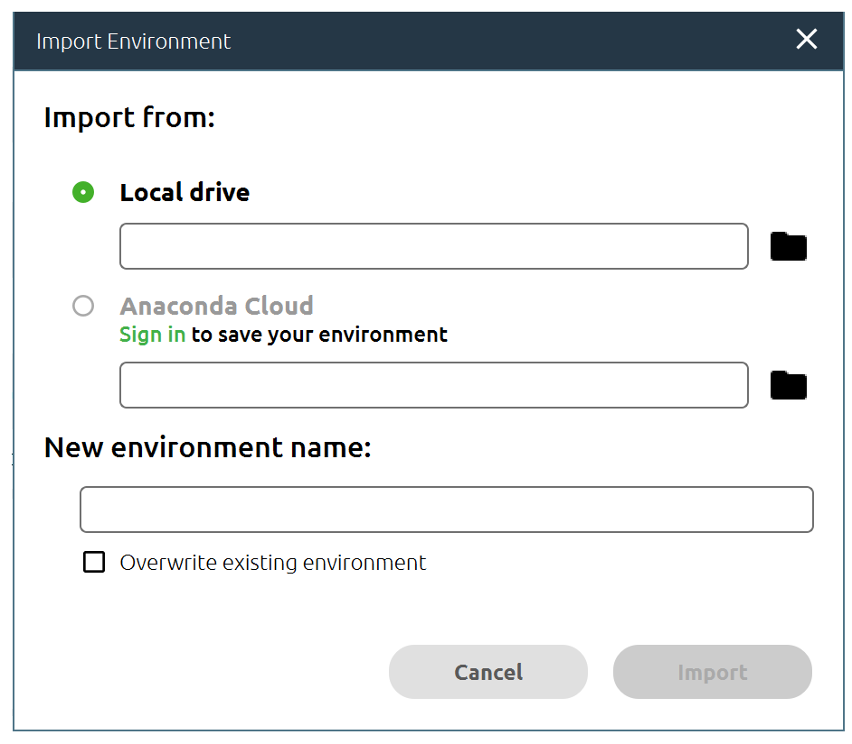
When you click on this button, the following window will appear:
Here, you need to define two things:
- The path to the YAML file containing information about the exported environment.
- A name for the new environment.
Let's do this right now.
Finally, I just need to click "Import," and I will get an exact copy of the environment I backed up.
How to Remove a Virtual Environment
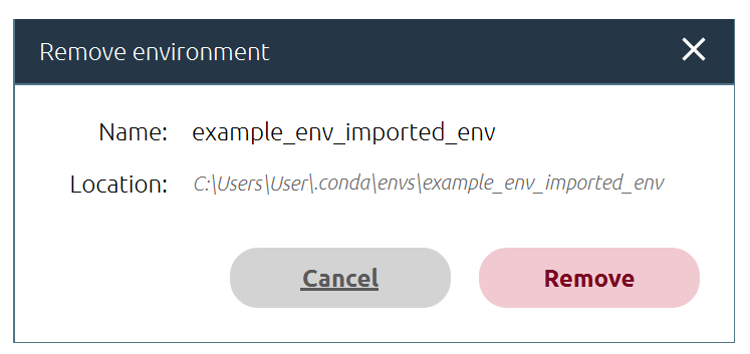
Removing environments is probably the simplest thing to do on Anaconda Navigator: just click on the environment and then click “Remove.”
When you do so, a window that looks like this will pop up:
Here, you just click "Remove," and the environment is removed.
In this article, I covered everything you need to know as a beginner about virtual environments, packages, and libraries, and even how you manage virtual environments with Anaconda Navigator. Now, you’re ready to create an environment in Anaconda Navigator and add, remove, and update packages in that environment. You’ll also be able to clone environments to access them later or remove environments when you don't need them. With this, you should be completely prepared to manage environments with Anaconda Navigator.

