


Table of Contents
Experienced programmers often prefer working with a command line interface over a graphical user interface (GUI). While working with the command line is much faster once you know what you are doing, I would argue that using a GUI is a better idea for beginners. Because a GUI can be more intuitive and has a smoother learning path, there is less room for error, and you can start learning programming as fast as possible. In this article, I’ll explain all the useful features available in the Anaconda Navigator.
- Intro to Programming: How to Use the Command Line (Part 1)
- Intro to Programming: How to Use the Command Line (Part 2)
What Is Anaconda Navigator?
Anaconda Navigator is a graphical interface that makes it very easy to manage Python environments and launch Python applications. Using it, you can create, delete, import, and export virtual environments, install/uninstall and update packages and much more. You can even run applications directly from Anaconda Navigator using just your mouse, no commands needed.
If you installed the Anaconda Python distribution, you already should have Anaconda Navigator on your computer. If you are interested to learn how to install Python with Anaconda, take a look at the previous article in this series.
Article continues below
Want to learn more? Check out some of our courses:
How Do You Use Anaconda Navigator?
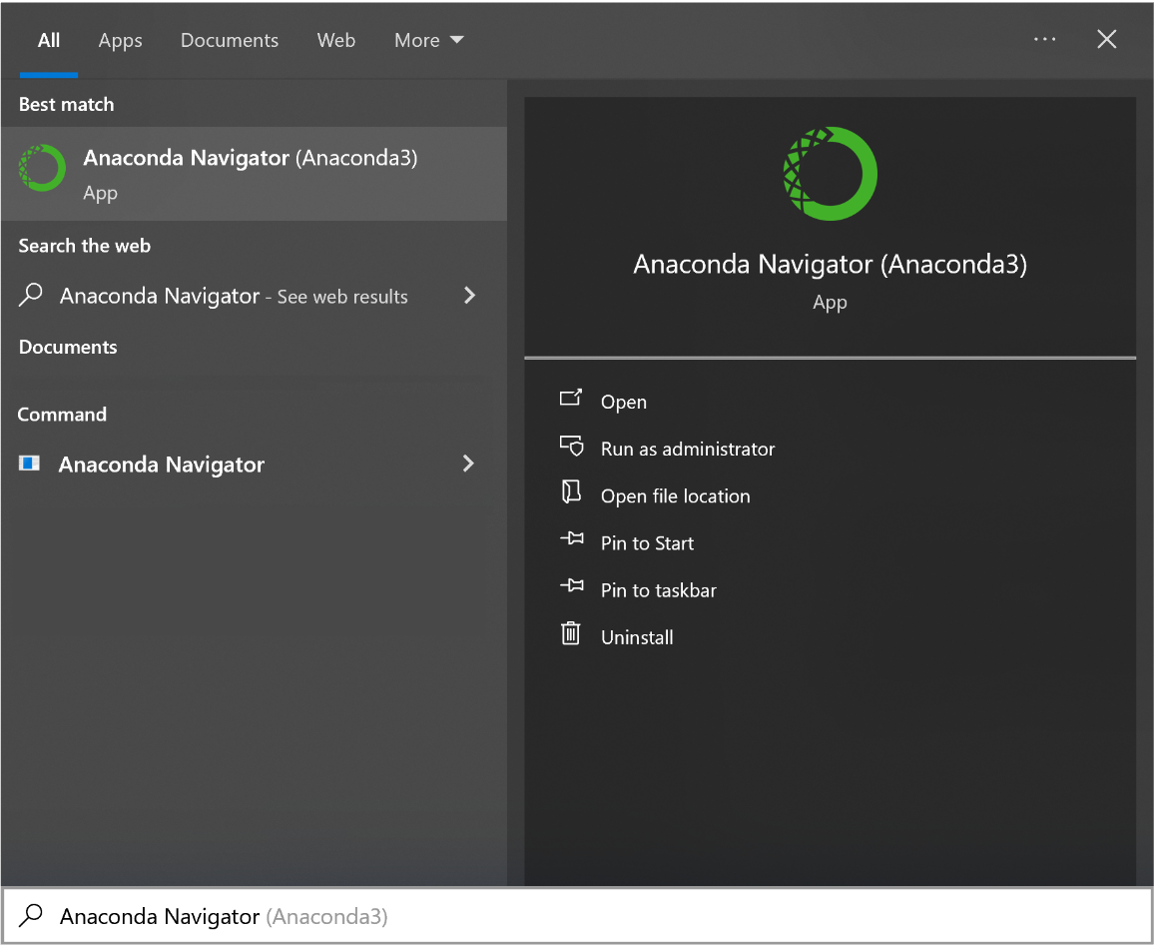
To start Anaconda Navigator, just find it on your computer and run it. If you are not sure where it is, you can always search for it by typing "Anaconda Navigator" in the search bar.
Searching for Anaconda Navigator in the search Bar.
Image source: Edlitera
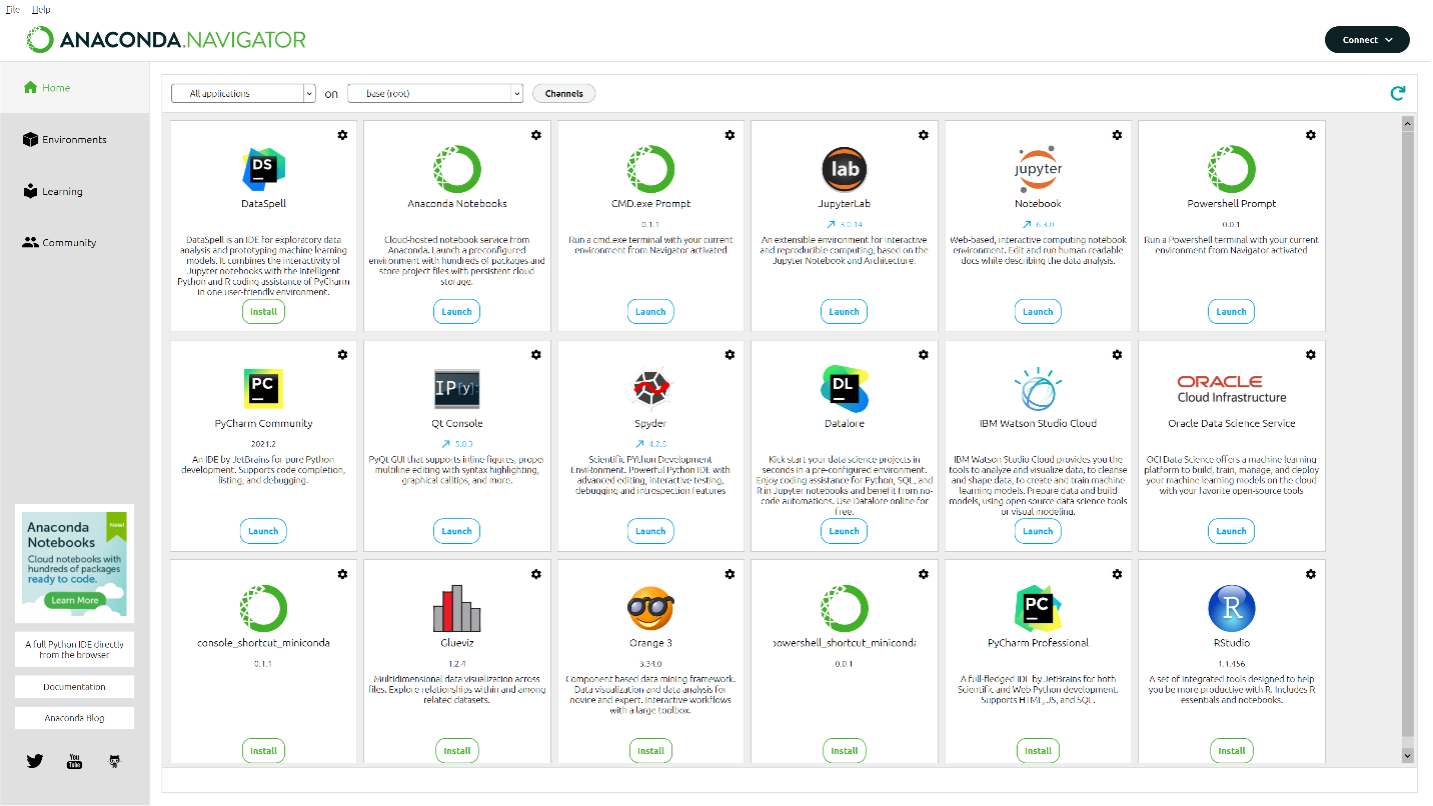
Once the program opens, it will greet you with a screen that looks like this:
The opening screen of Anaconda Navigator.
Image source: Edlitera
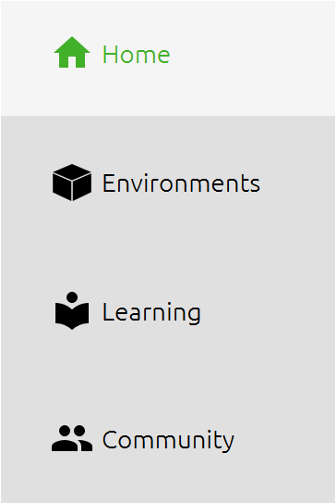
As you can see, the GUI is simple. If you look at the left side of it, you will notice that there are only four main tabs:
The four main tabs of the Anaconda Interface.
Image source: Edlitera
Let's now explain what these tabs are for.
How to Manage Applications Using the Anaconda Navigator Home Tab
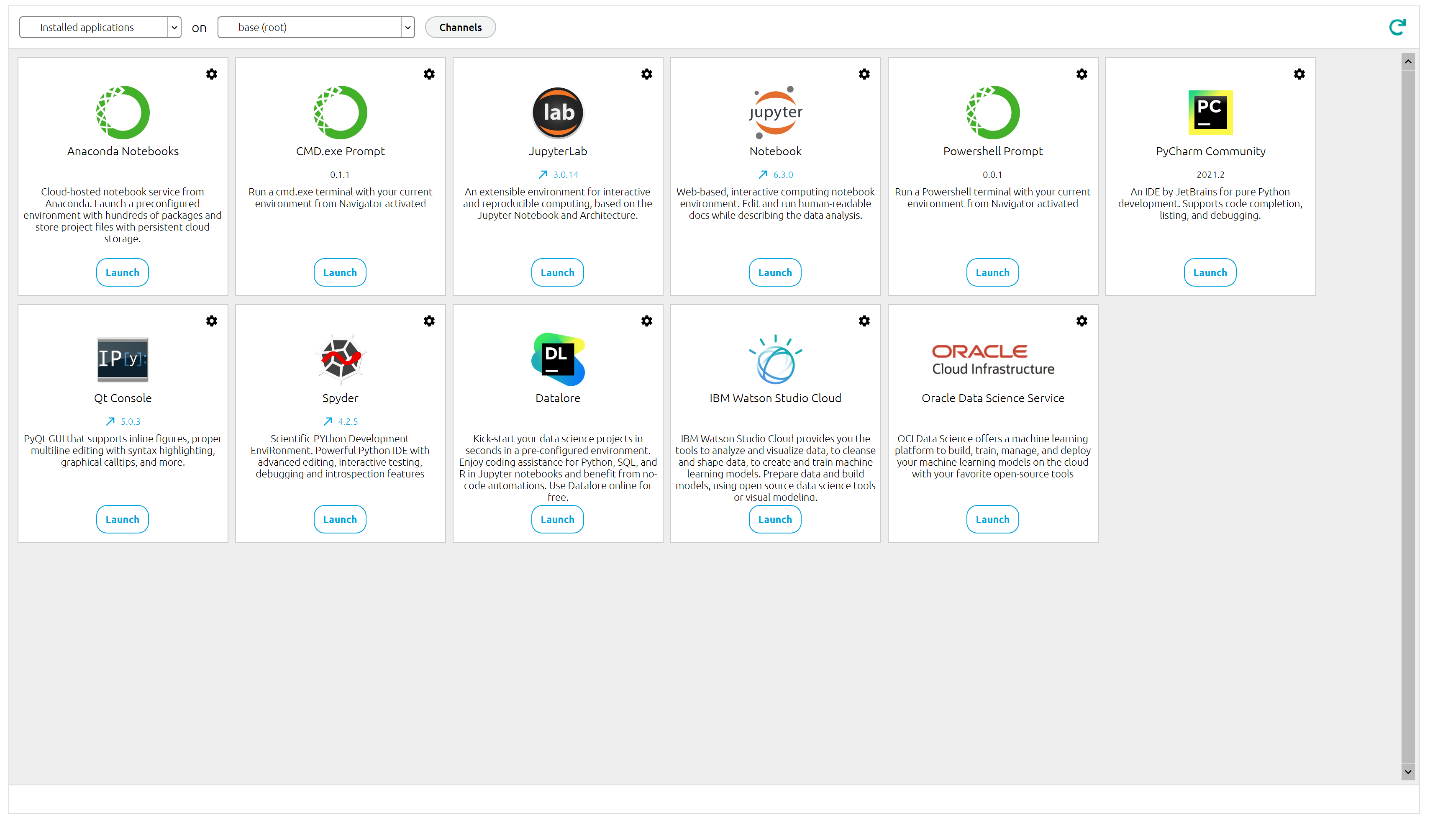
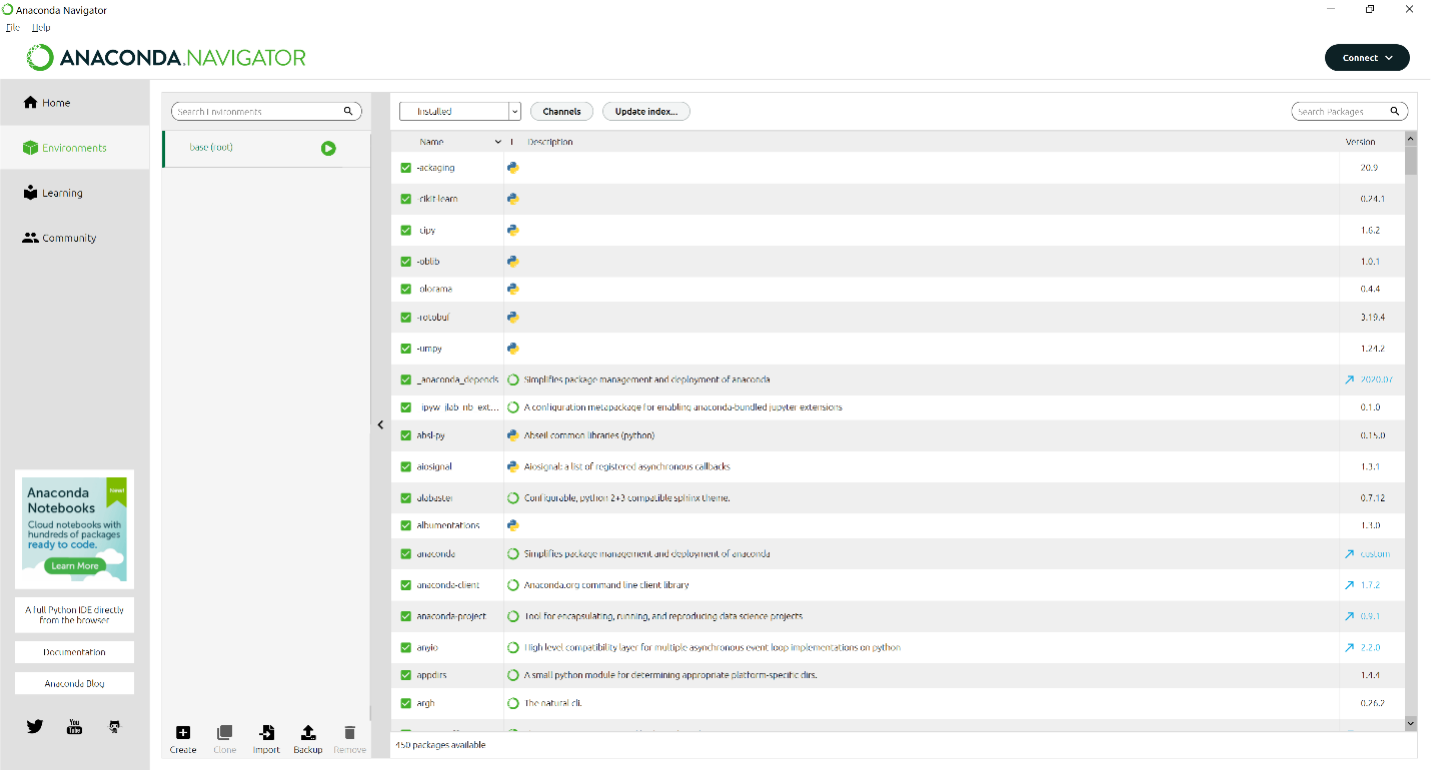
The Home tab serves as the dashboard for Anaconda Navigator. It opens automatically when you run Anaconda Navigator and lets you view, launch, and manage different applications bundled with your Anaconda distribution. A crucial part of this tab is the drop-down menu at the top. It allows you to track which applications you have already installed in your selected environment, and which other applications are available for installation. The Home tab also allows you to easily update installed applications.
One very important thing to remember is that each environment has its own list of installed applications (e.g. Jupyter). For example, in the screenshot below, you can see that I'm on the base (root) environment, where I already have a few applications installed: Anaconda Notebooks, CMD.exe Prompt, JupyterLab, JupyterNotebook, etc.
The Anaconda Navigator Home tab.
Image source: Edlitera
As you can see in the image above, I'm showing the applications in the default environment of Anaconda, which is called base (root). This environment is automatically created when you install Anaconda. On my computer, I have many other environments, however. I could also pick one of the other environments to look at the applications I have installed in each one of them. If you are unfamiliar with Python environments, don't worry, I will talk about them later in this article.
To launch any of the installed applications, I just click on the Launch button, and Anaconda Navigator launches it automatically. For example, data scientists use Jupyter Notebooks and Jupyter Lab a great deal, so using Anaconda Navigator you can start these applications by clicking on Launch, and you don't have to worry about anything else.
How to Manage Python Environments Using the Anaconda Navigator Environments Tab
Managing environments is complicated because it involves installing packages, uninstalling packages, updating packages, ensuring that you have compatible packages installed, ensuring that you have the correct version, and much more. Because of this, managing environments is usually difficult for beginners.
Managing environments merits an article of its own, but for now, let's use a simple analogy. Toolboxes include tools which can tackle specific tasks. For specialized jobs, you'll need specific tools designed for those challenges. In other words, you may need to access tools located in different toolboxes.
When you install Python, it sets up a default environment complete with a variety of packages that address a range of general tasks. This is your default toolbox. However, as you get more advanced, you may need to install specialized packages crafted for specific issues (e.g. you may need packages for deep learning or data science).
Many programmers tackle diverse problems, so continually adding packages to a single environment isn't wise. Just as you wouldn't clutter a toolbox with every conceivable tool, it's better to maintain multiple Python environments, each tailored for a specific task. Unlike a physical toolbox, where adding one tool doesn't affect the functionality of another, in Python, adding certain packages can lead to compatibility issues. Some packages might conflict with others or only work with specific versions of other packages. So clearly, maintaining separate environments is much better than keeping everything in one place.
You can manage environments using just a few clicks with Anaconda Navigator. When you enter the Environments tab, you will be greeted with a screen that looks like this:
The Anaconda Navigator Environments tab.
Image source: Edlitera
On the left side, you have your list of available environments. In this case, I don't have any extra environments installed, so only the default environment is there, but if I had created multiple environments, this is where I could access them. The five buttons at the bottom make environment management very easy. You can:
- Create a new environment
- Clone an existing enviroment
- Import an environment
- Back up an environment
- Remove an environment
Even though these are all basic operations, they are all you need to manage environments and share your environments with others.
For example, if you are working on a Python project in a custom environment, you can create a backup (a copy of that environment) and send it to somebody who wants to start working on it. That individual can then import the environment file you sent them and immediately access the environment you created. This means they can start working on the project immediately and don't need to spend time setting up an environment on their own. And because environment can be exported to (and imported from) yml files, this makes them very portable.
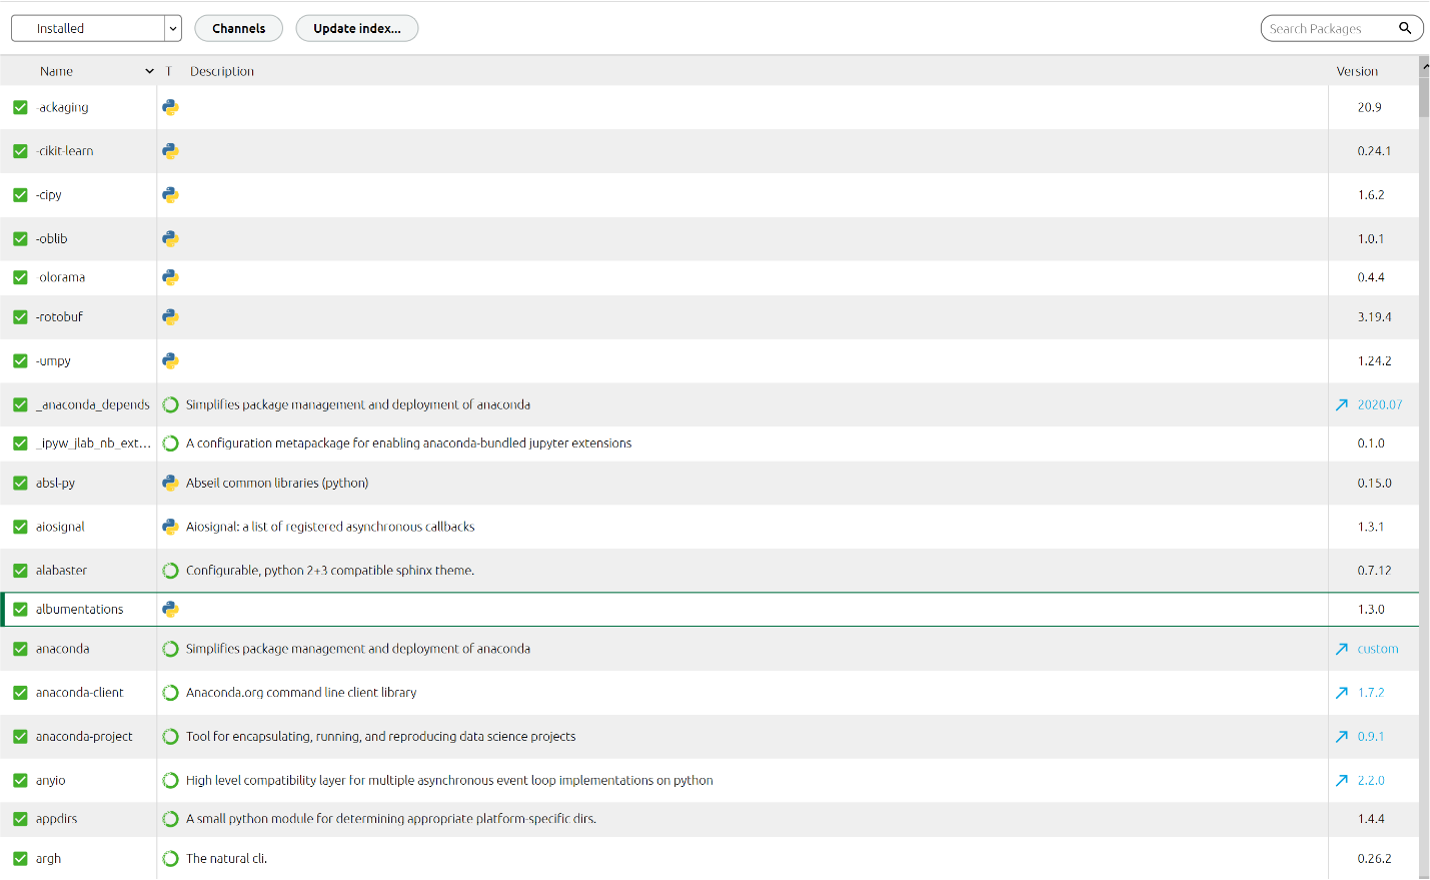
You can add and remove packages from an environment with just a few clicks. Once again, there is a drop-down menu that displays packages installed in an environment by default.
The drop-down menu displaying installed packages in an environment.
Image source: Edlitera
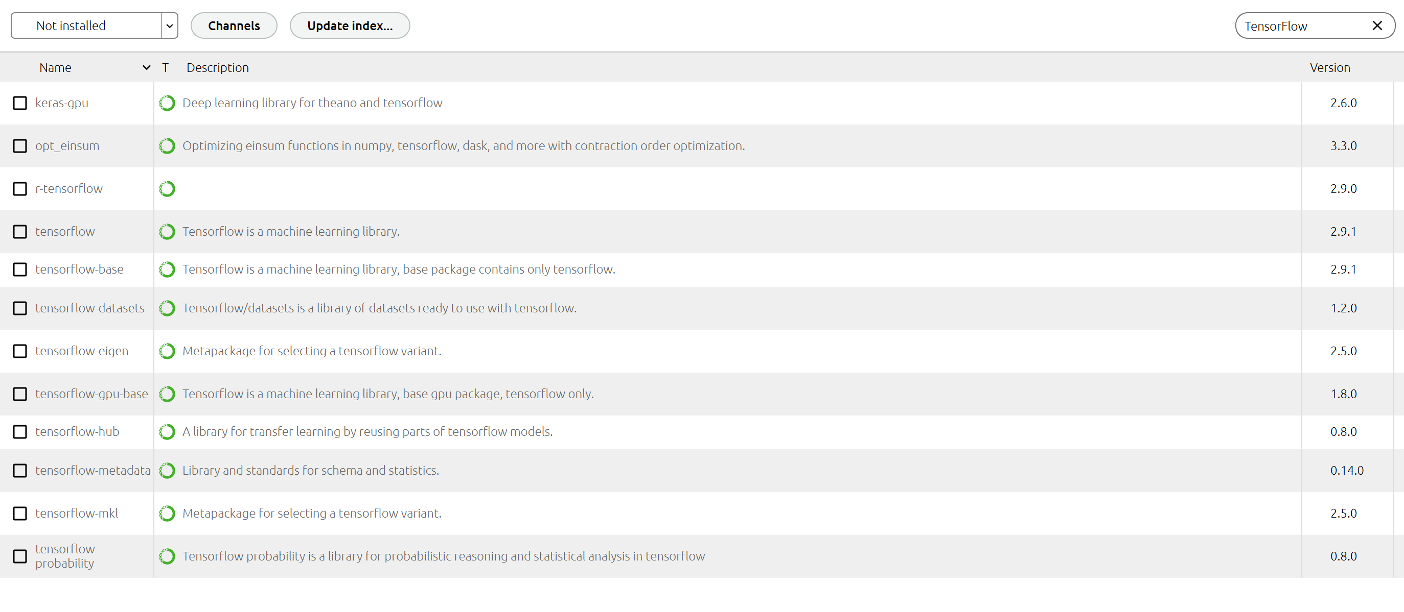
In this part of the drop-down menu, you’ll see the name of the package, a short description, and which version of the package is installed in the currently selected environment. If you want to see what packages are available for installation, you can simply change the drop-down from Installed to Not installed. Of course, because there are so many packages, it is generally a good idea to search for the package by its name, instead of just scrolling endlessly. For example, let's search for TensorFlow.
Searching for packages in the Anaconda Navigator
Image source: Edlitera
As you see, I get a list of possible packages with that name. Now, one problem is that packages usually depend on other packages. For instance, to install TensorFlow 2.9, a famous package for creating AI models, I need to have other packages installed. Not only that, I also need to have the suitable versions of those packages installed if I want TensorFlow to work properly.
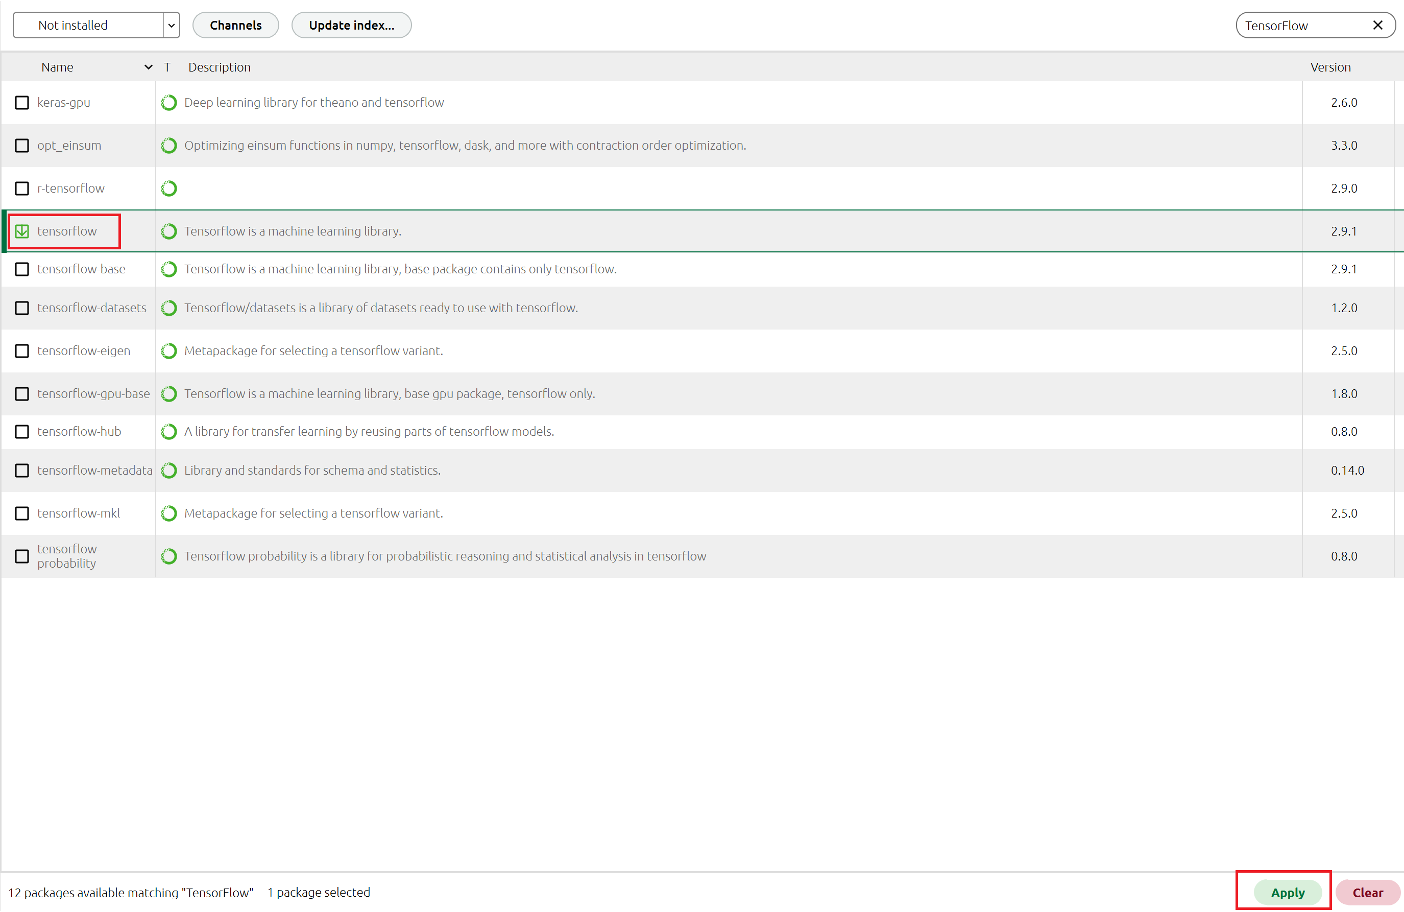
Luckily, when using Anaconda Navigator, you don't need to worry about any of that. Just select the package and click Apply in the bottom right corner.
Installing packages with Anaconda Navigator.
Image source: Edlitera
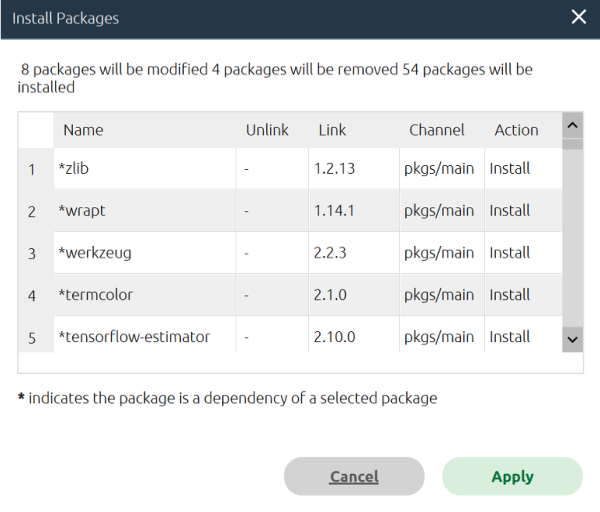
When you do that, Anaconda Navigator will install the package and ensure all the prerequisite packages are installed.
Package prerequisites for TensorFlow.
Image source: Edlitera
In this case, for TensorFlow to work properly in my environment, I would have to modify eight packages, remove four packages that are not necessary, and install 54 new packages. That's quite a lot of work. Using Anaconda Navigator, you can just click a single button, and all of that is handled for you.
How to Access Educational Content in Anaconda Navigator
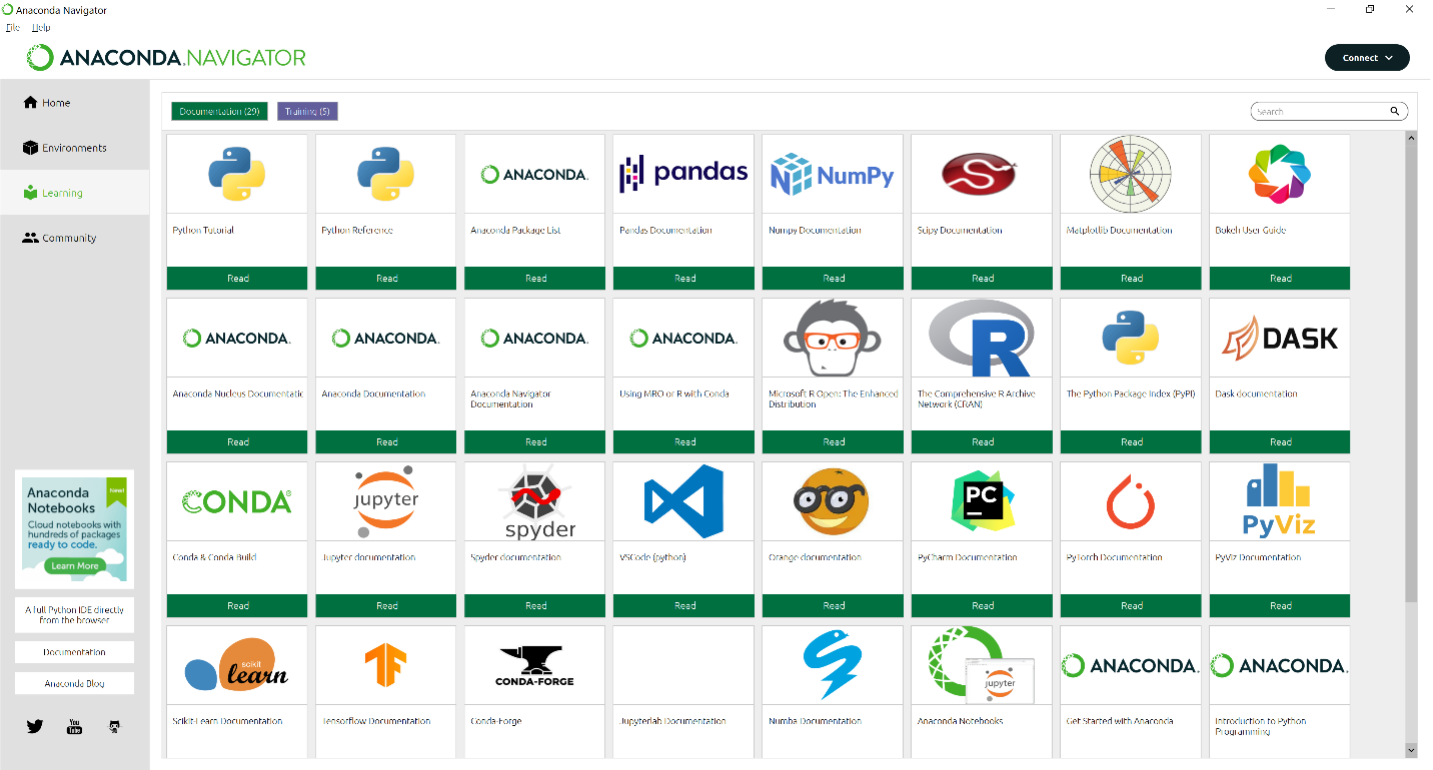
The Learning tab is Anaconda's hub for educational resources. Here, you will find links to tutorials ranging from beginner to advanced levels, documentation for the different tools that Anaconda offers, resourcesfor data visualization, machine learning, and much more.
The Anaconda Navigator Learning tab.
Image source: Edlitera
The Learning tab is a fantastic place for beginners because it can kick start their journey. Alternatively, they can also sign up to access over 200 hrs of educational content, solved problems and practice exercises in programming, data science and machine learning right here, on Edlitera.
- Intro to Pandas: What Is a Pandas DataFrame and How to Create One?
- Intro to Pandas: How to Analyze Pandas DataFrames
What Is the Community Tab In Anaconda Navigator?
The Community tab contains links to forums where users can ask questions, share projects, and engage in technical discussions. It also includes information on upcoming data science events, conferences, and webinars that Anaconda or its partners are hosting. Finally, it also keeps you updated with what's new in the Anaconda world, be it software updates, new partnerships, or other announcements.
The Anaconda Navigator Community tab.
Image source: Edlitera
With its user-friendly GUI, Anaconda Navigator acts as a bridge between advanced users and beginners, allowing both to get the most out of the Anaconda ecosystem. Whether you're managing environments, launching tools, upskilling through learning resources or networking with the community, Anaconda Navigator simplifies and streamlines the process.

![[Future of Work Ep. 2 P3] Future of Learning and Development with Dan Mackey: Learning Data](https://res.cloudinary.com/edlitera/image/upload/ar_16:9,c_fill,f_auto,q_auto,w_100/z4omald0x6c7isoqhgf2w7skd3x0?_a=BACJ3SGT)