


Table of Contents
Jupyter Notebook has become a pretty standard tool in the world of data science and machine learning. While it does have its problems, there is probably no better way of sharing important information with others, and demonstrating results of data analysis with graphs and similar tools, than with Jupyter Notebook.
However, while using Jupyter Notebook is very convenient for sharing information between those that are involved in data science in one way or another, there is still the problem of sharing the contents of a Jupyter Notebook with somebody who doesn't know how to program. Each data scientist will, sooner or later, need to present their findings to people who are not necessarily tech-savvy, and, in that case, Jupyter Notebook might not be the best tool for that job.
The recent pandemic didn't help with the technology-knowledge gap. While more people have started working from home, which is also a trend that was adopted by many colleges and other institutions, teaching others has become a completely new experience with no contact policies and everyone is feeling the strain. While it makes sense to demonstrate code using a Jupyter Notebook, going over the theoretical background behind data science and programming concepts is not very practical without using visualizations.
One way to deal with this issue is to create a presentation and switch between a presentation and a Jupyter Notebook to combine theory with demonstrations of practical applications, but that is often way too clunky and impractical. Your best bet is to find something that combines the aesthetics of presentational tools, such as Microsoft PowerPoint or Apple Keynote, with the best of Jupyter Notebook. That something is RISE.
What is RISE?
RISE is a Jupyter Notebook extension that allows you to easily create reveal.js-based presentations from Jupyter Notebook. RISE is a relatively powerful tool with a lot of in-built functionality, which is also simple enough to be used by beginners. That being said, more advanced users familiar with HTML and CSS will get the most out of it, but 90 % of its functionality can be accessed by total beginners.
There are many things even beginners can customize:
- Presentation theme and slide customization
- Transitions between slides
- Slide sizes
- Slide decoration (header, footer, background)
- Scrollbar
- Automatic selection of cells
- Using custom CSS
- Presentation flow
- Auto-launch presentation mode
- Where to start the presentation
- Using a leap motion controller
- Keyboard shortcuts
- Chalkboard capabilities
Aside from dabbling with HTML and CSS, most of the aforementioned can be used by interacting with a very simple and intuitive interface.
Article continues below
Want to learn more? Check out some of our courses:
What Are the Basic Capabilities of RISE
To use RISE, you need to first install it. It is available on PyPI, but it can also be installed using Anaconda.
- How to Install Anaconda: Intro to Programming: How to Get Your Computer Ready to Run Python
Depending on what you prefer, you need to run one of the following two to install RISE:
- pip install RISE
- conda install-c conda-forge rise
Once RISE is installed, you can find it next to the command palette button in a Jupyter notebook:

Before you start the slideshow using this button, you'll need to define your slides.
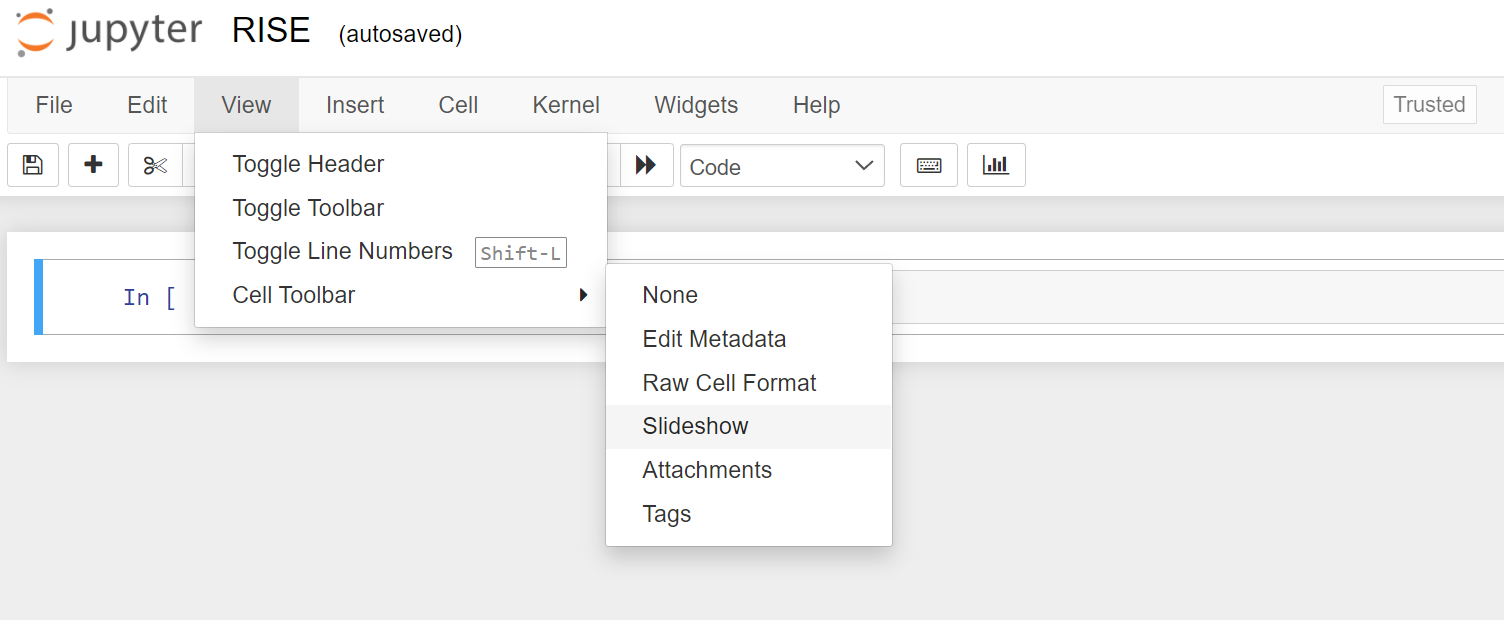
To do that, you need to enter the View tab of your Jupyter notebook and access the now available option Slideshow that exists with the Cell Toolbar section:
Image Source: Jupyter RISE, https://rise.readthedocs.io/en/stable/index.html
This will automatically convert the original look of the notebook into one that looks like this:
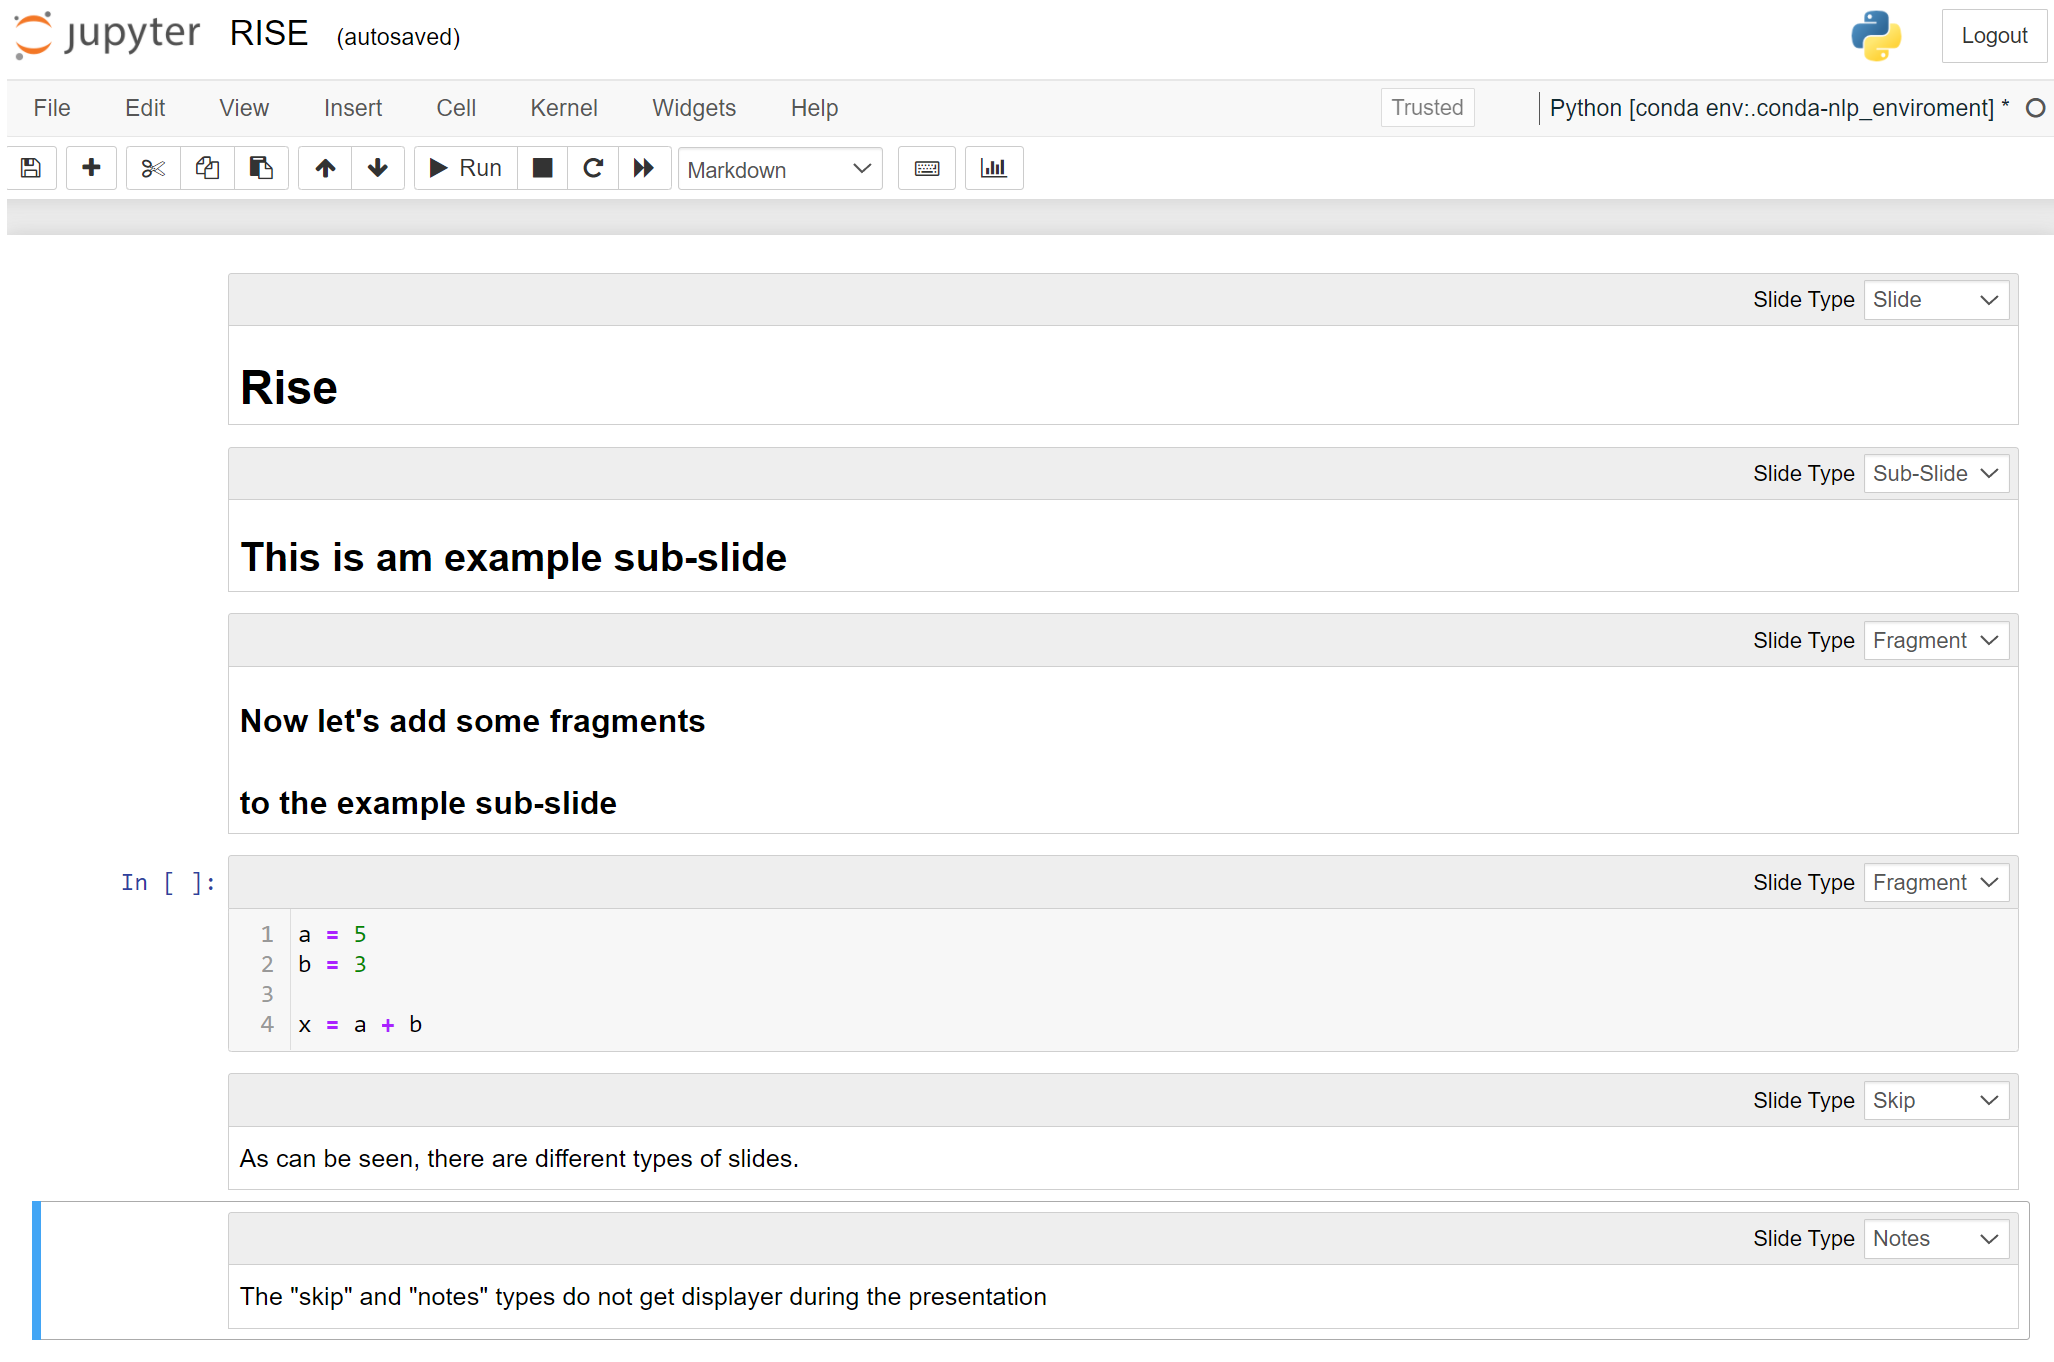
As shown above, a special indicator for Slide Type has been added to each markdown and code cell. These different types of slides are:
- Slide - the basic type of slide
- Sub-slide - subsegment of the "Slide" type
- Fragment - information that appears on the same slide as the "Slide" or "Sub-slide" type
- Skip - this cell gets skipped during the presentation
- Notes - special, will mention in-detail later
Few things to note here:
- If you do know how to work with HTML and CSS, you can customize the content more easily than those that don't. However, even the default version looks pretty good.
- The Sub-slide type of slides is relatively redundant in my opinion and they work very similar to slides. For a simple presentation, you can just avoid the Sub-slide type and use only the Slide type and the Fragment type of slides.
- The Skip slides and Notes slides will be skipped when you show the presentation.
- There are two symbols on the left side of the screen that you can hide if you want. The X symbol moves you back to the notebook from the presentation, while the ? symbol accesses the help section of RISE and shows you RISE key bindings.
This is all you need to know to create a basic presentation, similar to those created using PowerPoint or Keynote. This doesn't mean that that is all you can do with RISE, so let's take a look at some more advanced functionalities.
How to Use Advanced Capabilities in RISE
Knowing HTML and CSS is crucial for fully taking advantage of everything that RISE has to offer, but that doesn't necessarily mean that if you don't know HTML and CSS you are left with the basic look of RISE. You can still customize quite a lot of different things.
There are a few things you can do to optimize RISE:
- The nbextensions_configurator tool
- JSON files
- Custom CSS files
- Embed settings in the notebook itself
The easiest way to customize RISE is to install the nbextensions_configurator. This is also the preferred option because it is a useful tool overall, and allows you to easily enable, disable, and tweak all kinds of different Jupyter Notebook extensions.
To install nbextensions_configurator just run the following:
conda install -c conda-forge jupyter_nbextensions_configuratorOnce you have the nbextensions_configurator installed, you can very easily, using an UI, configure RISE.
To access, just click on Nbextensions tab:
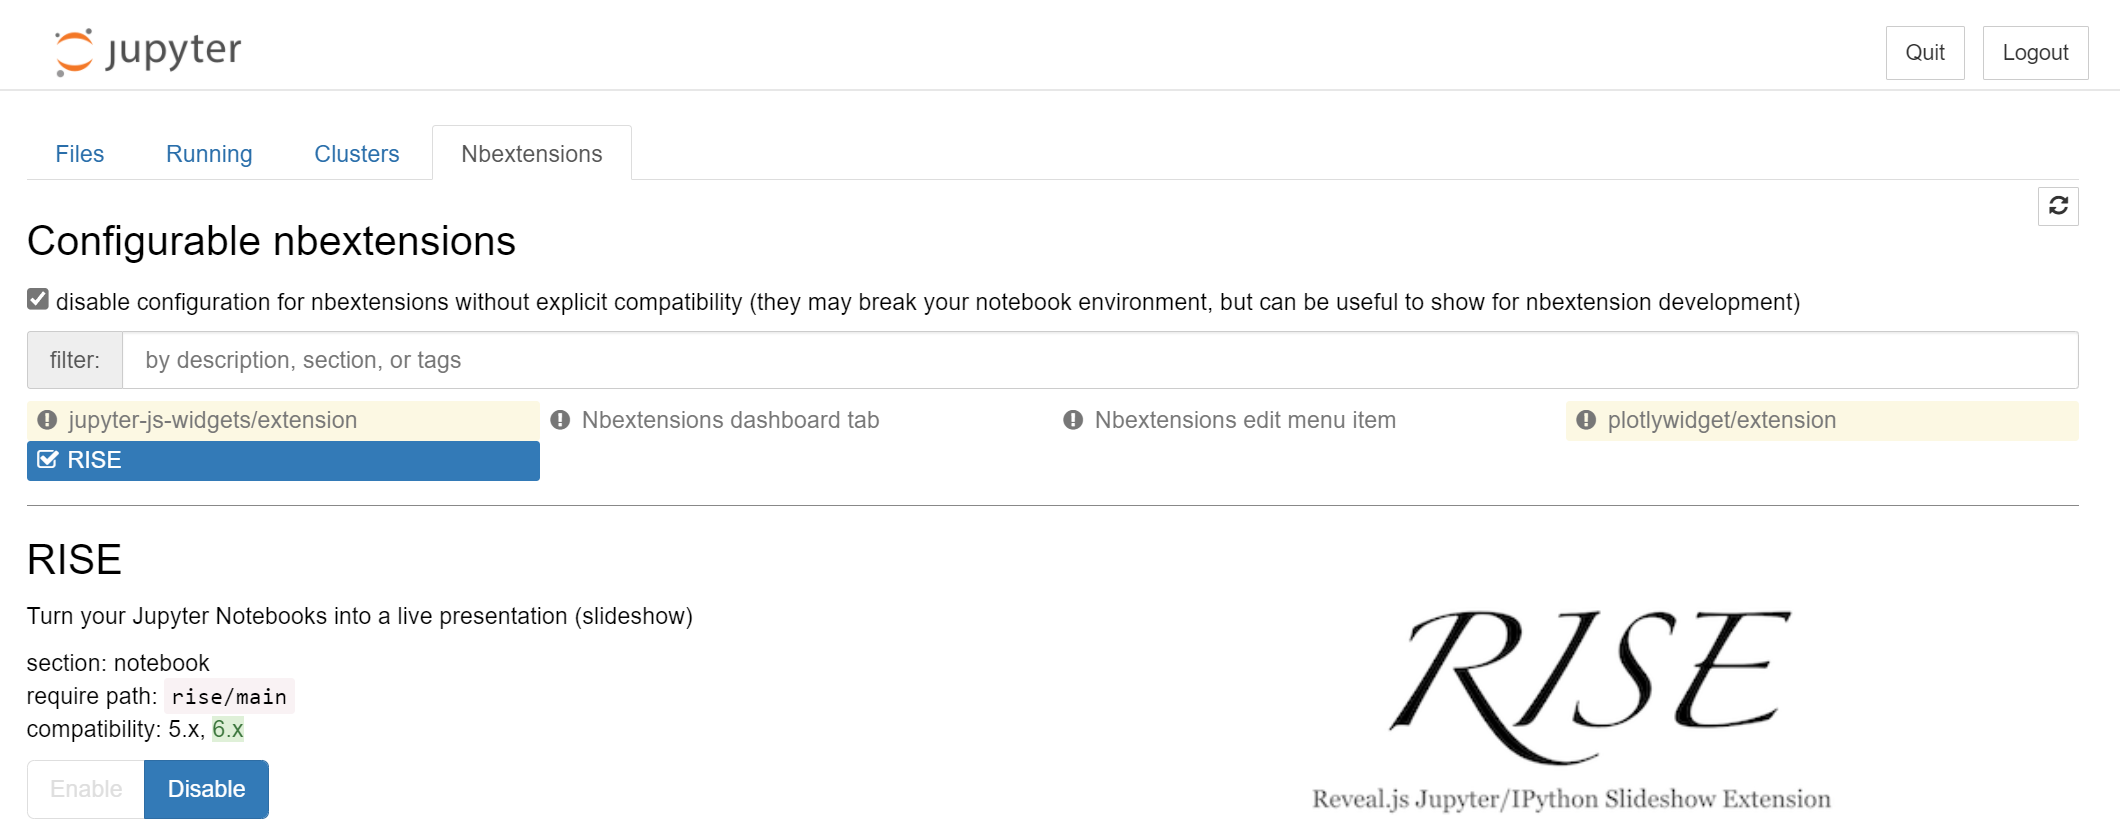
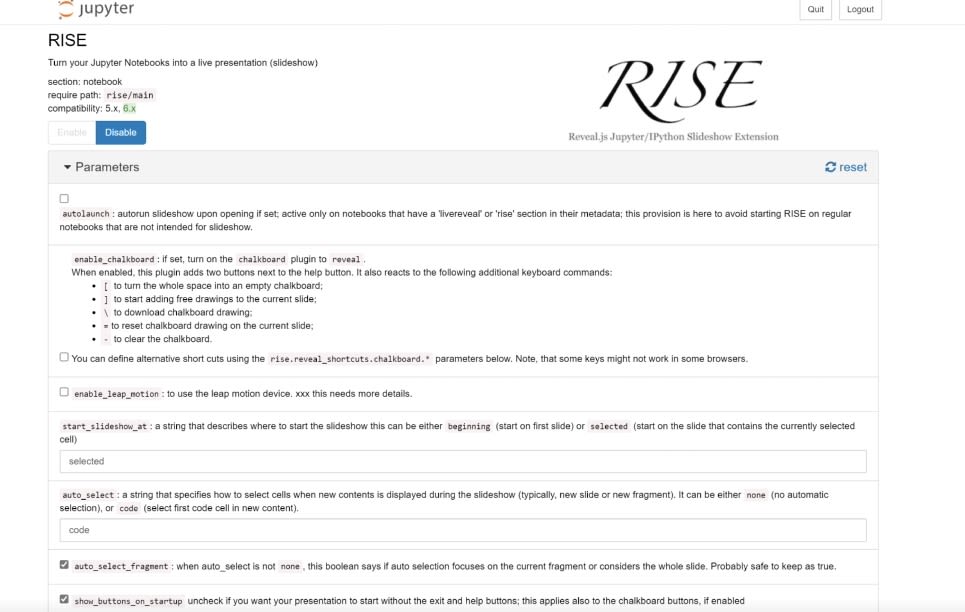
This UI allows you to modify a lot of different things:

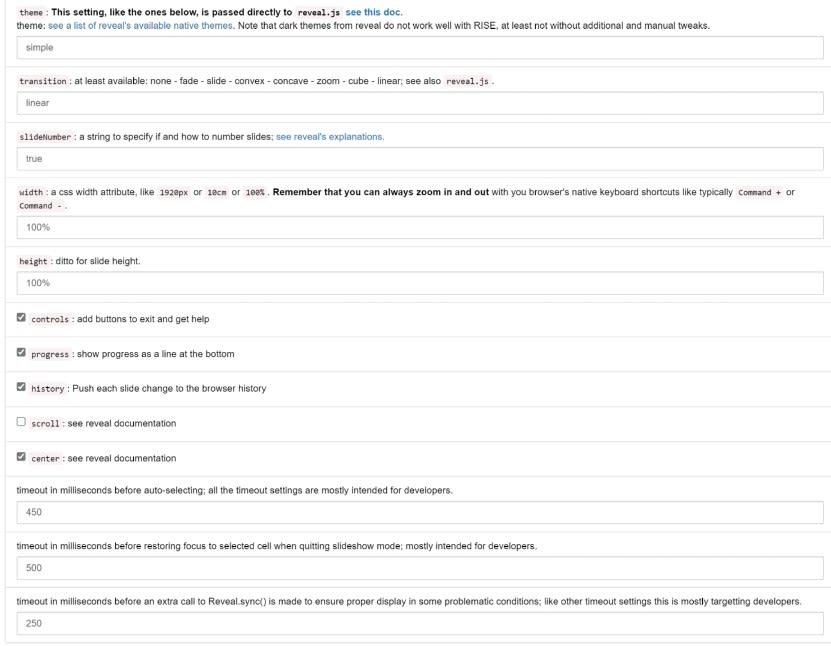
Out of all of the different options, the two most important ones for beginners are the ones near the end of the video:
- Theme: for the theme of your presentation, there are various themes you can use by visiting this page https://github.com/hakimel/reveal.js#theming
- Transition: for the type of transitions between slides, there are already premade ones such as the following:
- None
- Fade
- Slide
- Convex
- Concave
- Zoom
- Cube
- Linear
- Reveal.js ones that you find on the internet
Aside from the above, there are two things that I need to yet mention: the Chalkboard and the Notes section.
How to Use RISE Chalkboard
The Chalkboard allows you to draw on slides. It is very easy to use and is also fully covered in the Help sections. You can access the Help sections under the ? symbol.
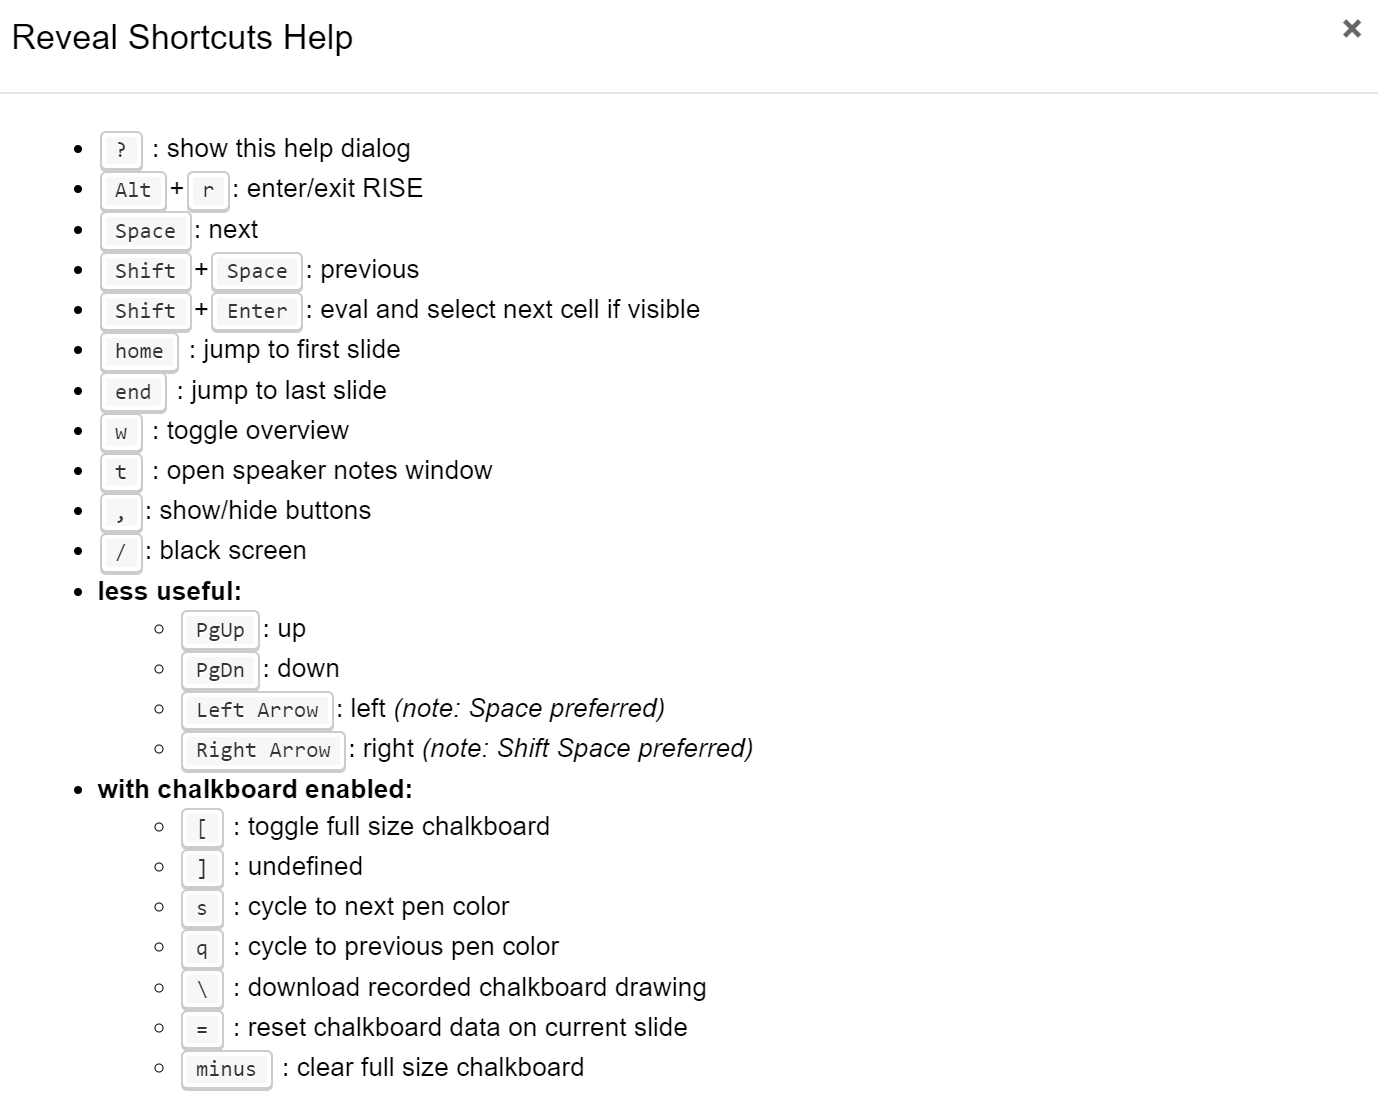
These shortcuts allow you to do different stuff with the Chalkboard, but mostly what you will be doing is drawing stuff and erasing stuff:
How to Use Speaker Notes in RISE
Aside from the Chalkboard, there is a functionality called Speaker Notes. It is, in essence, a much more advanced version of the presentation: it displays the current view, the next slide, and the notes for the next slide defined in the Notes slide type.
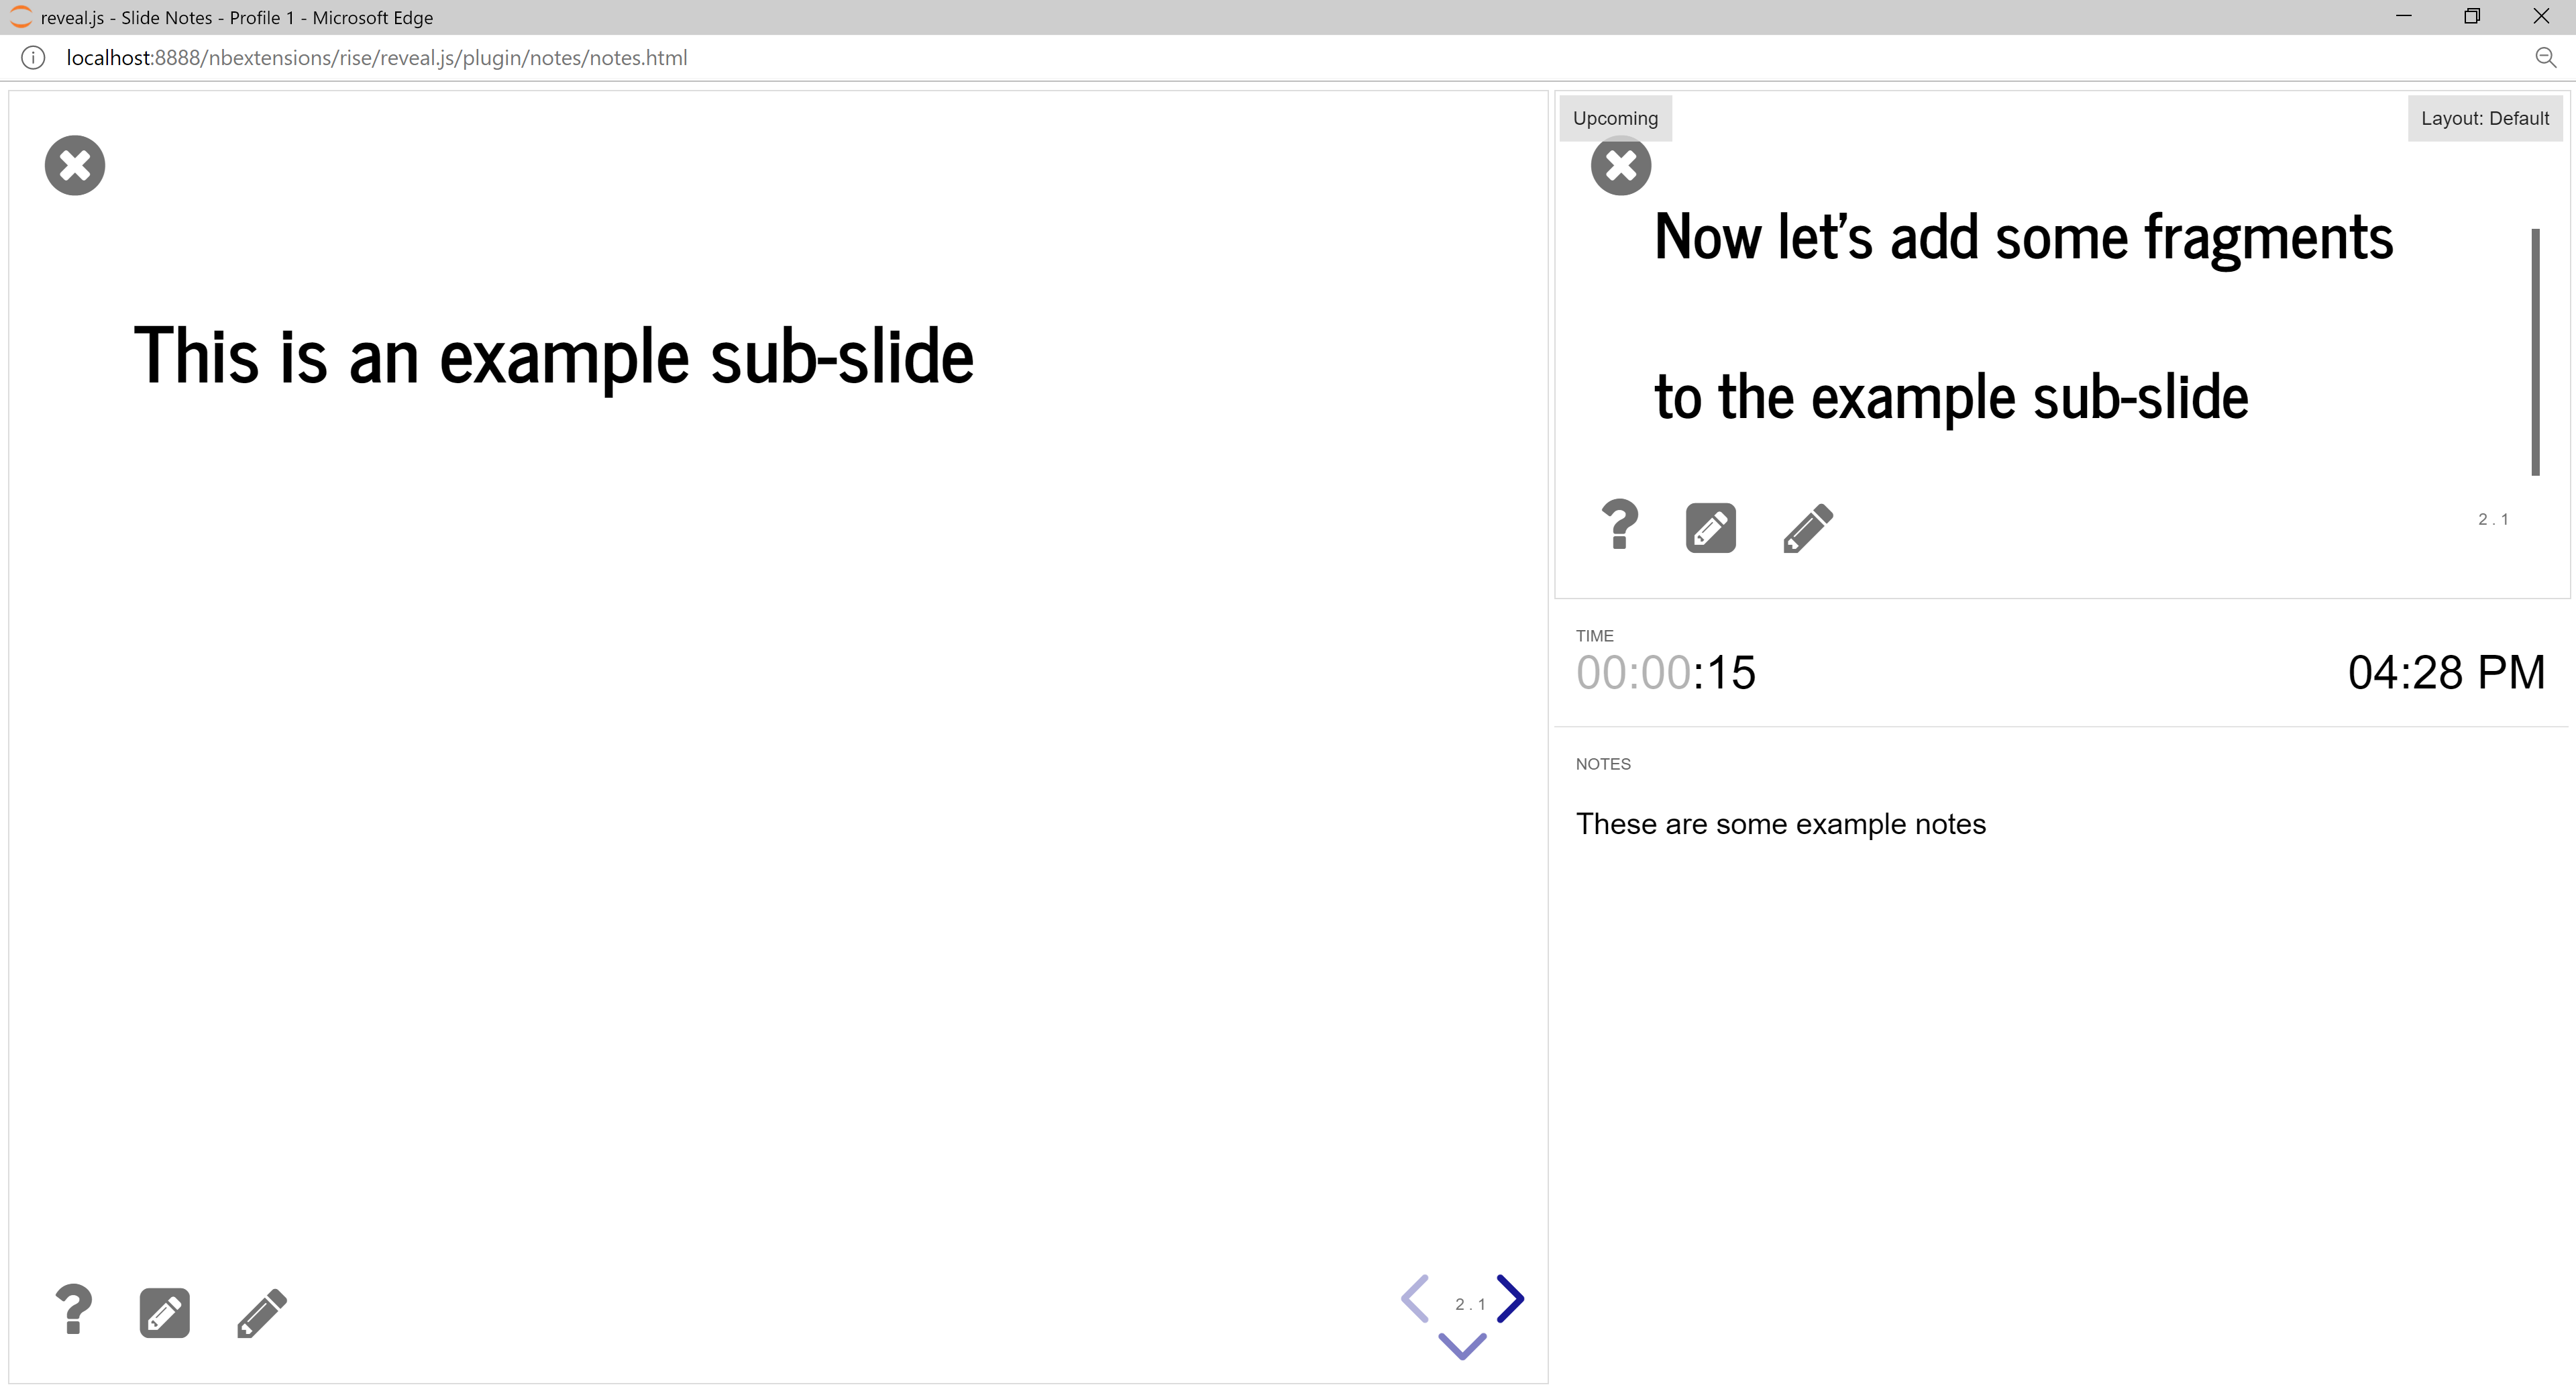
RISE Notes are anonymous, so you can set them up so that they are only seen by the person using RISE to hold a presentation.
Overall, RISE is a pretty good tool that allows you present material in a way very similar to PowerPoint presentations. In this article, I explained and demonstrated what you can do with RISE. Even though the tool itself is very powerful, the most important reason why you should consider using it is that it allows you to, actually run the code that is presented in a slide, which is something you can't do if you decide to use PowerPoint presentations to present some material.
In general, if you are working in an environment where you often need to hold presentations that involve code to others RISE will prove to be invaluable in helping you to better get your point across to those listening to you.

